
• Skip to primary navigation
  • Skip to main content
  • Skip to footer
RealBestLife
  • Food, furniture flips, and farming – making urban farming a lifestyle
    • food
    • furniture flips
    • farm
  • Stories
  • Recent Posts

Blog

Why am I eating basically the same food every day?

Aug 4, 2020 ·

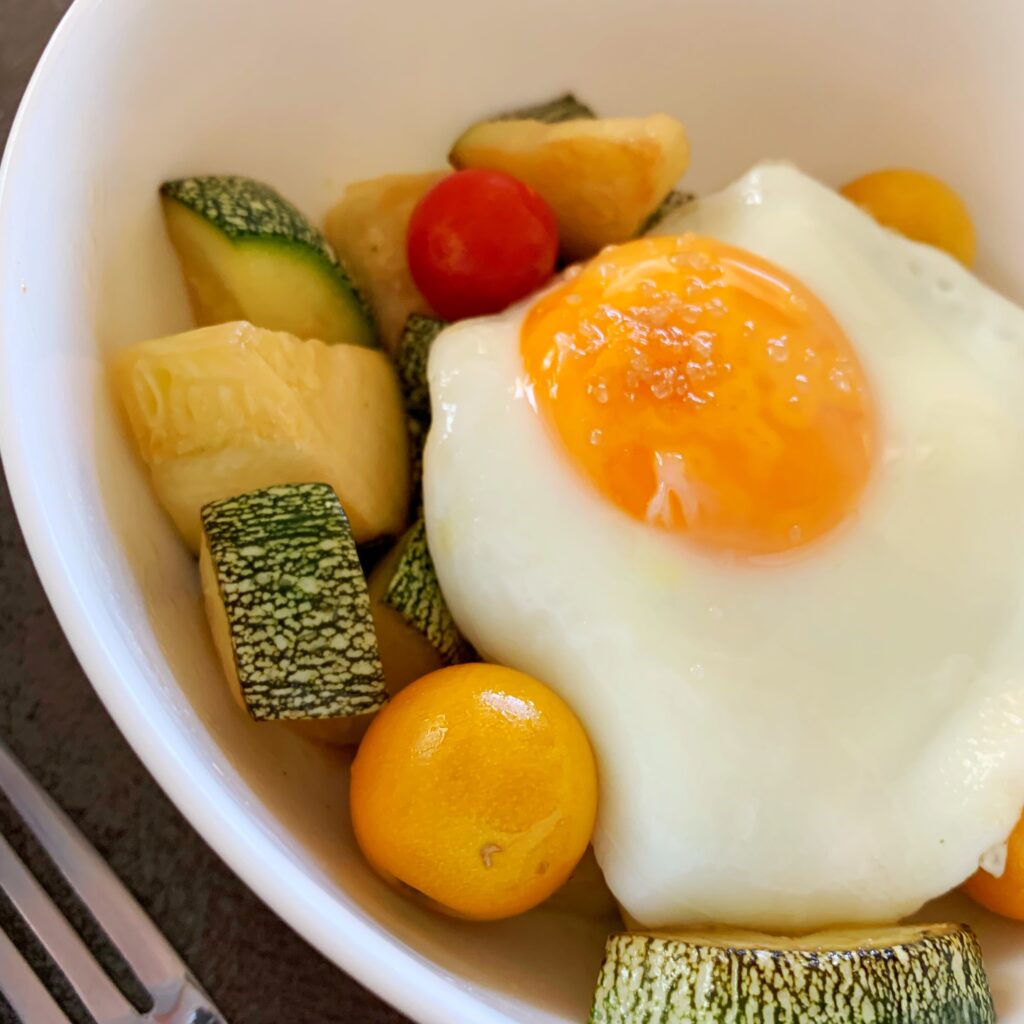
I started the Homegrown Year and, obviously, started posting photos of the meals I was eating. They’re pretty and delicious, but I’m eating almost the same combination of ingredients at every meal. Why?

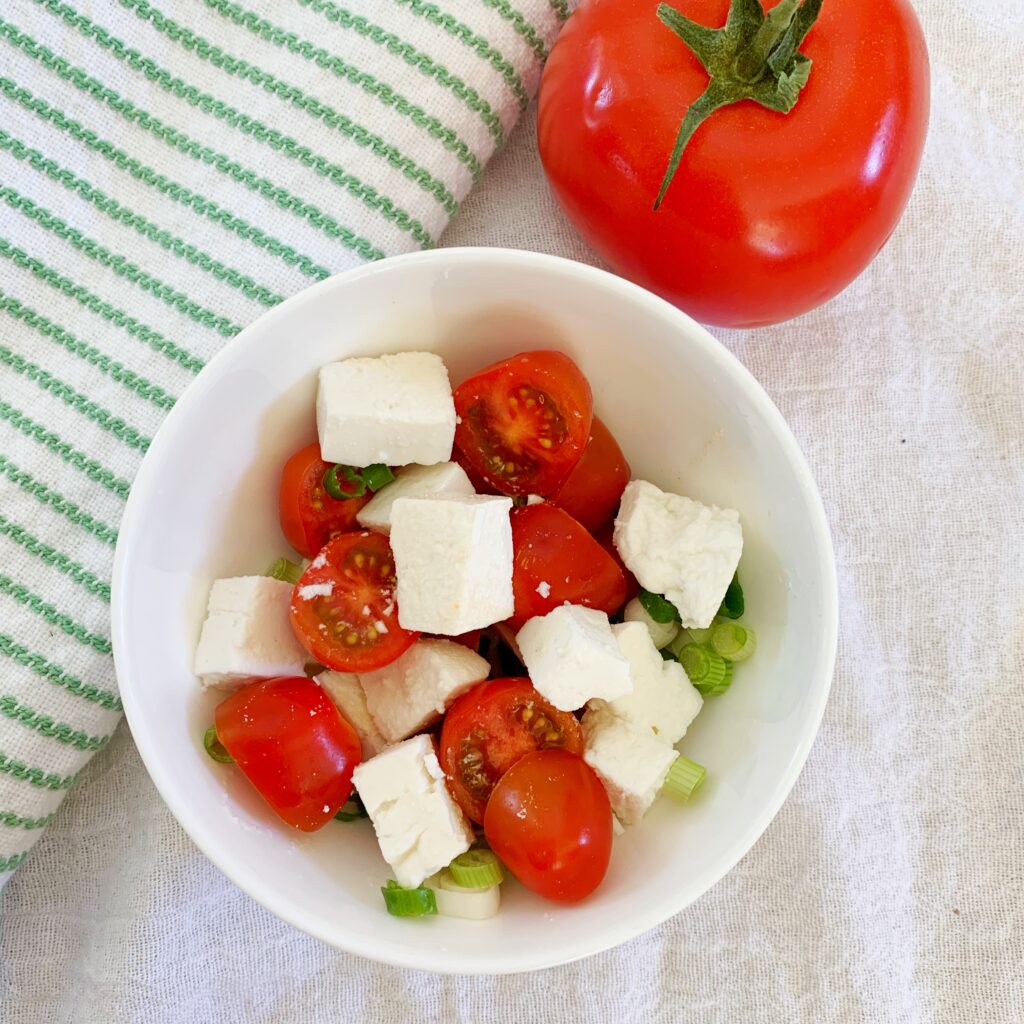
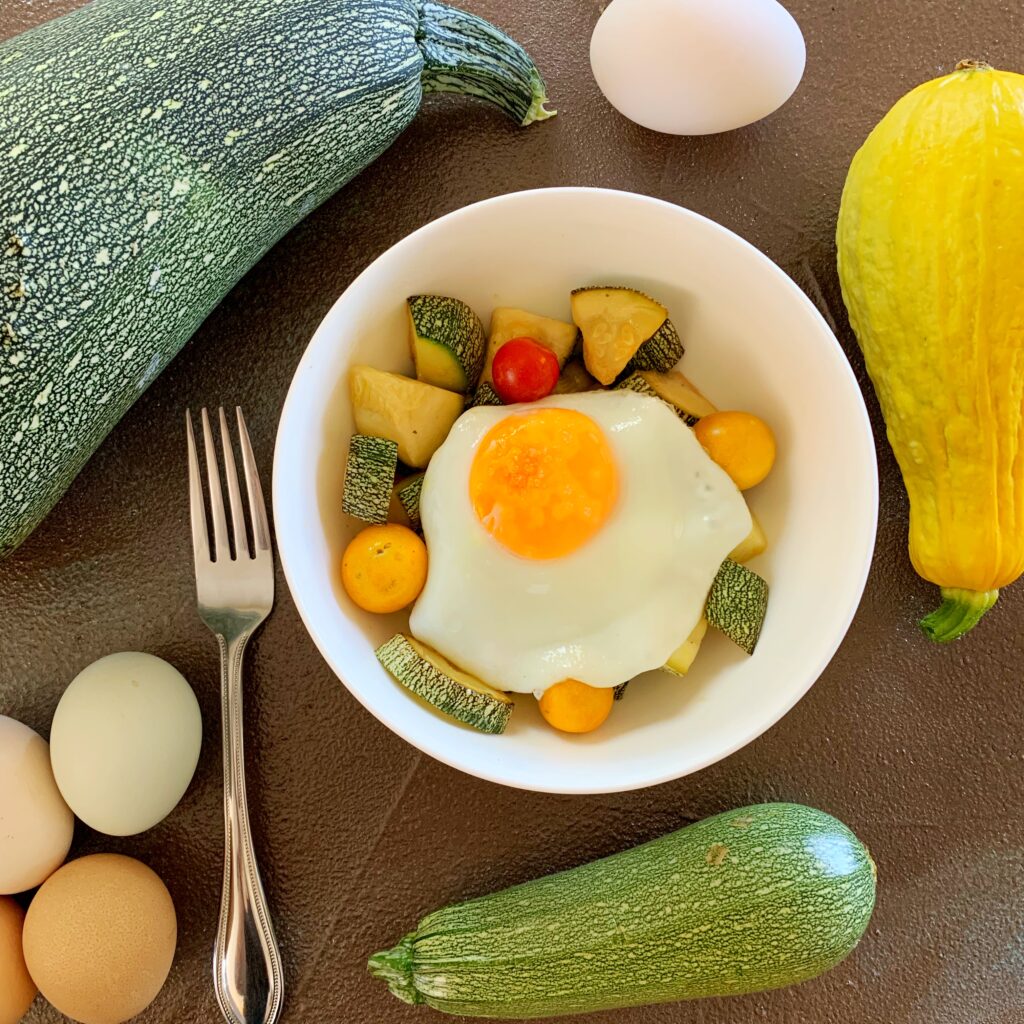
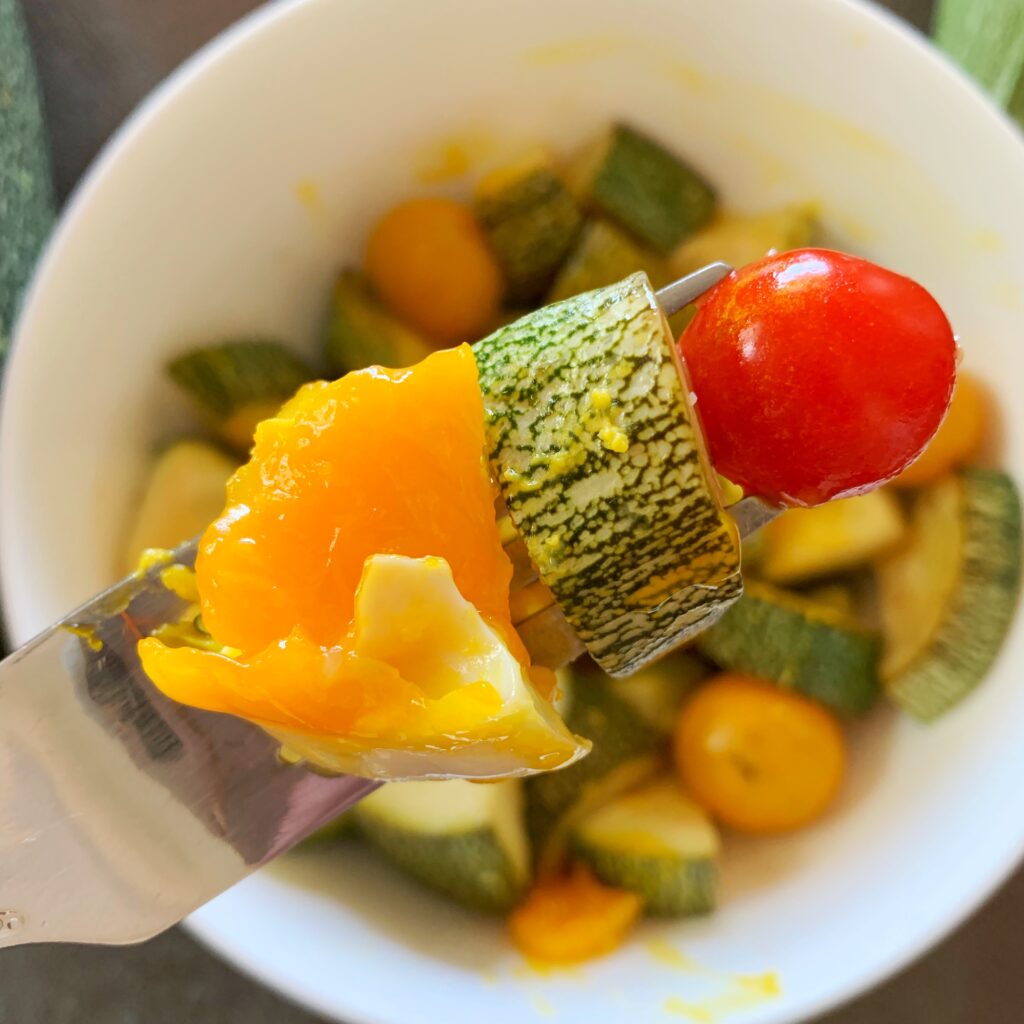
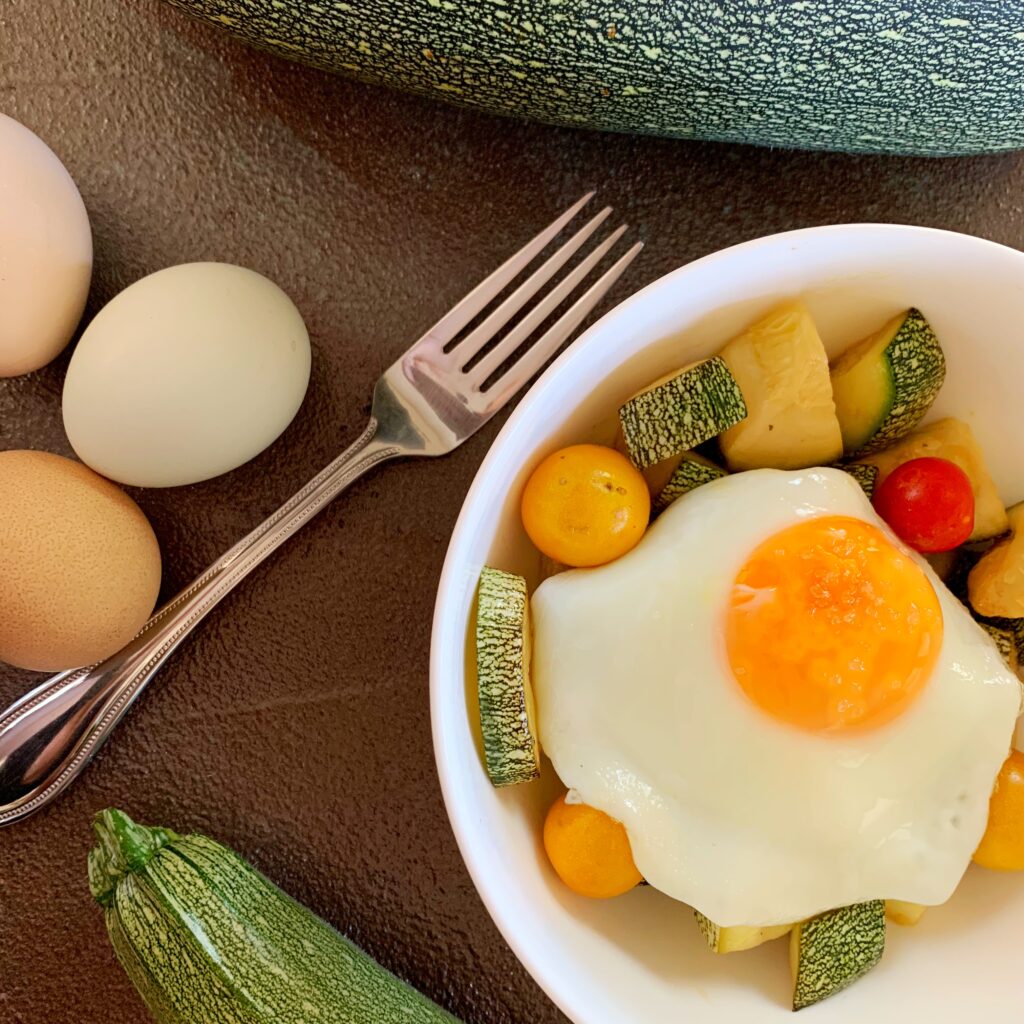
On day two I posted an egg, cheese, and tomato bowl for breakfast, and *you guessed it * an egg, cheese, zucchini, and tomato bowl for dinner. As soon as I posted photos of both, one of my best friends, Bethany, immediately noted: “Didn’t you just have that for breakfast?” Yes. I did.
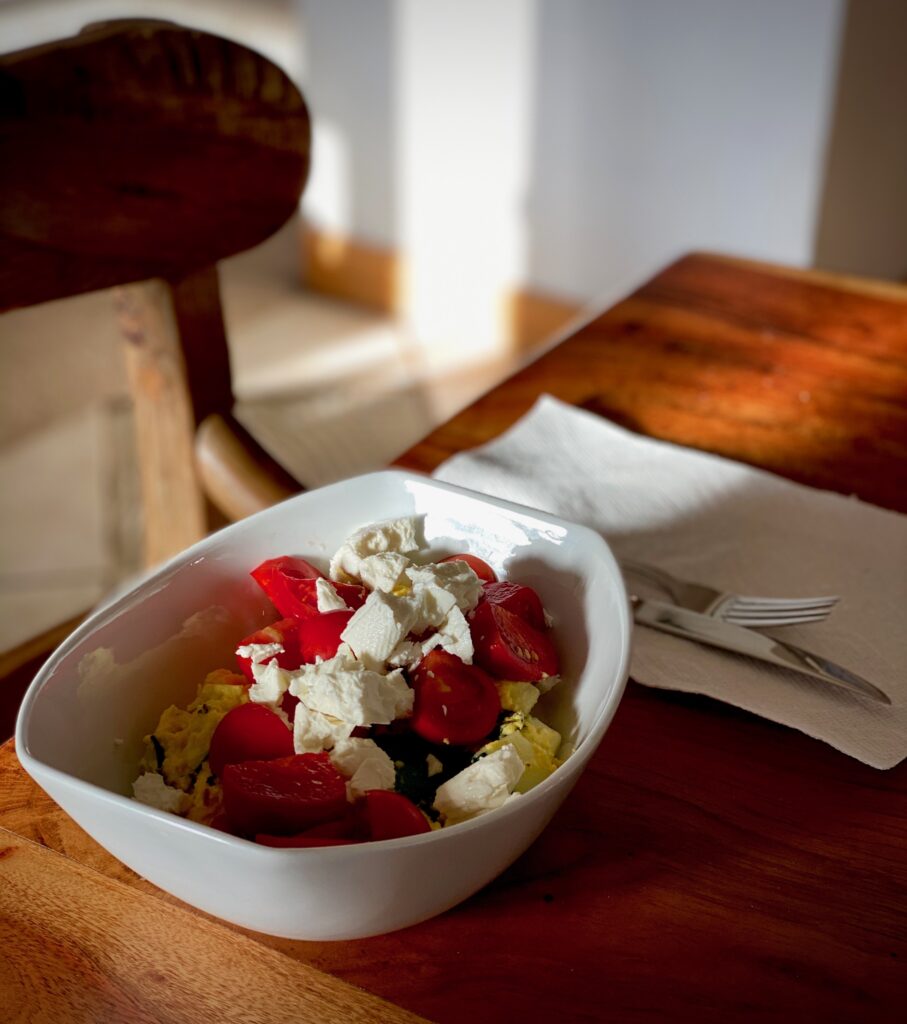
But WHY? Why would my meals mostly look the same right now? Haven’t I been planning and bartering for things I can’t get (like lemons) so that I can get a little variety? Yep. However, I need to eat fresh for as long as I can, because every time I use a preserved food, that’s one more fresh thing I need to preserve. There’s not enough bandwidth to deplete my supplies during the times I need to be building them.

I’ve spent the last several months contemplating the sheer volume of food I will eat in a year. It’s staggering. Many days I will google things like “How many chickens does a person eat in a year?” Or text my friends and ask “How much celery do you actually EAT every month?”

I break it down by days, weeks, calories, and the calendar. Nights are spent thinking about what I’m going to do in January, February, March, and April. I keep repeating the parable of the grasshopper and ant. My current mantra is, “be an ant.”

Minimizing the work it will take to feed myself for a full year means that I’m eating quick and fresh now. Everything I grab from the garden and munch on is one less jar I need to pull from the shelf.

That said, if you have any combination of egg, cheese, zucchini, cucumbers, and tomatoes that’s quick and easy, let me know. I’ll be panic-preserving in the meantime.

The Homegrown Year starts in ONE WEEK

Jul 26, 2020 ·

Welp – when I announced the Homegrown Year project, August 1st, 2020 seemed so far away. It was a date far enough in the future to ensure I would have plenty of fresh food and would have enough time to complete all the projects needed to overcome this huge challenge, (never heard of this insane thing I’m doing? Here’s a quick primer.) The plan was to joyfully waltz into the start of the project, fully ready to live off the fruits of our farm for a year. Real life never goes as planned, though.

Since announcing the Homegrown Year, the world is drastically different. The COVID-19 pandemic has changed everyone’s routines, including us. Mostly, we just felt very lucky to be on a small farm to ride out lockdown with our two small sons. I try to imagine if we were in a small house or apartment without the outdoor space and endless chores with two boys under three. Unlike many others who were also required to shelter-in-place, we had had no time to wallow. The immediacy of the next task always fills the horizon.

However, since the summer months were filled with our actual jobs and no childcare, many of the larger structural goals in terms of gardening and preparation were pared from the to-do list. Even the simplest of tasks, from gardening to feeding chickens, takes 10 times longer when you have a child “helping.” Don’t get me wrong, we have done A LOT to prepare for the year. We are in a place where with some scrambling, a little luck, and tons of work, success is certainly possible.

So, am I fully prepared and 100% confident that I’ll be able to complete the Homegrown Year? No. It’s going to take some creativity and strategy to succeed.

So, just a few thoughts as the final countdown begins:

I had planned to slowly wean myself off coffee. That didn’t happen.

A few months ago I bought some decaf coffee with the intent of slowly changing the ratios of caf to decaf until I was drinking only decaf. Being home with two babies means that the decaf never made it out of the can. So, I fully expect that next week is going to be like a detox mixed with a hangover straight from the depths of hell.

I bought several tea plants (Camellia Sinensis) from a nursery off Amazon to try to grow my own tea, and although they arrived healthy and vibrant – I promptly accidentally killed them. The only caffeine-producing plants I have managed to keep alive are a Yerba Mate (if this keeps doing well all my houseplants will be these) and a single coffee plant that seems a long way off from bean production. Pray for me. More importantly, pray for my poor family who has to live with me next week.

I need to eat fresh for as long as possible while preserving what I can.

My friend Emily, whose insane idea this was, came to help me work on final preparations. This included eating tons of food that I won’t have for a year (king crab legs, FTW) and also inventorying the food that I already preserved and put away that I can use later. I’ll be tempted to crack those foods open next week and start eating away. If I’m to succeed and minimize work, it makes no sense to first preserve something then eat it. I’d have to preserve more than if I try to eat straight from the garden now while also putting up and saving the preserved (frozen, freeze-dried, pickled, juiced, fermented, salted, etc.) food for later.

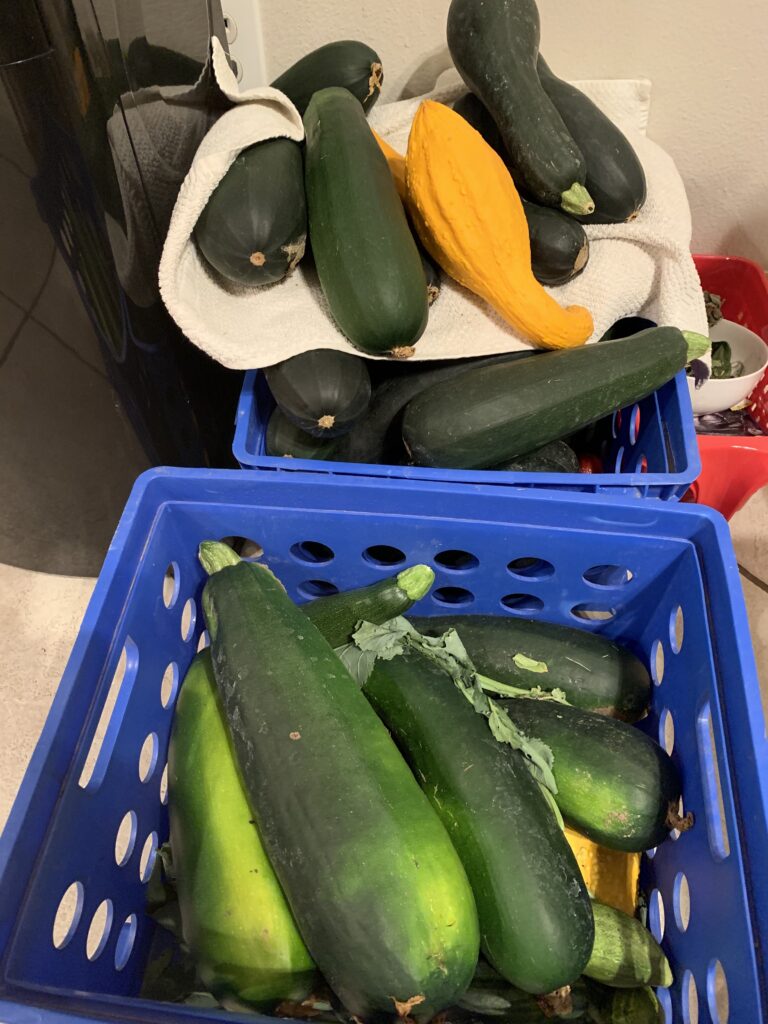
Currently, we have literal crates full of zucchinis sitting in a corner of the kitchen, so I will at least SURVIVE.

A few minutes to appreciate what HAS been done.

It’s easy with a big project to focus on all the things that aren’t happening or that failed and forget to see the bigger picture. Yes, all the cumin refused to sprout even after I watered it for a month, so now I don’t know if I’ll be able to have salsa (I started some in the window and it’s just sprouting so – fingers crossed) or worry about the bucket of potatoes I went to dig out that was just full of bugs instead. However, if I take a step back and look at all the things we have accomplished just to get us this far, it’s pretty amazing. It makes me feel proud.

Just a short list of what’s on the top of mind includes:

Bought a Harvest Right freeze dryer and learned how to use it.

Got rid of the temporary bird pens and had a permanent “Poultry Palace” built instead

Had a pig pen built

Got actual pigs

Bought new serious dairy goats and tripled our milk production

Added two new goat pens

Got 5 turkeys

Ordered meat chickens

Hatched at least 50 chicks in the incubator

Quintupled the size of our garden

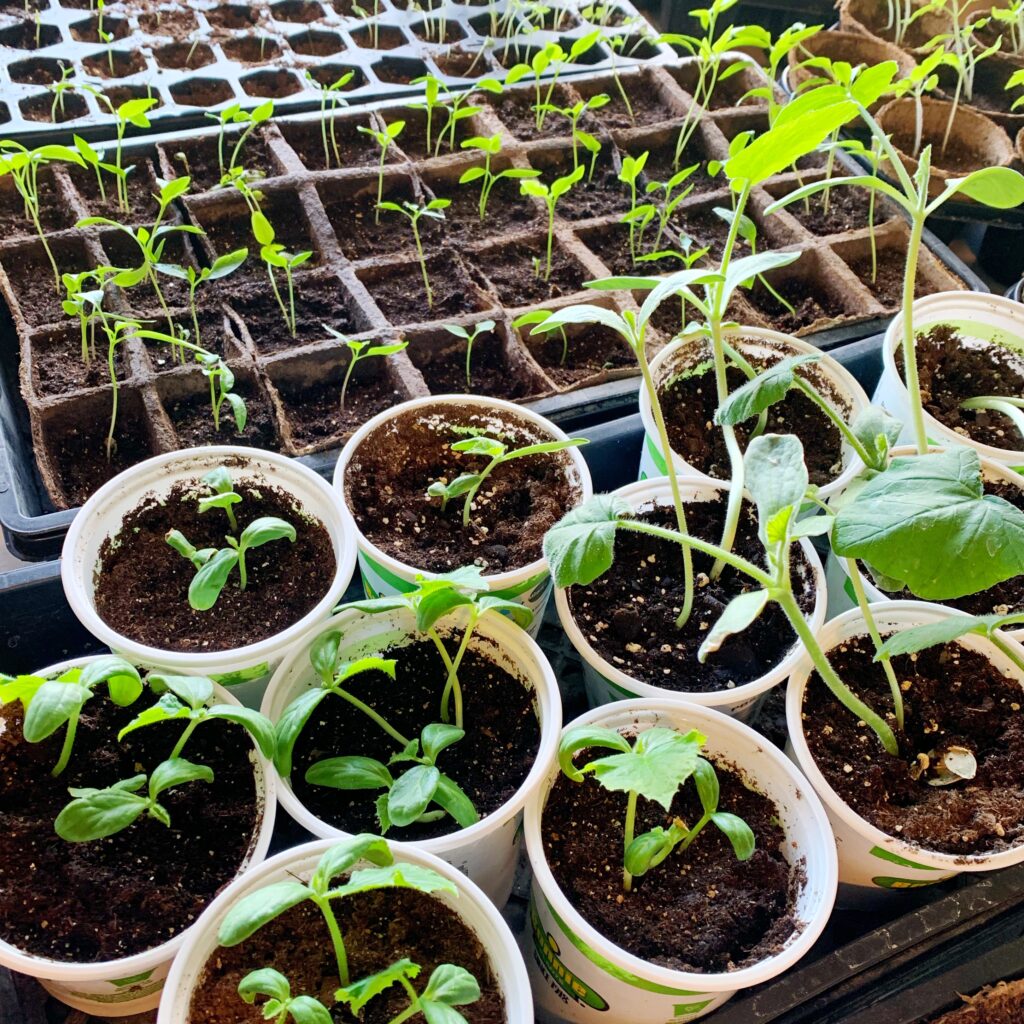
Started growing (and killing) a bunch of new kinds of plants

Had a greenhouse built

Had the greenhouse rebuilt after a wind storm knocked it down

Hired a water lawyer to make sure we had the water rights to water the garden

Grew a million (give or take) zucchinis

Added massive food storage capabilities (so many jars – buy stock in Ball)

Met with my accountant about the tax ramifications of bartering (yes, you have to report it – I am not joking)

Made tons of wheels of cheese

So much feta

Made and froze pounds of goat butter

Bought an accidental baby goat

. . . and that’s just what I can think of right now. This doesn’t include the weeding and the milking and the feeding and the late nights and the early mornings of just everyday maintence. Merely creating the infrastructure to hopefully feed a single person has been enormous.

So off we start. A week from now I’ll write to you in full withdrawal from caffeine, alcohol, sugar, and processed food. I feel like that dog in the flaming room from the “this is fine” meme. This is fine.

5 things you can do to control your own food supply chain

May 2, 2020 ·

food supply chain
food supply chain

There are five steps you can take right now to start controlling your own food supply. Friends across the country have been reaching out asking for advice because they know I’ve been working hard to secure my own food sources at home. We’ve all seen the news over the last few weeks and are getting nervous.

Some people are thinking about food security for the first time in their lives. Many of us have taken for granted that we can buy almost anything we want at any time. John Tyson, chairman of the board of Tyson Foods, one of the largest producers of chicken in the U.S., took out a full-page ad in the New York Times where he warns that the “food supply chain is breaking.”
Supply chain issues aren’t isolated to just meat. Even if the plants and animals that make up our food supply are out there right now, that doesn’t necessarily mean they’re making it to the store. The vast majority of our chain is reliant on specialists, so when one link breaks, so can the path to us consumers.

I’ve been thinking about my personal food supply chain for a long time. In fact, it’s turned into an entire project for me. But you don’t have to live on a little farm and milk your own goats to start thinking about steps you can take to care for yourself and your own family.
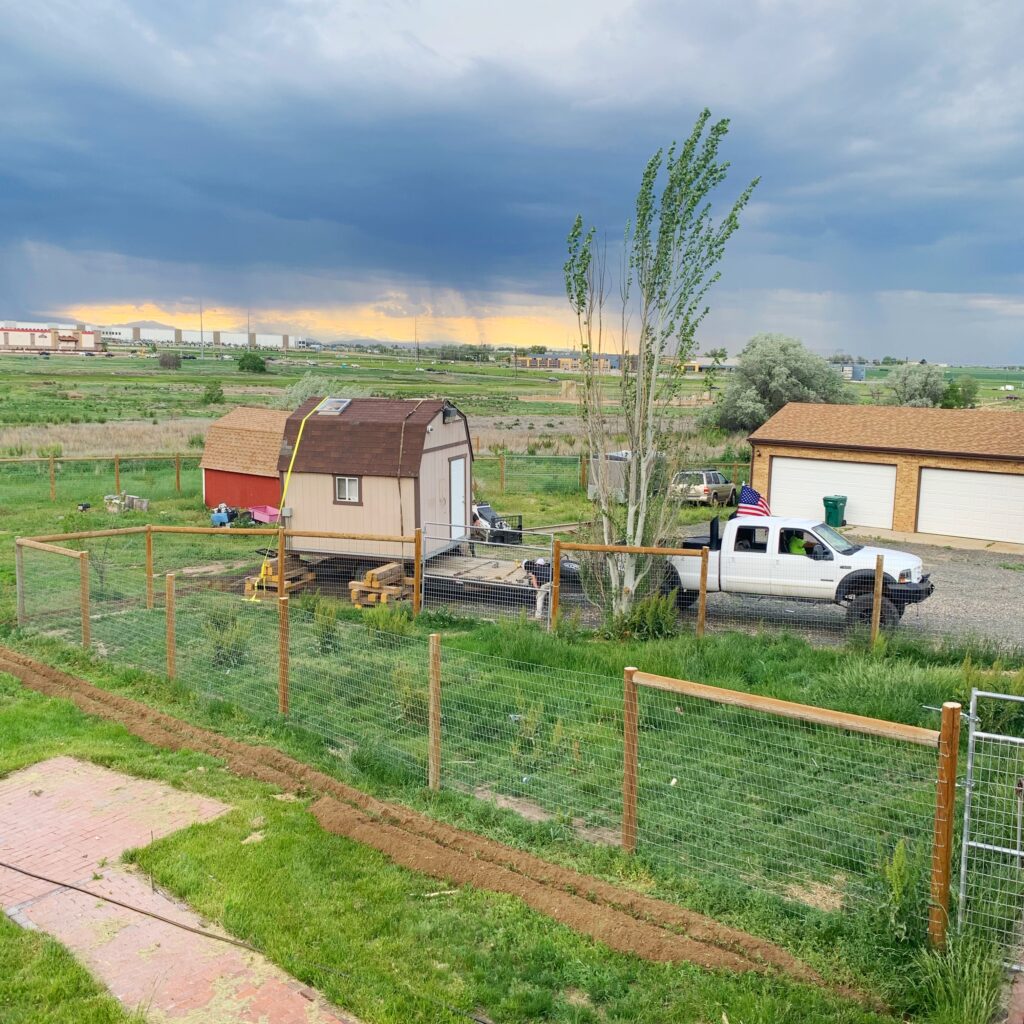
Here’s the good news: we have full faith in our farmers, ranchers, butchers, truckers, and processors. Hopefully, a silver lining of this global challenge is a renewed appreciation for those people who keep us fed every day.

There will be bumps in the road, though. If you think of our economy as a huge cruise liner on the ocean, it will take us some room to slow down in order to turn. This pandemic requires huge shifts in how we conduct the business of living.

Think of food like money that expires. If you want to control your own food supply you need to get more of it in the door, (like asking for a raise or starting a side hustle) but also get it into a state where it lasts longer (like putting it in the bank or an investment).

Luckily, there are a few steps you can take right now to secure your own personal food supply:

Buy a chest freezer

If you don’t have one, a chest freezer is one of the simplest ways to even out the ebbs and flows of an inconsistent food supply. If you can possibly swing it, get one to add to your capacity. Having a chest freezer will allow you to buy in bulk when it’s available. It offers the flexibility of storage for almost any food with minimal prep work.

As we see changes in what’s available and pricing over the upcoming months, it might become necessary to change buying habits. Were you going to the store every other day? Once a week? If you have more capacity you can go less often, buy more per trip, and ultimately save money.

The ability to freeze food when it’s available at a price you can afford gives you more flexibility in when and how you choose to buy it. It also will allow you to cut waste. You can take that half a roast and freeze it for soup later if you have space.

Chest freezers are available at big box stores and even your local hardware store – also check neighborhood postings and craigslist. It might seem like a huge outlay when finances are questionable, but it will more than pay for itself over the lifetime of the freezer. The way our family’s grocery bills are right now, if we can shave $20 – $50 off every few weeks, it will pay for itself within a year. This includes the (small) increase in the electric bill.

If you don’t have room in a basement or a garage consider painting the freezer fun color and make it furniture. It’s surprising how a little box can add so much peace of mind.

Start a relationship with your local butchers and farmers

For us, this relationship-building started long before we moved to the small-acreage farm. Years ago, a friend of mine put together a group of four families to all go in together to buy a cow from a rancher, Ron. Once a year Ron sends one of his cows to a small butcher in eastern Colorado. Each of the four families will talk to the butcher about our preferred cuts and we all split it up. Depending on the year or the size of the cow, the price varies, but it’s always much cheaper than if we did it piecemeal over the year.

One of the fun parts of buying a quarter beef instead of just getting meat at the store is that we have tried new and different cuts than we were getting before. Getting out of the steak and burger routine has been fun for us.

The cow started the train down the track of smaller meat producers. Another family friend, also coincidentally named Ron, raises hogs and introduced us to a small butcher two towns away where our pork now comes from.

If you don’t know someone who knows someone, try looking for small butchers and markets in your area. From veggies, to meats, and baked goods – often these places will have relationships directly with farmers.

Right now producers are posting livestock and butchering services for sale direct to consumers on social media and craigslist, too. Once you get out of the mentality that all your food has to come from the same big box store and look around, you’ll be shocked to see all the options available.

Incidentally, we can only buy a quarter beef, or get an entire butchered hog, because we have chest freezer space that allows us this flexibility.

Learn the basics of canning and preservation

If you’ve never done it before, I highly recommend using this time to preserve some fruits or veggies. Preserving gives you a new understanding and appreciation for your food that you may not have. It’s also a useful skill. During the zombie apocalypse, every rag-tag team needs at least one member with a basic understanding of what’s safe to eat.

Even if you’re in an apartment with a tiny kitchen, when you get berries or veggies – just try your own preserves or pickles. Preserving is just getting your food into a state where it inhibits bacteria growth and remains safe to eat for longer periods of time. I suggest starting with this book (Amazon affiliate link) and give it a try at least once. If it’s not your jam (pun intended) then you don’t ever have to do it again, but it might be the thing that sets you on the path to a full-blown home preserver.

Start a victory garden (even the windowsill kind)

I wrote a whole piece imploring people to start their own Victory Gardens. Especially now, this seems like a reasonable thing to do. Regardless of your level of expertise or the greenness of your thumb, give it a try. Just like preserving, it’s better to know the basics and not use it again, than be months down the road and wish you had tried it.

As an aside, if you do live in a place where all you can do is a tiny window herb garden, there are plenty of great savory herb preserved jellies that are VERY gourmet right now.

Get a dehydrator or smoker

When we think about preserving food for the future, we usually think about either freezing or canning it – but there are other methods too. Salt is the most basic food preserving agent. By the way, if you haven’t read the literal book on Salt, it’s a must-read.

Both smoking and dehydrating your food can also inhibit bacteria growth and make it last longer. Think: fruit leathers, veggie chips, meat jerkies. There’s a whole world of ways to take your basic foods and extend their lives. Once you get into advanced mode, we can start talking about fermentation and cultures. This is gonna get fun.

So, get that food for yourself and your family and take it to the bank.

Still doin’ the gardening, farming, self-sustainable challenge

Apr 26, 2020 ·

Now is the time for a homestead, prepper, gardening, farming, self-sustainable, gourmet, farm-to-table, challenge – complete with goats, chickens a huge garden, and pigs, if there ever was one.

There’s nothing like a worldwide pandemic to change most plans. However, since my plan was to eat off what we produce here on our small homestead-farm, not only is it not changed, it seems downright prescient.

The Homegrown Year challenge was designed to be an exploration and a learning experience. There’s no doubt there is also some late-30s mid-life crisis sprinkled into this lofty goal, too. However, the one thing I had never considered it might be, until now, is a necessity.

The world has changed since I started preparing for this project, though. People are concerned about food security. They’re worried about the future. Rightly so. So, what now?

For me it’s just this: head down move forward.

Unforeseen challenges

What is there to do in the midst of uncertainty but just power through? One foot in front of the other. So, the plan is still intact – at least for now. I’ll start the Homegrown Year on August 1st, and just keep going until I either prevail or something makes it untenable.

New challenges have arisen as a result of shelter-in-place orders, though.

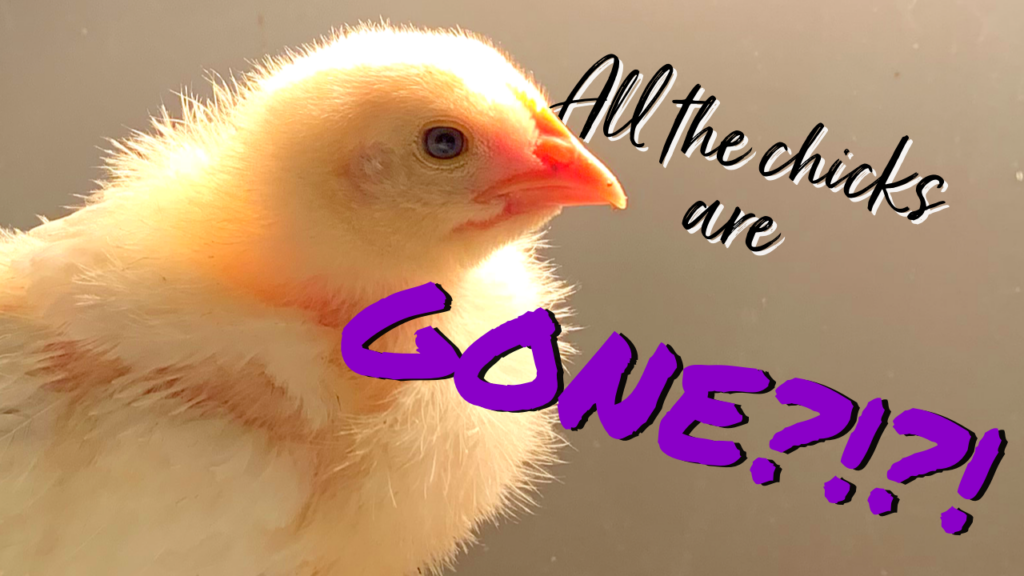
I assumed when starting this project that all the chicks I would need for laying hens as well as to raise for meat would be available for purchase. I have incubated duck and quail eggs for chicks in the past. However, I have a great chicken guy who usually mails me my chicken chicks. Well, both he and every store in Colorado are sold completely out of chicks. There was a huge national run on them when stores ran out of eggs. So, I’m back to incubating, this time for chickens.

Along with people’s new concerns about the long-term effects of our economic shutdown has come an either new or reignited passion for gardening. This is great, the more gardens the better. It also means, though, that seeds and plants, just like chicks, are scarcer than I have ever seen them before. I’ve had to get a little creative as a result. Luckily, there are a lot of things already in the kitchen, from potatoes with eyes to the onions from the bottom of the fridge that have sprouted (we all have them) that can be repurposed for the garden.

New opportunity

One of the original goals of the Homegrown Year before was to find creativity and new skills by creating a framework of rules. So far this has meant, for instance, that I learned how to salt-preserve lemons. I would have never done so without the challenge.

The new rules, laws, and social norms that have come from the coronavirus are hard to overcome and work within, but will offer their own opportunities for creativity.

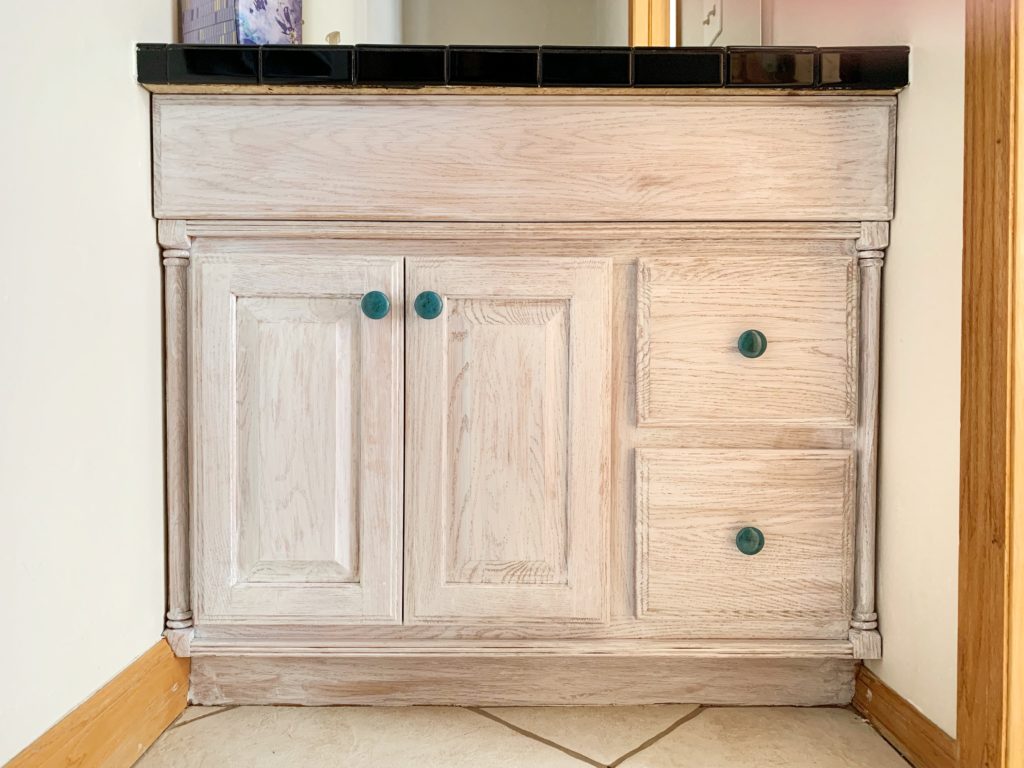
DIY Distressed Whitewashed Farmhouse Vanity Refacing for Under $40

Apr 23, 2020 ·

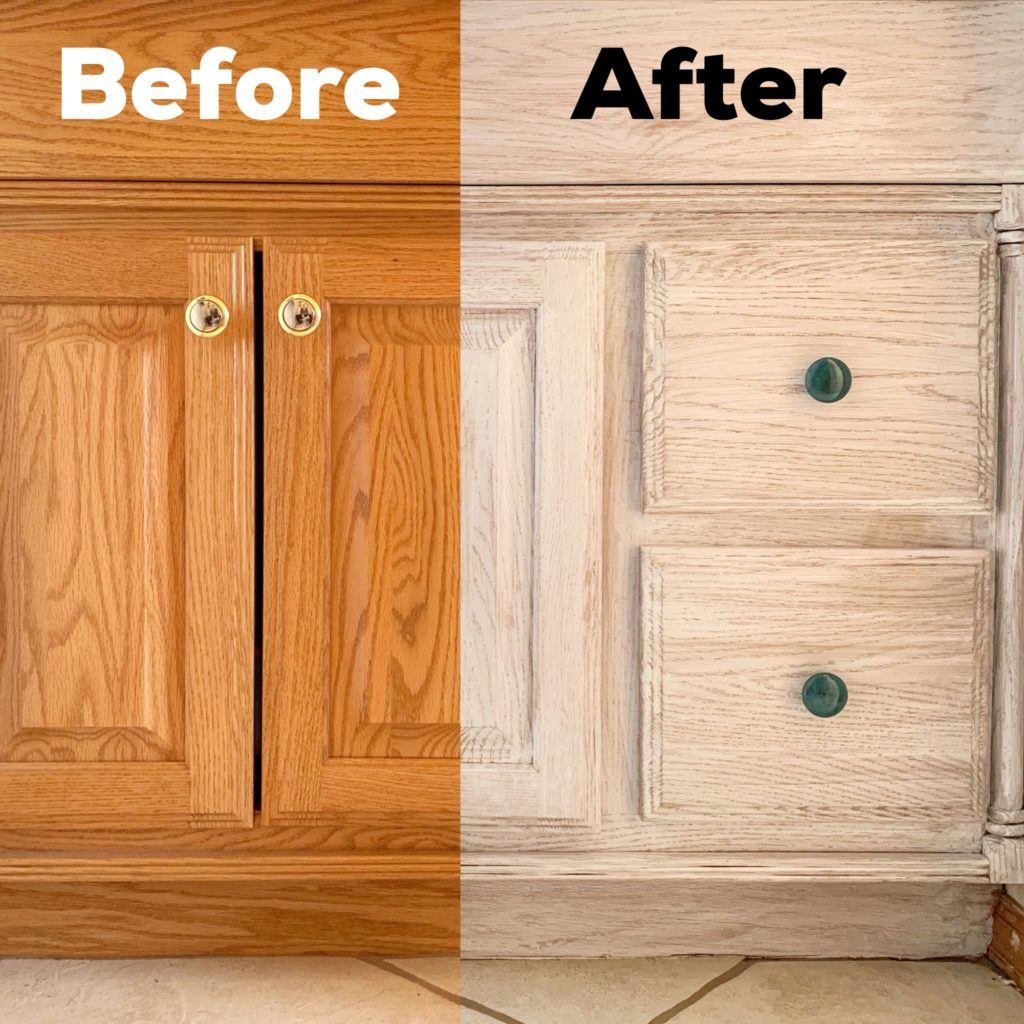
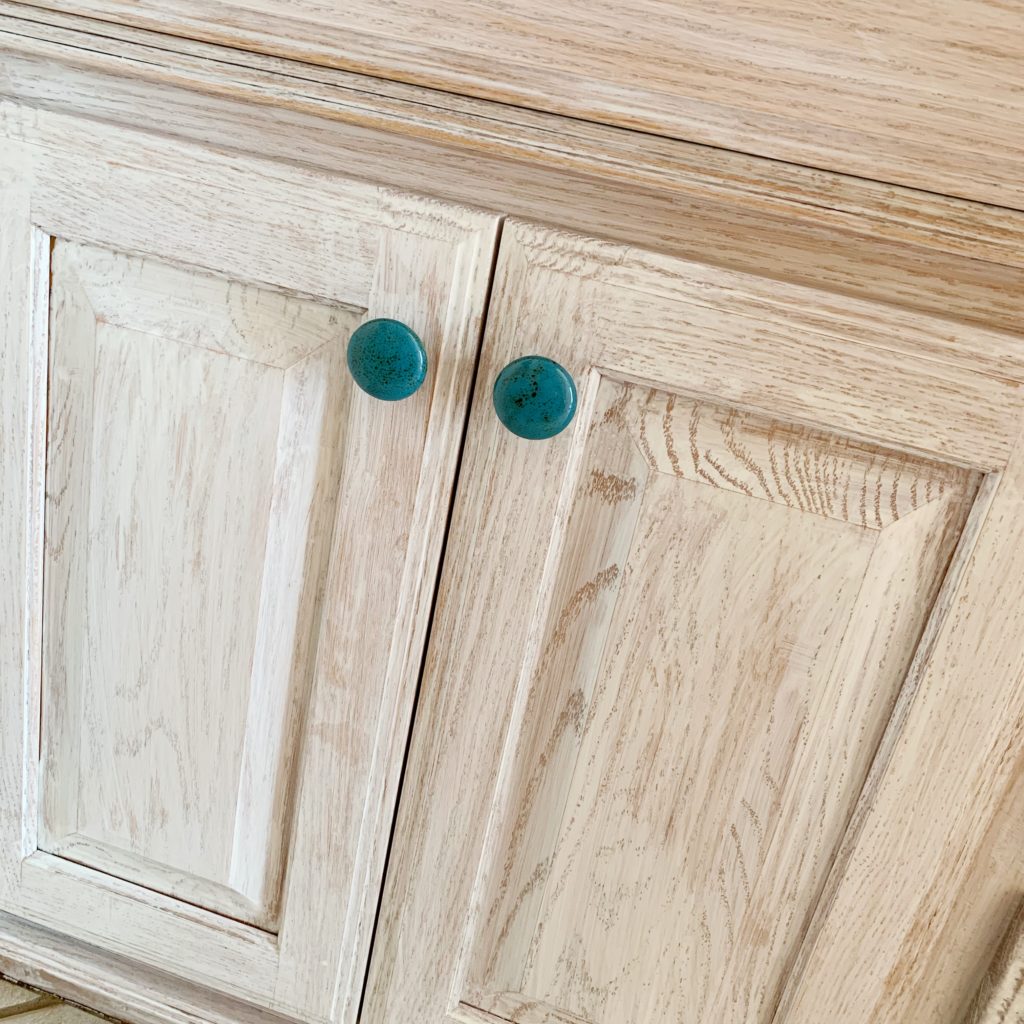
This is the perfect project for a weekend. I did the white stain wiping on Saturday and the poly coat on Sunday and the whole project took me less than two hours of total work.

Our guest bathroom is fine-ish. It’s functional, dated, and generic. Like so many generic bathrooms across America, it contains the standard contractor-grade “built-in” yellow oak vanity. I realized, though, that ripping it out would require major drywall work, and by extension, a redo of the entire bathroom – no.

Check out the web story of this process here!

Considering the major work that needs to be done across our entire house, a full remodel of just the small guest powder room is low on the priority list. That doesn’t mean that there’s no room for a small upgrade with a big impact – until we win the lottery.

Rather than just painting this vanity, I wanted a distressed farmhouse “shabby chic” look. I went with a glaze because I like the grain of the wood to show through. Also, I am super lazy and I was NOT interested in the multi-step process of stripping/sanding/filling that is required to paint an entire piece. Luckily, I achieved exactly the look I was going for with this method. Using a wiping glaze gave it the right consistency, the best color, and the least work.

What you need:

Wiping glaze – I spent a LOT of time looking for the perfect thing for me – this is what I used. It’s the “pickling white” color. I was skeptical of getting paint via Amazon, but it was delivered totally fine.

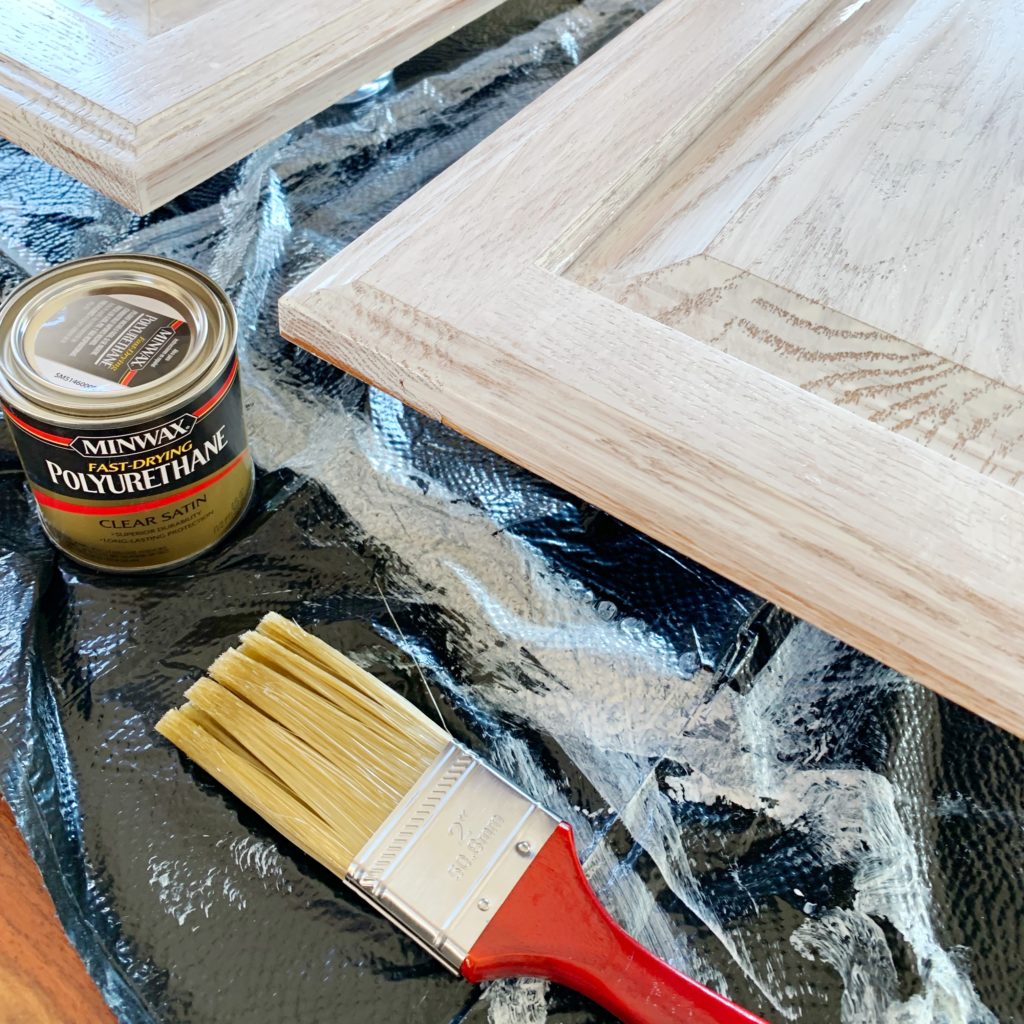
Polyurethane top coat – you can find this anywhere

A no-pilling rag to wipe stain with – I used an old cheese cloth, make sure it’s something you can throw away when you’re done

A paintbrush – for the topcoat

A really good cleaner – this is prep step you do not want to skip. There’s probably years of who knows what on these vanities. I rubbed every surface down with denatured alcohol. Based on what came off the wood, it was much grosser than I had thought.

Painter’s tape and plastic – even if you’re extra meticulous, you will drip.

Plastic gloves – you’re wiping this stain on with a cloth. White nails are trendy, but not that trendy.

New knobs – my husband went with me to Hobby Lobby to pick out ours, I kid you not. He picked the turquoise – this was both a surprise and impressive. $12 total.

Optional: A piece of large-grain sandpaper – if you decide to rough up the wood to make the glaze adhere better. I chose not to and it was fine. I picked specifically this wiping stain because it looked like it would stick to anything, and it did. Again, I’m lazy.

What to do:

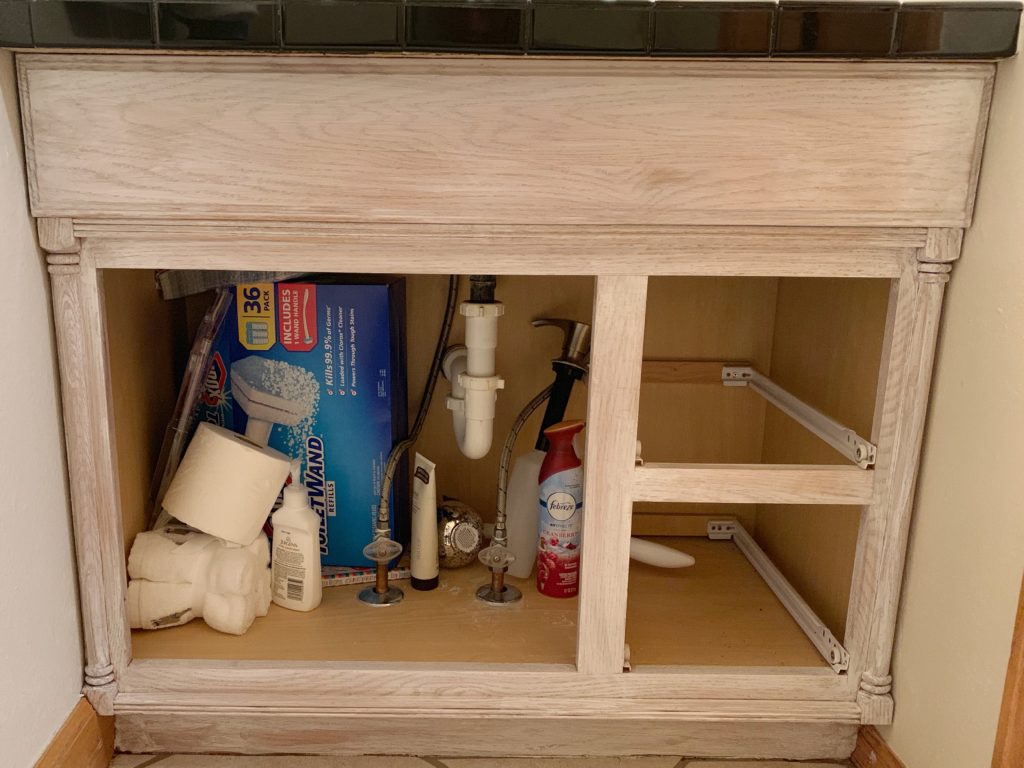
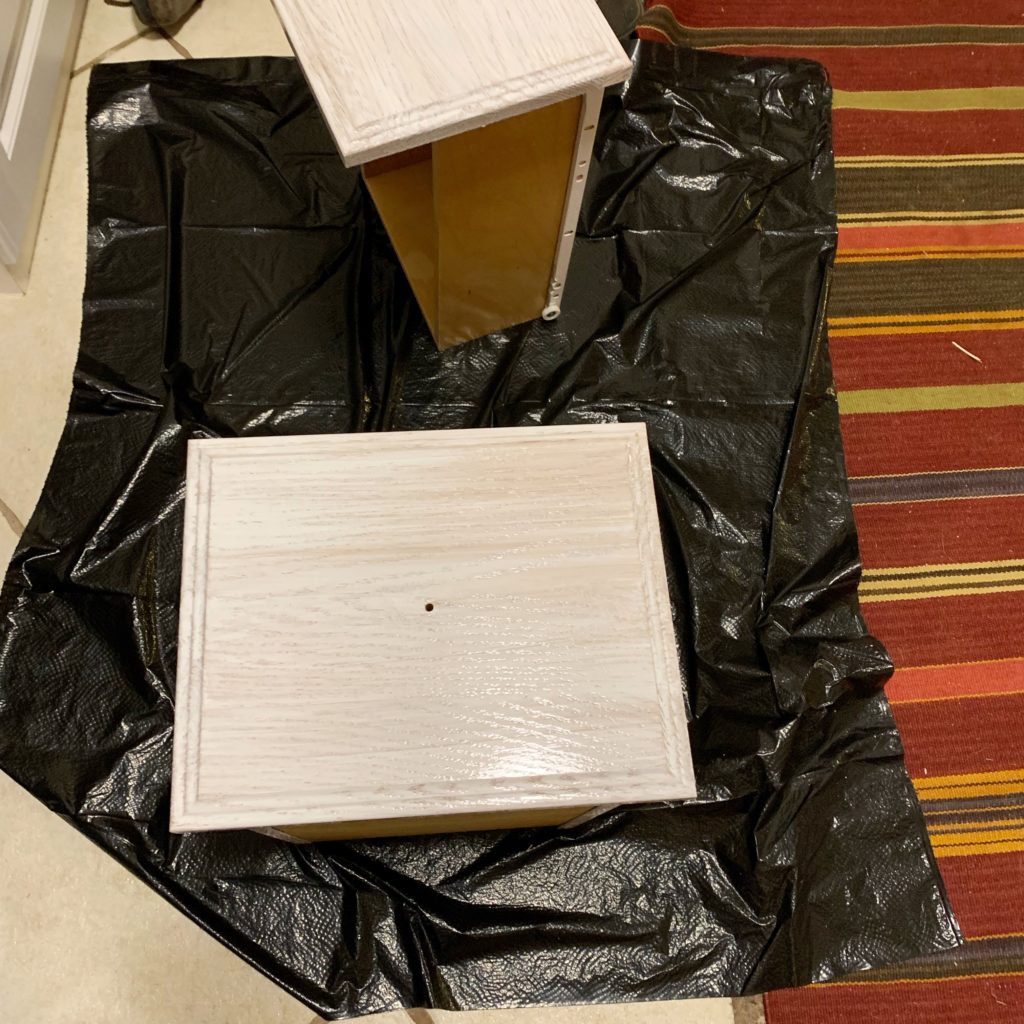
Remove all doors and drawers. Lay then out on plastic. Thoroughly clean all surfaces with denautred alcohol or another grease and dirt cutting cleaner.

Tape and cover all surfaces you don’t want white splotches on.

Optional: Rough up wood with large-grain sand paper. Then clean again, (pass).

Wipe stain over all surfaces to color. Wipe with the grain of the wood. You can wipe on and wipe off several times to achieve the desired look.

Do a second coat of stain if you so choose after a few hours. This allows you to get a more uniform look over the whole piece and touch up where you need.

Let dry overnight.

Paint one to two coats of polyurethane on every stained surface. Let dry completely.

Replace doors, drawers, knobs.

Take photos for Insta. OBVIOUSLY – if you don’t photo it, it didn’t happen.

Hard lessons:

Do not skimp on taping or covering of other surfaces. I found that I’d gotten a few splotches on the trim surrounding the vanity. Luckily we like the look enough that staining the trim in that bathroom is next on the list.

Wear gloves. It takes a long time for this stuff to come out from under your fingernails. I may or may not still trying to get it off.

Clean well before you stain. This stain is a great consistency and adheres well, but years of wear – even if it doesn’t look dirty – leaves a film on wood that will make the stain not stick.

Update:

So, it’s now been over a year with this treatment on the cabinets. I still LOVE it. It looks just like it did the day I did it. In fact, I love it so much that I had a granite guy come out and replace what was a tile counter for a legit granite one and even added a snazzy vessel sink. Now our guest bath looks AWESOME. Also, if you enjoyed this post I just did some bedside tables/nightstands (I don’t know what the difference is between these two things) that you should check out.

Adventure ​in cheesemaking – my first attempt at homemade feta

Apr 2, 2020 ·

Note: this is more of a blog post than a recipe (although I did post the recipes I use) but if you’re just looking for a straight feta recipe, this probably isn’t your jam.

Since having goats at our house and regular access to fresh milk, I have started dipping a toe into the pool of homemade cheese-making. Thus far this has created an interesting mix of successes and failures, but this weekend I finally decided it was time to graduate to the big leagues. It was time to create a cheese that was slightly more complex than I had done before. It was time for a cheese with culture, literally and figuratively. Specifically, I started my bigger cheese dreams with a feta.

Beginner Cheese

All the early and exceptionally easy cheeses I made up until now I called “farmhouse ricottas.” By the way, YOU CAN MAKE THESE. It literally only takes two ingredients, milk, and an acid. All it requires is that you heat your milk up to almost boiling (180 – 185 degrees) and add an acidic ingredient (I started with just plain white vinegar).

People make these cheeses with vinegar, orange juice, even wine. Each acid (and type of milk) brings out a unique flavor in the cheese. (Note – you can use almost any type of milk besides the ultra-pasteurized stuff.) Although we started with plain white vinegar for our acid, I quickly got on the citric acid train. It changed the flavor of the milk least of any of the different acids we tried and was still compatible for organic recipes. When you have a beautiful milk like fresh goat milk, you want to accentuate that flavor the most.

As soon as I realized that if I wanted cheese (which is all the time) all I had to do was heat up milk and add whatever acidic ingredient I thought would be interesting, there was no going back. If you have a gallon of milk in the fridge and some vinegar, you can go to your kitchen this minute and make yourself some cheese. I don’t even know why you’re reading this. Go. Now.

Once I perfected the art of bringing the milk to the edge of a boil and carefully disbursing my acid with a slow stir, then draining the curds, I began to play with flavors.

I started by draining the curds really well which will leave a dense cheese if you pack it into a mould or Tupperware. I experimented with salt, various seasonings – from dill to local honey, and even buffalo seasoning with ranch (which is AMAZING, by the way). Once you get the base method of making cheese down, you can do anything with it.

Directions:

Heat 1 gallon of milk to 180-185 degrees, stirring constantly to avoid scorching (if you have a double boiler, even better, though not necessary.)

Remove milk from heat and sprinkle either 1 tablespoon of citric acid or 1/2 – 2/3 cup of your desired acid (start slowly, you can always add more).

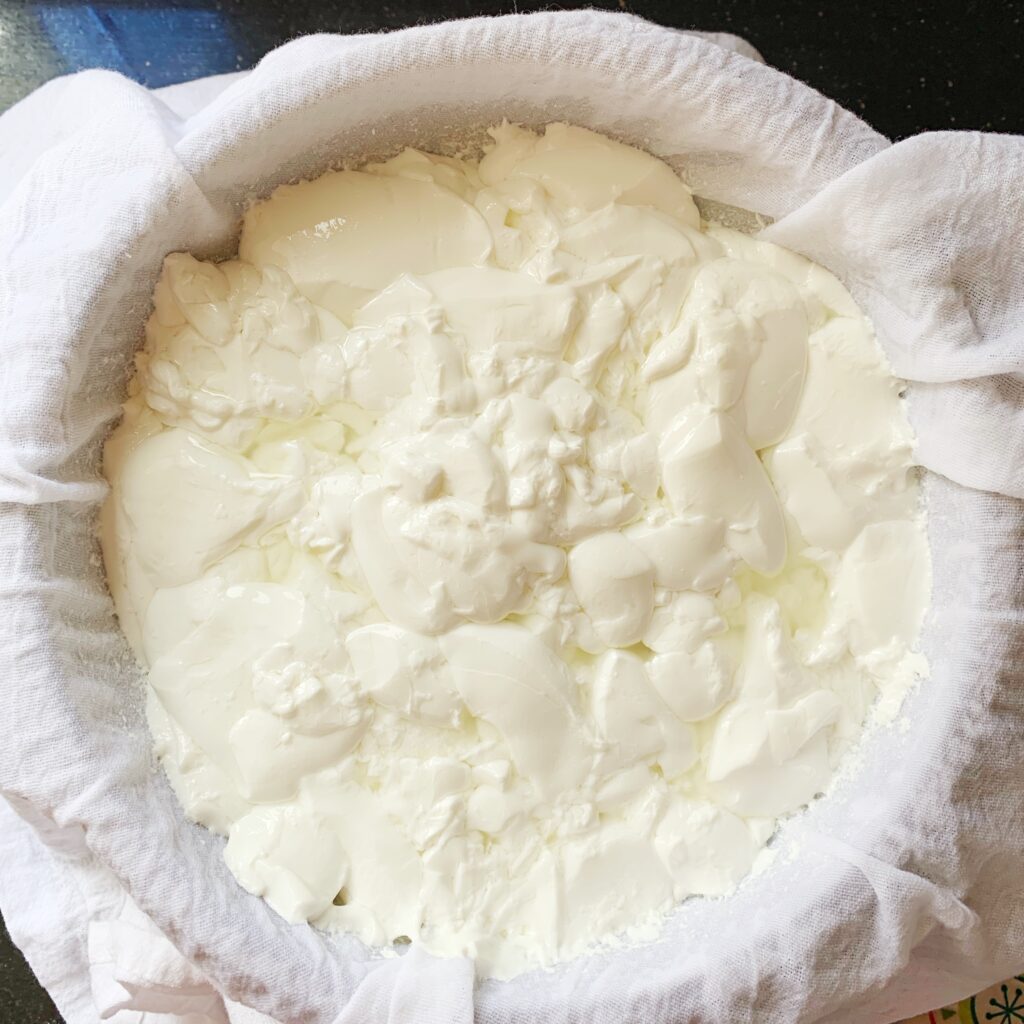
Slowly stir and you should see curds start to form, if they don’t, add more acid graduall. Once all the liquid and solids have separated, pour the pot into a cheesecloth covered colander.

Rinse the curds.

At this point, you can get creative – if you want to drain or squeeze the curds for a denser cheese, you can. You can salt it, or not. Add seasoning, or not. It’s fun to test out different options.

Feta!!!

After months of playing around with the two ingredient cheese, I decided it was finally time to be an adult and try a complex cheese that takes more than one basic step. Hence, feta.

Feta is usually made with sheep or goat milk. Luckily, I have plenty of goat milk on hand because I’m your weird friend with goats in my yard. This process can be done, though, with even a normal gallon of milk from the store. If you want to try it out, you should!

For my first attempt, I followed the directions in this book EXACTLY. I wanted to get the process down pat, as I had with previous cheese, before I start trying to tweak or change anything.

I did go ahead and pasteurize my milk because I’m not interested in food poisoning.

Ultimately, I posted the whole process in my Instagram stories, and it turned out amazingly well.

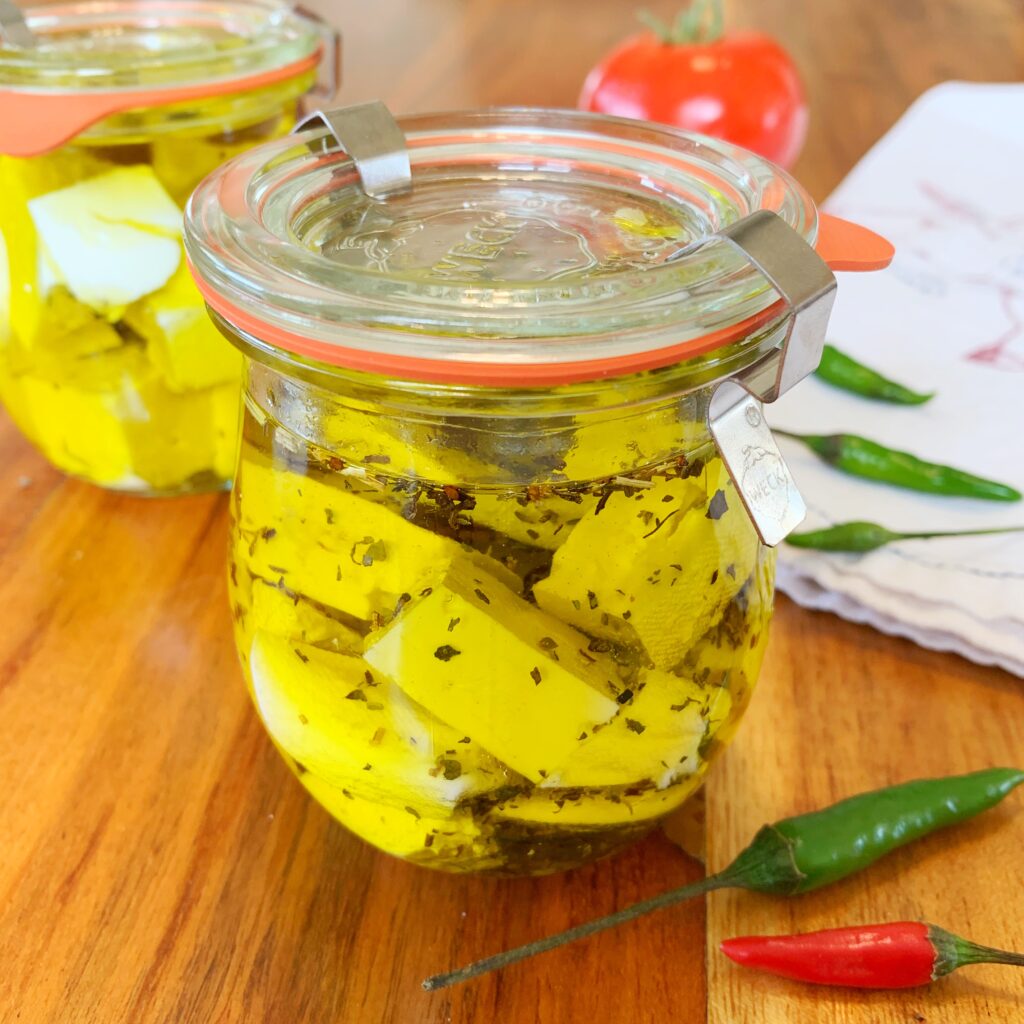
I let it sit in salt for a week and then packed it in a light olive oil with Italian herbs.

Homemade and fresh feta has a creamy complexity that you simply can’t get from the store. Try it at home. Seriously.

Directions:

Heat milk to 88-90 degrees (I simply let my milk cool from the pasteurization temperature, but if you’re using store milk you don’t need to do that.)

Add culture – Flora Danica. I got this from a cheesemaker store on Amazon. Because of course I did. 1/8th teaspoon. Tiny amount. Let it sit (held at that temperature – this was easy because I had a double boiler so I just left it in the warm water – for an hour.

Add calcium chloride (diluted) – this is another solidifying agent I got on Amazon from a cheese shop, it’s optional but I wanted to give my first go the greatest chance of success. 1/8th of a teaspoon again. Let sit for 5 minutes.

Add 1/16th teaspoon rennet (diluted) – bought on Amazon, again. (Literally, how did people know how to do stuff without the internet?) Let sit for 45 minutes to 1 hour and maintain temperature.

Test the curds by cutting a small slit in the curd and slipping your knife in and pulling upward – wait for the curd to “break” separating away from your knife on its own.

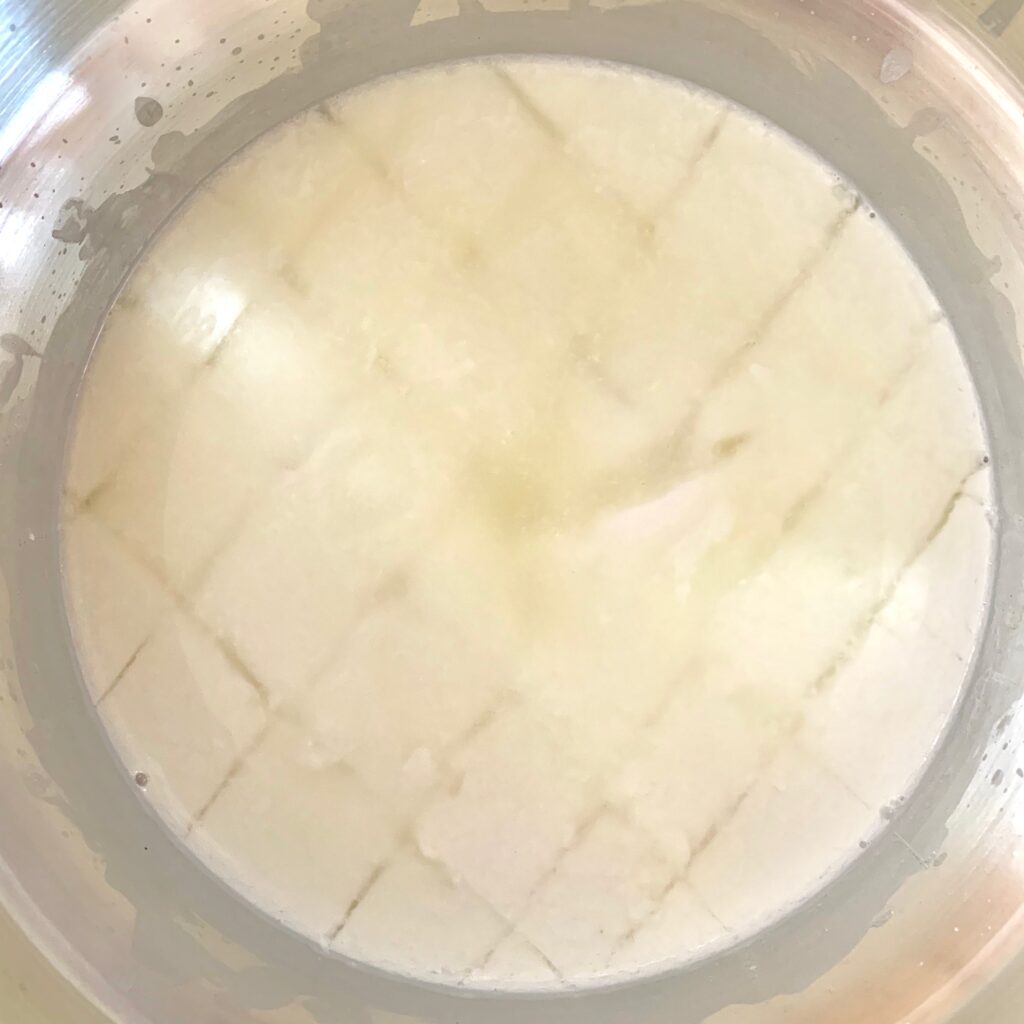
Cut the curds into 1-inch cubes. Okay, this was really fun. It went from a pot of milk to a semi-solid state to actual cheese chunks. Stir the curds periodically (and very gently) every 5-10 minutes for the next 20 minutes maintaining the temperature.

Drain the curds in a colander covered in a cheesecloth. Tie the ends of the cheesecloth and allow the bundle to drain for 12-24 hours. (I just tied it around a spatula and left it to drip. Unlike the other cheese, don’t squeeze these curds.

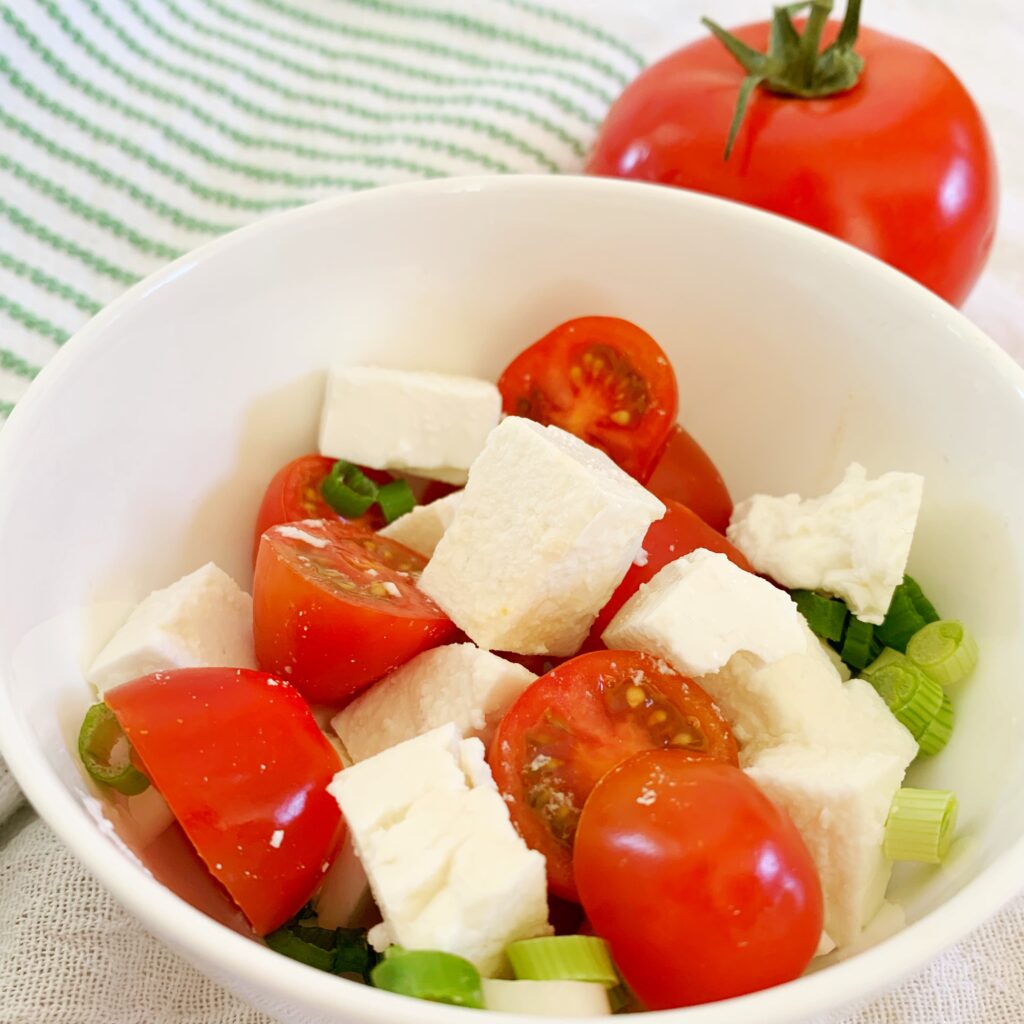
Unwrap cheese and cut into 1-inch chunks and salt. Turn occasionally for 8 hours.

Eat as is, or refrigerate.

I stored mine in olive oil and herbs, and you can leave that for up to A YEAR to marinate. WHHHHAAAAATTT!?!?!?

I’m telling you. This is life changing. DO IT. Message or comment with questions, but it was such a gratifying experience. Try it once, you’ll be hooked just like me.

It’s time to bring back the Victory Garden

Apr 1, 2020 ·

Victory Garden during coronavirus

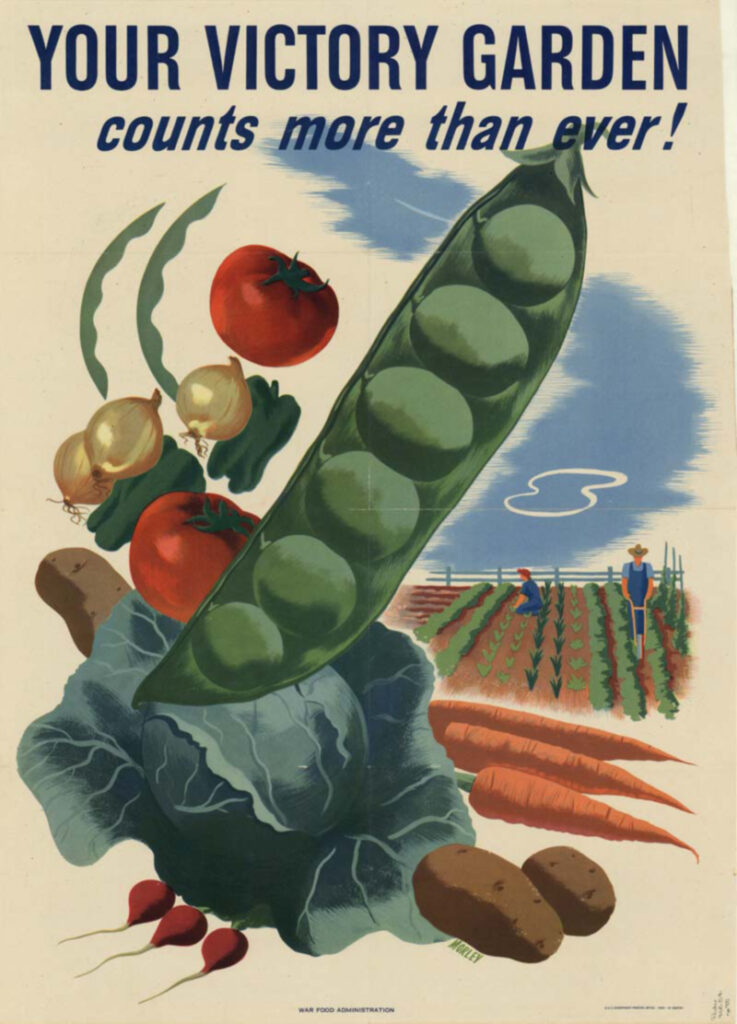
It’s time for Victory Gardens to come back into fashion. Immediately.

If you’ve never heard of a Victory Garden, you’re not alone. Victory Gardens, household vegetable, herb and fruit gardens, started to appear during WWI but became a widespread phenomenon in the midst of WWII in the allied countries.

As food was rationed during wartime, families were encouraged to start vegetable, fruit, and herb gardens at home. This helped to relieve pressure on supply chains, feed families and send more rations to the troops. They also served as critical “morale boosters” to families back at home. Victory Gardens allowed even those who weren’t fighting to have a purpose, some self-reliance, and a job creating something both useful and delicious.

Imagine the aggregate impact we could make if every person planted just a single edible plant. Or if each of us made the goal of growing enough this year for just a single meal. It would be staggering.

victory garden propaganda
A Victory garden for your mind and soul

The mental health benefits of gardening are well-documented. The art of starting a garden, however small, requires the practice of both ceding and taking control of a situation simultaneously.

In times of stress, a tangible goal as simple as growing basil can give the grower the gift of momentum. However small the undertaking, from seed to consumption, there is always a next step.

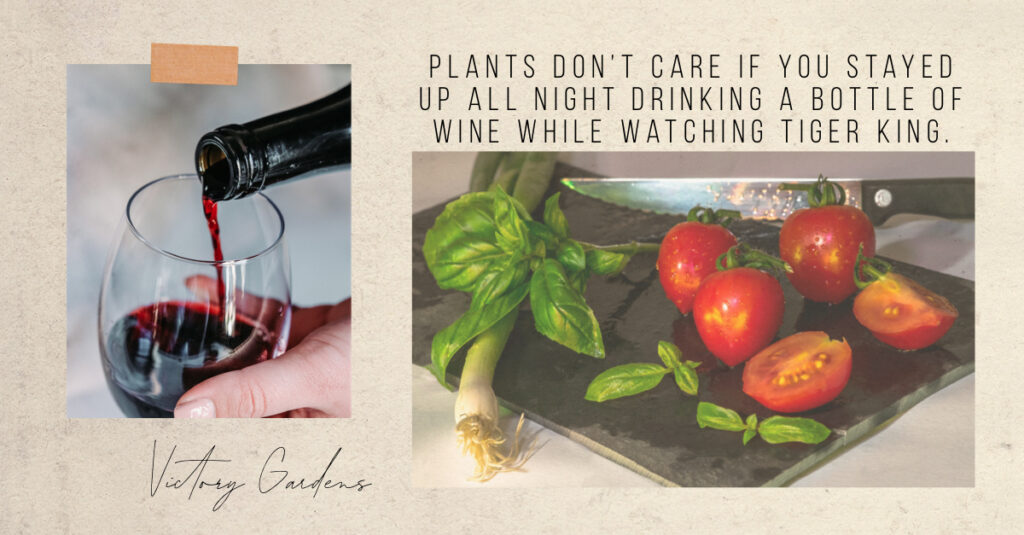
Plants don’t care if you’re in a hurry, if you’re behind at work or with the rent, or even if you stayed up all night drinking a bottle of wine watching Tiger King – if you give them soil, water and light they will find a way. Even the most basic gardening allows us to take a few minutes away from the daily grind to marinate on the overwhelming beauty and improbability of life.

plants don't care if you drank wine and watched tiger king all night

It sounds trite, but bearing witness to the almost magical process of roots emerging from a seed and sprouting forth into a plant can offer a critical perspective. When we open a jar of marinara from the shelf it’s not often that we contemplate the complex interplay of air, soil, water, and light that sustained a single tomato before dumping the sauce on some pasta. If we’re growing our own tomatoes that same jar takes on a wildly different value.

Victory Garden for gratitude

There is nothing like growing something yourself to open your eyes to how much plenty we enjoy today. The rote way we go through supermarkets filling baskets with food from all over the world is astounding. It’s easy to forget the immense work of farmers, ranchers, preservers, packagers, butchers, canners, truckers, grocery stockers, and checkers that go into even the simplest meal.

We forget about these heroes, not out of malice, but because our current world is so insulted from them. They’re the people who will keep us fed throughout these challenging times.

A few months ago I told a legit farmer™ (I don’t put myself in this category) about the Homegrown Year challenge. He mentioned to me how he wished more people would try to grow at least a little of their own food. He felt he could better relate to those who know “what it’s like.” It isn’t until you’ve tried to grow something of your own that the immense frustration and intense gratification seeps in. Until you’ve done it it’s hard to explain.

Letting go of perfection

Gardening is a constant confrontation of the fragility of life. Although gardening is portrayed in media as a hobby primarily suited to newly-retired women in their mid-sixties who enjoy bunko, quilting, floppy hats and probably have a punny wine sign hanging somewhere in their kitchen, it’s actually a brutal sport.

gardening is awesome and brutal

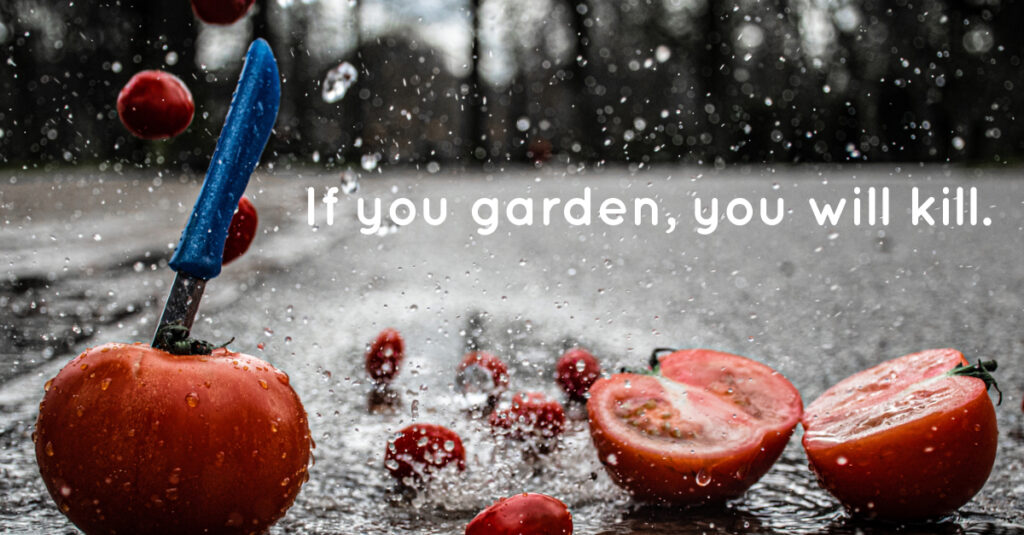
If you garden, you will kill a plant. You will likely kill many plants. The best gardeners I know are those who have the highest capacity to kill something, till it under, learn whatever lesson from the death, and do it differently next time. A good gardener just plants it again and again. Part of the stunning beauty of life is that there is always next season. The marginal adjustments determine success, but you can’t improve upon something you’ve never started.
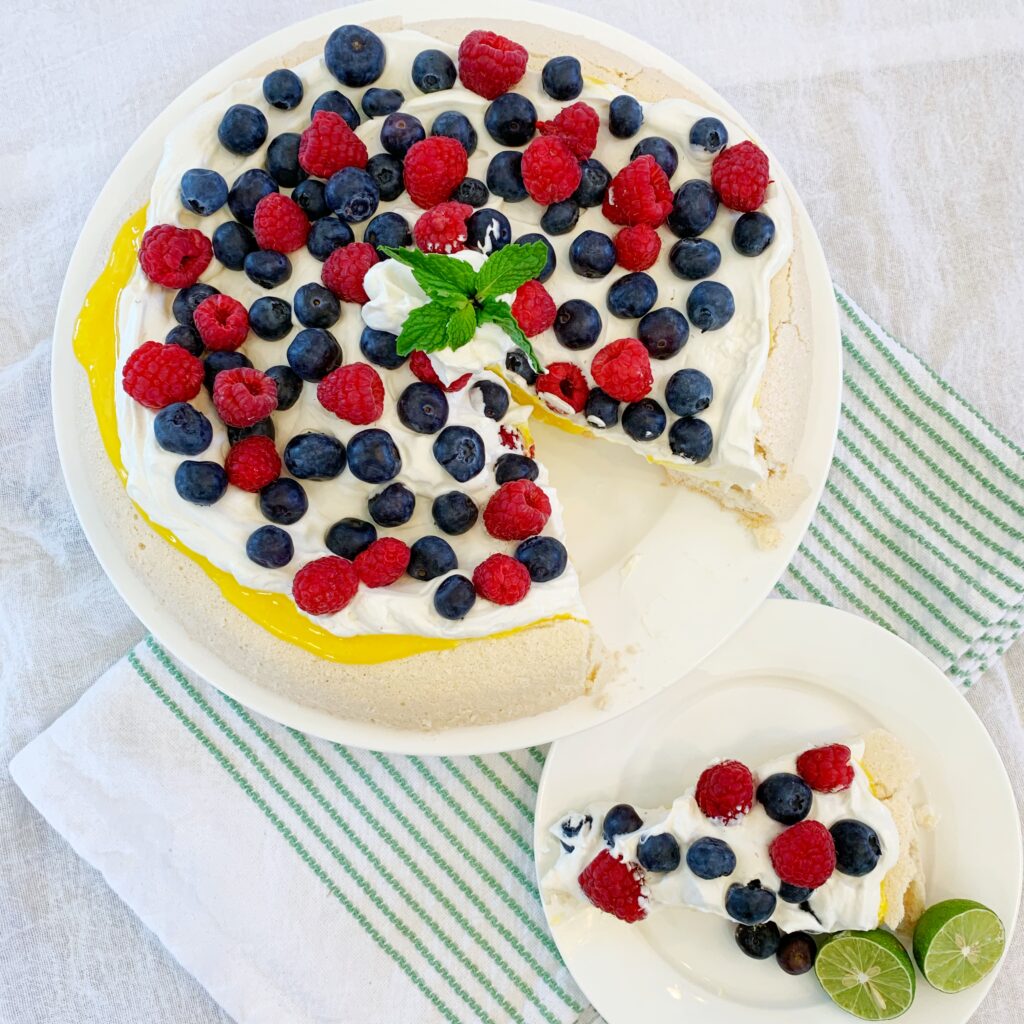
A green thumb is really little more than a high threshold for involuntary herbicide (the verb, not the noun), an assessment of failures, and an ability to adjust next time. The most important thing is to not give up and ensure there *IS* the next time. Try again. And again.


A Victory Garden for deliciousness

There’s a reason that even before people started to seriously think about food scarcity and security that becoming a locavore and “farm-to-table” became en vogue. Access to food from around the world is great, but there’s something uniquely delightful about taking a bite of something you created from “scratch scratch” – from seeds, water, dirt, and sun.

So, try it. If you’ve never planted anything before try just one plant. You can do it. It’s worth it.

seedling

I moved my office to a SheShed – and it’s amazing

Mar 14, 2020 ·

It’s turned from a running joke with my group of girlfriends into a source of pride: I work in a shed. Literally. Like the sheds you see for sale in the parking lot when walking into a home improvement store. Unexpectedly, I have never been happier to open my office door and step inside.

Challenges are an opportunity for reevaluation

Five years ago if you asked my dream office location, I would have told you I would be at one the top floors in the high-rise just north of Colorado’s Capitol. Referred to as the “cash register building,” it’s been an iconic part of the Denver skyline since I was in elementary school. To me, that building signified success. Rent for a single office was higher than the mortgage on our house – but that’s where the “successful” people were.

Fast forward to today, and I’ve never worked further from that highrise. But, when I walk across my driveway with a cup of coffee in hand and then open the door of my “office” I couldn’t feel more fulfilled.

I have no commute, traffic, parking permits, or toll fees for the fast lane when I’m running late (which was basically every day). I’ve traded honking and smog for the occasional goat sneaking in the door and chickens, ducks and guinea fowl making noise in the background of my conference calls.

There were times during the path from the downtown office to the sheshed where I felt like a failure. I had to change my preconceived notions of what “success” looked like for me.

A recent piece in The Economist outlined how the Coronavirus quarantines could make businesses reevaluate some of their practices and find new opportunities in these challenges. Although mine was on a much more micro scale, had some of the things I saw as failures at the time not happened, I wouldn’t be in the ideal situation I have today. Now I get to tell people, with a smile and a twinkle in my eye, that I work in a shed.

Not to be too Pollyanna about everything, but it’s these moments of flexion where your life can spin off in an entirely different direction. You might be surprised how much you like it.

Now I sit here and think: “What better place to organize and write about the Homegrown Year than in a SheShed office?” I feel more connected to my animals, my garden, my family and even myself than I ever did driving downtown in the mornings.

A change of scenery can change your mind

Studies abound about the negative impact an oppressive urban environment and bad architecture can have on the psyche. I never thought that *I* was one of the people that affected by my surroundings, until I changed them.

Sheshed office

We were very fortunate that I managed to buy a fully finished shed from a family friend who had used it as the office for his asphalt company. When he had to move yards he called and asked us if we wanted to purchase the office from him. It was absolutely perfect and I found a company to move it to our property.

The building, moving it, and hiring an electrician to wire and hook it all up cost less than 6 months of rent in Downtown Denver. I’m no less capable as a worker – probably even more creative now. I have the same intellect and skill set that I had when working in the middle of downtown, I just feel like I can smile and breathe a little more.

A no hurry and no expectations update

When I was downtown I tried (and often failed) to strike a balance between what I thought my office said about me to others and who I actually was. I always wanted to read as successful, but not TOO successful, professional, but also down-to-earth. Now that I have a space that is truly and completely MINE I don’t care what it says that I have a daybed across from my desk. I wanted a daybed and I prefer it to sit on and work on the laptop to a couch or chairs.

With the shed, every single thing I have done to it so far, from getting it reroofed, replacing the windows, having it repainted, is exactly how I want it. As I create the list of to-do shed items I have the ability to consider how I was each detail.

Because it is currently serviceable, I am on no specific timeline so it allows me the flexibility to discover what I want in my space. This has created a situation where I get to discover what *I* like rather than worry about what it makes others think about me. It’s a weirdly liberating experience.

Moving where I work made me change the view of myself

I know this is going to sound a little crazy, but having the opportunity to strip away my concerns about what my space said about me, and just being able to spend my days focused on creating has made me a better worker and a happier person.

Could you work in a shed?

I’m your prepper Mom friend – Here’s what’s in my emergency baby bag

Mar 12, 2020 ·

(This post contains affiliate links to Amazon – but you can get almost all of this stuff at your local store, too.)

Ok, so, first off – everyone is freaking out right now. It’s going to be okay. Really.

I know that maybe you and everyone around you feels panicked – but acting like Beaker from the muppets isn’t going to help. So, for just one second – take a deep breath.

If you have a baby, you might feel even more stressed out than everyone else. There is something about having a baby that makes you feel EXTRA vulnerable in times of upheaval. It’s normal. Arguably, it’s even a healthy feeling – as long as you can keep it in check. Part of the need to protect our children is what makes us human.

Because it seems like everyone in the world decided to learn about prepping in the last 5 minutes (Seriously, toilet paper?!?!? What are you people even doing?) I have been inundated with texts from friends who are either pregnant or have tiny babies and want to know what they can do. They know that I’m their weird prepper friend who doesn’t subscribe to the dark and twisty anti-social parts of it, but who likes to be ready in case of an emergency.

I made a “bug out/in bag” – but for babies

I formulated my baby emergency bag a few months after my first son was born – which was at about the same time major swaths of Texas were facing huge floods. It was hard to read the news every day, exhausted and full of post-partum hormones, without spiraling into a blind empathetic panic.

What did people need? Diapers and formula. I tried to Amazon Prime some to a local church that was distributing them, but it was a challenge getting anything into the area.

Looking down at my own infant son, I felt so scared for moms in Texas and wondered what I would do if I were them. What if my own home flooded? How would I handle a fire? Being stuck in the house with no electricity or running water? What if I needed to evacuate with a tiny baby in my arms?

The prospect of being helpless seemed overwhelming and scary. I hate feeling that way. So, I created my own baby emergency bag, then just stashed it in the bottom of a closet.

There are a million websites that will tell you what you should have in a “bug-out bag” in case you need to evacuate your location quickly and care for yourself. However, those of us who have taken that first trip out of the house with a newborn while loaded down like a pack mule heading to the top of Machu Picchu know that babies have different needs. Although we all need similar things to survive – babies are just special.

To clarify: this is NOT the same as my diaper bag. I bought a cute Kate Spade white fabric bag when pregnant for my first son (that was dumb – dark vinyl only from now on) that has 14 different kinds of lip gloss stashed in various pockets along with various Cheerios crumbs. This is definitely not the same thing. My emergency bag was packed for maximum usefulness for minimum weight.

You don’t have to go overboard, but the peace of mind in knowing that you have something to grab and go if necessary is especially critical for those of us who are already sleep-deprived and covered with a nigh constant stream of unidentifiable secretions.

Also, knowing you have a bag in the closet with some basic baby necessities in case you lose power or need to shelter-in-place for a few days can help to relieve your anxiety.

Being prepared doesn’t mean being negative

There’s a weird misconception about “preppers” that assumes we’re always looking for bad things to happen. I find that in a lot of cases, it’s quite the opposite. The better care we take of ourselves, the better care we can take of those around us.

Obviously, I don’t wish to be in a disaster, with a baby or otherwise. But if I am I hope to care for both myself and him well enough so as to help those around me.

Often, the best thing you can do to help others in a crisis is to merely be able to care for yourself and your immediate family. This opens up emergency services and supplies for those in a critical situation. If you don’t need help, services can be provided to the next person down the line.

Here’s the other thing – if you’re in a crisis with a baby and you need help, who do you look for? The mom who looks the least panicked. She knows what’s going on, she’s got it under control, maybe she even has some spare baby supplies to share. I aspire to be THAT mom in a crisis.

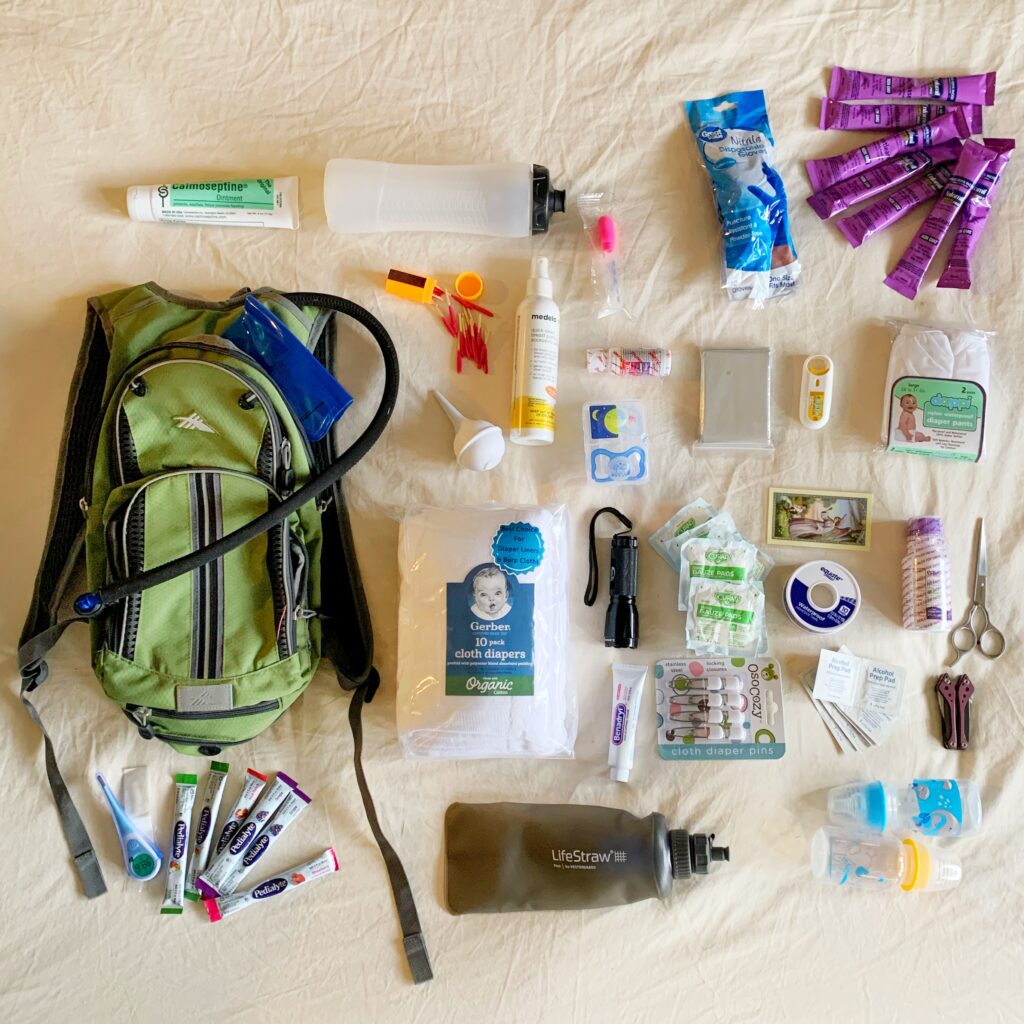
Here’s what’s in my bag – and why

Babies are different. They are the most vulnerable, and yet dichotomously also the most resilient, amongst us. If you need to evacuate (or need to stay in) with a baby, there are some things to consider having that you don’t need to worry about with people who can eat solid food and do very basic personal care. Here’s what’s I keep in a small backpack solely for caring for my baby in case of an emergency. If the need arises, I’ll fill the water bladder and off we’ll go.

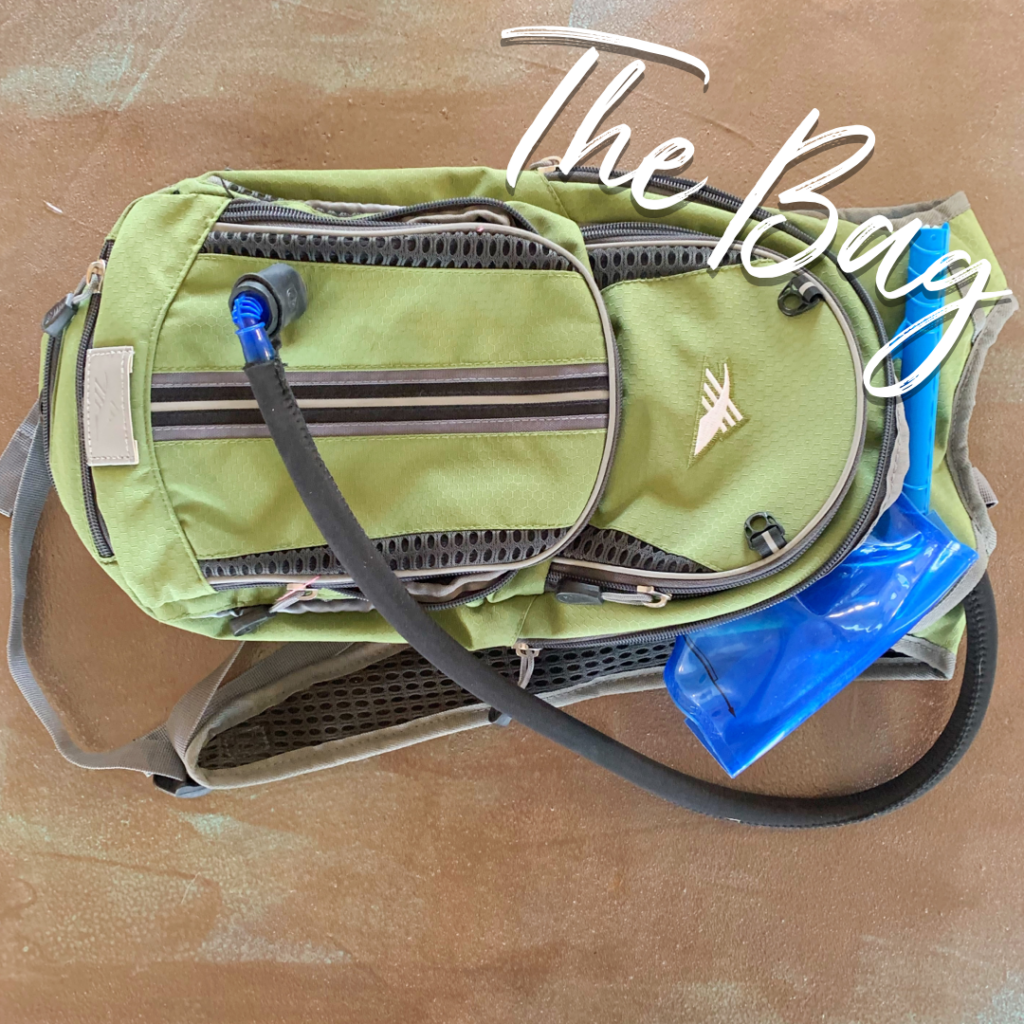
The Bag

I bought my bag at Costco a number of years ago for “light hiking.” This was back when I was still deluding myself into believing I was a person who does light hiking. I don’t. However, that’s what ultimately made it the perfect bag to fill with items I would need in an emergency and then toss in a closet. Because I don’t actually need a bag for hiking. I keep my baby carrier close to my emergency bag because you will need that, too.

What makes a perfect bag for this application is the following:

  • It’s easy to carry on my back if I’m wearing the baby on the front, or vice versa. I suggest if you’re looking to pick your own, assume you will also have a baby carrier loaded with 4 – 40 pounds of human. Ensure your supply bag is light and easy to maneuver.
  • It has a water bladder. You don’t necessarily know where/how much water you’ll have, so having something to fill and take with you is critical if you need to leave. If you shelter in place, fill your bathtub in case there’s some interruption in utilities.

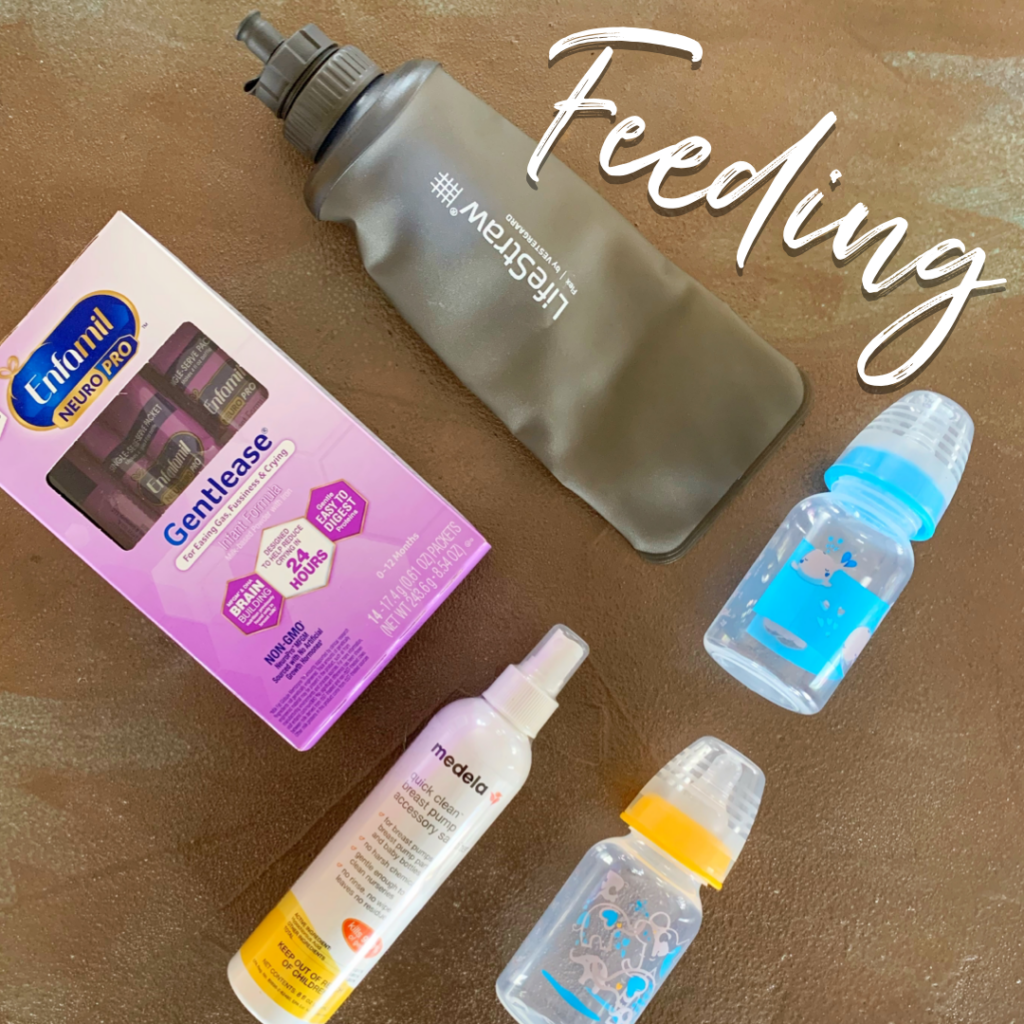
Feeding

Enfamil single serving formula powder packets

These are an amazing invention. I used to use tiny sandwich bags and scoop formula into them when I started keeping a baby emergency bag because these didn’t exist yet (by the way, using sandwich baggies is still a fine strategy if these packets sell out). Now you can buy these nice little premeasured tubes to be mixed with 4 ounces of water. Simply tear open the packet and pour it into a bottle.

Breastfeeding? Grab some of these anyway. It’s better to have formula to give away to others who need it if you don’t than be sitting in a crisis with a hungry baby (which can compound stress and can make supply harder) wishing you had something with which to supplement. Stress and a hungry baby can push you into a downward spiral that makes pulling up tough. There’s no harm in having some backup.

Do you have a formula baby already? I would consider keeping an extra can in the cabinet. If you have to jet, just pour that whole sucker into a Ziplock bag (easier to pack) scoop and all.

2 – 5 oz. plain, boring, baby bottles with rings and nipples

This isn’t the place to get all fancy with the bottles with the bells and the whistles and the 47 pieces to clean. These bottles are just utility players to ensure you can get sustenance into your baby. The less there is to mess with, the better. I suggest a mid-flow nipple that won’t overwhelm a tiny baby but will allow a 5 or 6-month-old to be fed efficiently. Dole out the formula packets one at a time – if she eats the first, then make her another. I suggest two bottles so you can have one cleaning and/or drying and still have access to another to use. The smaller bottles are easier to pack and handle and since you’ll only be making 4-ounce batches, the 5-ounce bottle is the perfect size.

1 bottle Medela quick clean breast pump & accessory sanitizer

Although this cleaner was designed for the breast pump pieces, it’s also a baby bottle cleaner. It disinfects non-porous surfaces (including against coronavirus) and doesn’t require rinsing afterward. Preclean bottles to the best of your ability, then just spray and let stand for 10 minutes to disinfect. This is available and most baby stores, Walmart, etc – but for some reason it’s not on Amazon. Def get a bottle or two, though – the ability to disinfect with a spray and not have to rinse afterwards is key.

LifeStraw with collapsible bottle

Almost any personal filtration system will work, but this is my preference. The collapsible bottle is easy to pack, and if we know anything about having babies – it’s better to have more bottle options than fewer. The straw can also be used in-line with your backpack bladder, which will help you refill when you have the chance. Obviously the ideal situation is to use distilled and filtered water with formula, and using this is the last choice – but knowing that you can utilize a water source if you absolutely have to is important.

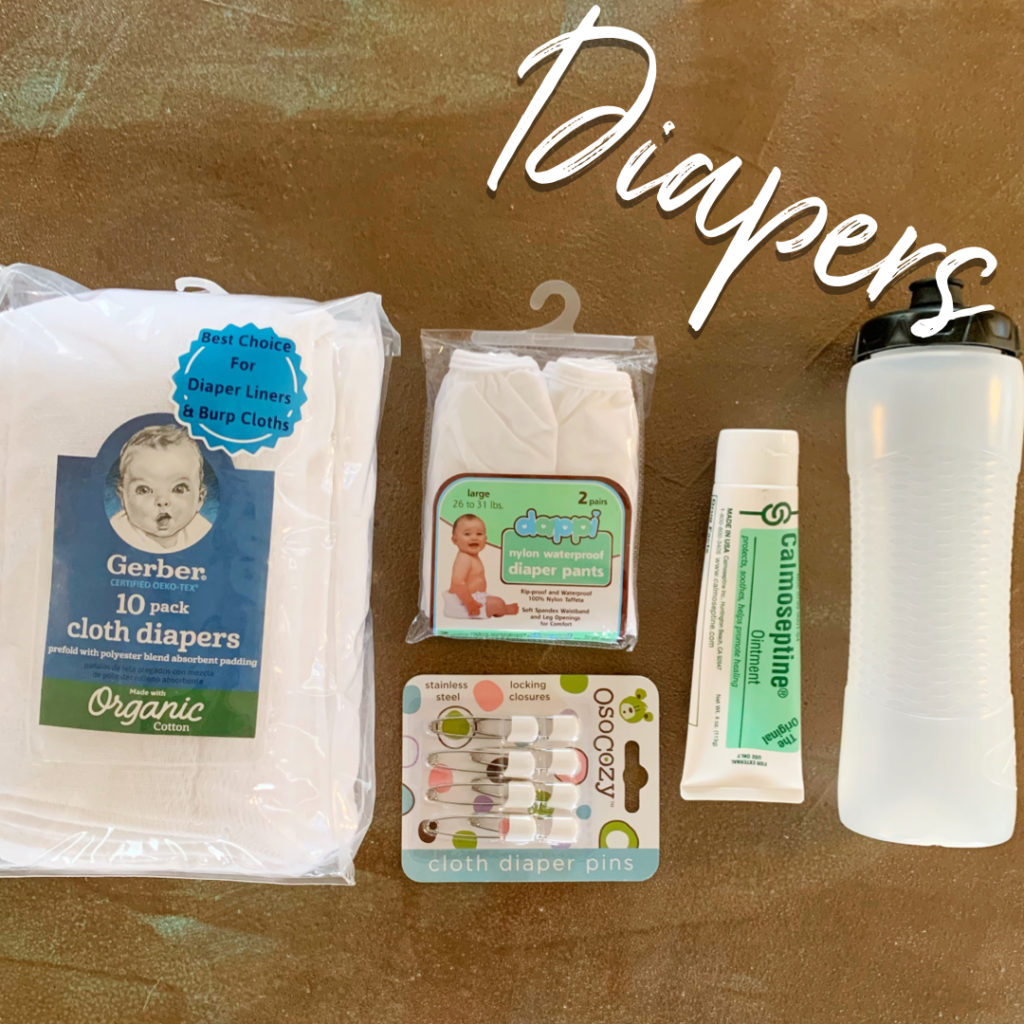
Diapers

Cloth diapers

Do I like cloth diapers to use as actual diapers? No, I do not. In real life, I buy disposable diapers on sale and in bulk. But in an emergency carrying around a case of disposable diapers is completely untenable. Even if you’re sheltering at your home, it may be hard to buy/store enough diapers to last. Your grandma did cloth diapers, maybe even your parents did it – you can do it in the short run. How many do you need? My answer is “pack everything else first, then fill every other spare inch with diapers. They’re wipes, they’re handkerchiefs, they’re soft – just keep these around for everything.

Safety pins

Safety pins are useful not just for diapering, but they have a host of things they can be used for if needed. Keep them on hand and in your bag. There’s a reason that MacGyver seemed to always end up with safety pins around.

Diaper covers

These are small, light, inexpensive, and easy to pack. Your goals in an emergency are to keep you and your baby dry, clean and as sanitary as possible. If you have two of these you can have one drying and have another ready for use.

Going just uncovered diaper will increase the chances your baby will leak on you and his/her environment making it much harder to keep everyone clean. These are cheap and easy to use. I suggest grabbing one that’s a little too big rather than the opposite. A bigger one will work with a smaller baby but you can’t get a big baby into the smaller cover leg holes. Moms with multiple kids who have had to raid Peter’s diaper stash to cover Paul’s butt are all too familiar with this.

Sports bottle

What about wipes? You’re probably asking yourself. I don’t actually have wipes in my emergency bag. GROSS. Here’s why, though: disposable wipes run out. Quickly.

If you’re relying on them you have to be worried in the back of your mind about how many you have left, and where you’re going to get more when you’re out. That’s critical brain space you need for other things. The only thing between you and being out of wipes is one big number two. A cheap sports bottle, though? It’s basically a baby bidet.

You can get a sports spray bottle for almost nothing at the store – and between that and the extra diapers you can shove into the space where you would have had wipes, you’re all set. Also, you can use the bottle as storage when you’re packing for all the single-serving packets. I suggest one of the more squishy squeezy bottles – easier to pack.

Calmoseptine

I learned about Calmoseptine from a buddy whose first child had a brutal diaper rash. He heard about it from a nurse friend. It’s his secret weapon. Don’t look for it in the baby section at the drugstore, it’s usually back by the medical devices. Although this stuff is my preference, any zinc diaper cream is fine if that’s all you can get. Nurses and hospitals use Calmoseptine for bed sores and feeding tubes, so it’s like the diaper cream you can get but it seems to work so much better on my kids.

In an emergency situation, do your best to not allow rashes to fester to the point that the skin breaks. I use this stuff at the first sign of redness. Broken skin is where infections can happen, so keeping skin clean, dry, and as irritation-free as possible is key.

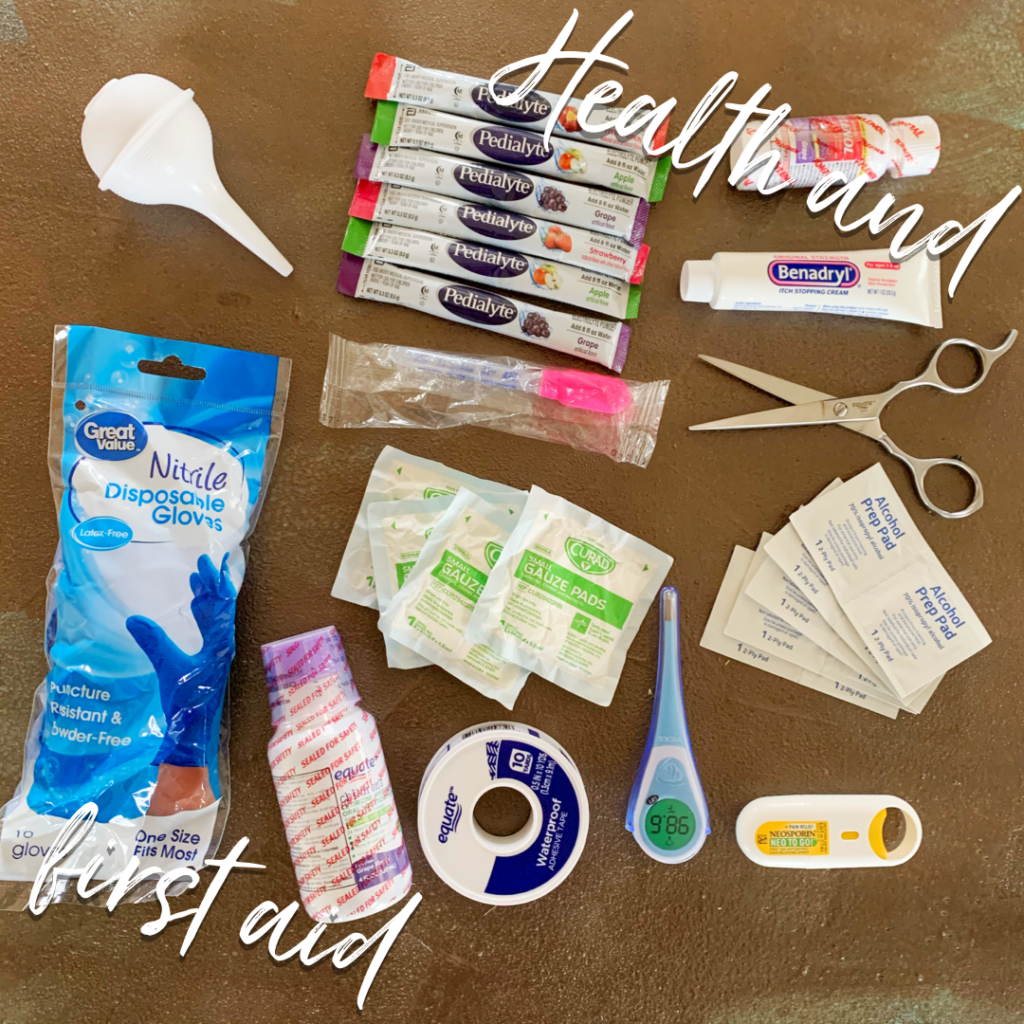
Health and first aid

First and foremost: CONSULT A PHYSICIAN BEFORE USING ANY OF THESE THINGS. I am not a doctor. My highest training on this stuff is that one time I did the baby CPR class and some general first aid training. That said, I *have* been in a situation before where, for instance, my pediatrician has told me to give Tylenol to a baby under the age of two.

In an emergency being able to fight dehydration, fever, allergic reaction, and wounds/infection is a must. I would rather be in a position to have Tylenol on hand if I have a baby with a fever should I receive a doctor’s instruction, then not have access to any. Again though, I AM NOT A DOCTOR – CONSULT A DOCTOR BEFORE GIVING YOUR BABY ANYTHING.

Pedialyte powder packets

Like the Enfamil packets, these are amazing. Being able to access an electrolyte solution in case of emergency is so critical. They’re easy to pack and preventing and fighting dehydration is critical.

Cheap, light, thermometer

Don’t get one of those heavy ear things. Just get a light and easy thermometer – also keep the covers.

Nose sucker

Those sucker bulbs are great, light, and easy to pack. Keep a spare.

A pair of nitrile gloves

Always have a pair of gloves in case of emergency. I prefer nitrile because you never know if the person who needs your help might have a latex allergy.

Gauze pads/Waterproof tape

“Why not bandaids?” you might be asking. Here’s the thing about bandaids – they only come in whatever size you buy them in. You can make a little bandaid with tape and gauze, but you can’t make a little bandaid bigger if you need more coverage.

Scissors

Always keep a pair of good scissors, not just for cutting bandages, but really for almost anything. Keep them away from baby, but my preferred scissors are the relatively cheap men’s barber scissors that you can get in the grooming section of the store. They’re small, light, easy to pack and keep a pretty good blade.

Alcohol Swabs

These are small, easy to pack, and can be used to disinfect in a pinch. Toss a few in the bag.

Neosporin spray

This relatively inexpensive antiseptic spray can just loop on to your bag. I keep them in my purse, car and medicine cabinet.

Children’s acetaminophen

Again. I AM NOT A DOCTOR and it is not recommended to give Tylenol to children under two. But, it’s better to have it in case of fever if a doctor instructs you to use it, than wish you had it.

Benadryl cream/liquid

One of the tricky things about allergies is that you never know when they’ll appear. Having a topical and liquid antihistamine on hand TO USE AT A DOCTOR’S DIRECTION can be useful. If you or your children have a history of anaphylaxis, an EpiPen might also be a thing you also need to add.

A dropper

No matter what you need to deliver, droppers in a plastic wrapper are cheap, easy, light, and hugely useful.

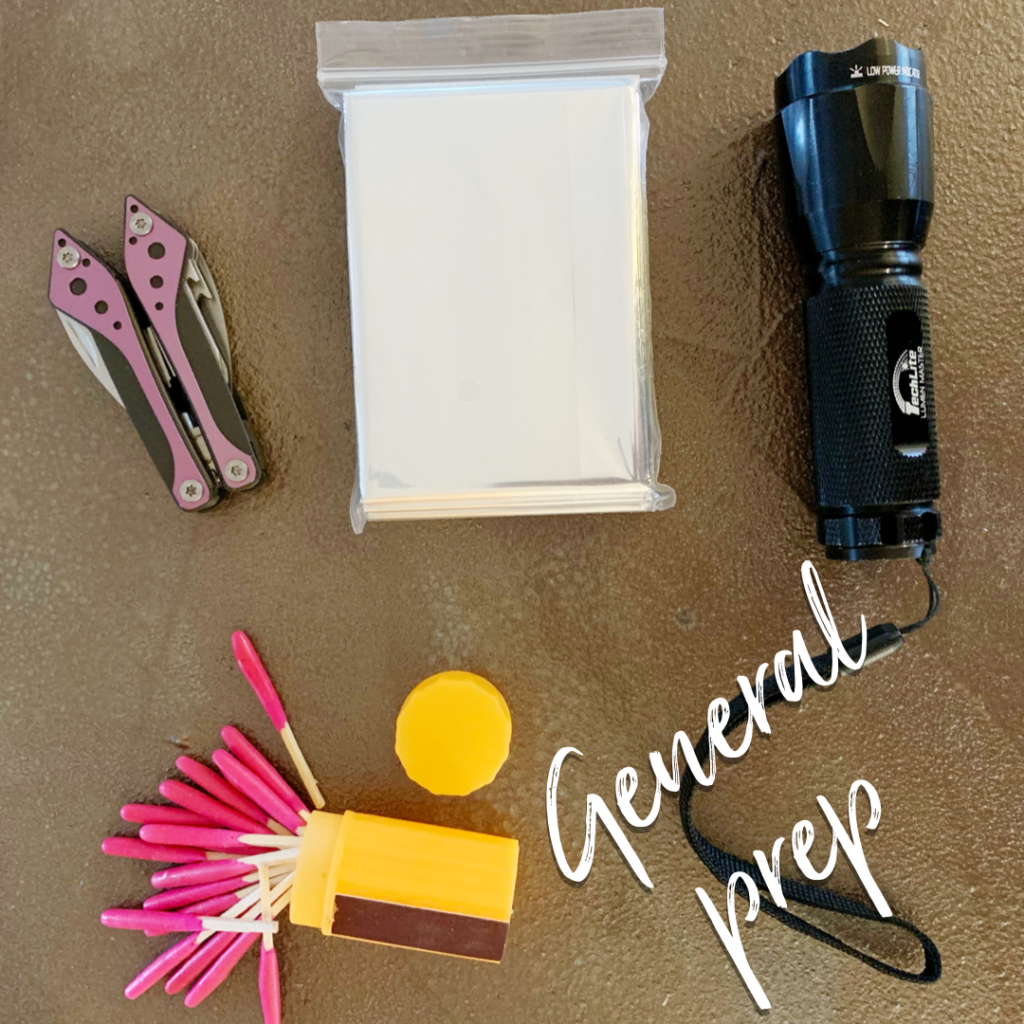
General

Here are a few things I keep in every bag in the house. Hopefully you don’t need them – but like all the stuff here – better to have it and not need it than wish you had it.

Matches in a waterproof case

You always want to be able to make a fire if you need it.

Astronaut/space blanket

The nice thing about these little blankets is that they fold into a tiny square that’s easy to stash or put into a small pocket, but can be the difference between freezing or not. DO NOT LEAVE A BABY ALONE WRAPPED IN IT. They are basically a giant plastic sheet and if you need to use it on your baby make sure you are holding her the whole time and it stays clear of her face.

Small flashlight with batteries

Always keep a flashlight with you – if the electricity goes out you’ll be shocked how dark it gets.

A Leatherman-style utility tool

You never know when you’re gonna need to MacGyver the things. There are plenty out there for under $20.

Comfort

Pacifiers

You may be super anti-pacifier in your normal life. I totally respect that. But I suggest you toss a few in the bag anyway. In times of stress, babies can sense it. They KNOW if you’re tense. If they have to go somewhere new this can just compound.

When you’re a Mom, what noise makes you more stressed than anything in the world? (Besides silence, if you have a toddler.) A baby crying. If you’ve done everything else, the baby is fed and clean and you feel like you just can’t get them to calm down, it’s ok to do whatever you need to do to get comfort to them and for yourself. The sucking reflex helps babies to relax. Give yourself a pass and if you need it, you have them.

An object that makes you feel grounded

I’m Catholic, so for me this is just a simple Guardian Angel prayer card. For you it could be a photo, beads, a coin – really anything. Just pick an object that can help you get re-centered and put it in your bag. You might think this is some mumbo-jumbo woowoo – but hear me out:

The MOST important thing you have in a crisis is this: your brain. Your ability to be brave, strong, creative, thoughtful, and hopeful will make the difference for you and your baby. We all operate better when we’re in the correct mindset.

If you need it, and as often as you need it, pause, breathe, and pray or re-center. Fear can be a great motivator, but it can also cloud your mind. Look down at that little person – you’re ok, they’re ok. On to the next challenge.

A running list of all the things I will miss during Homegrown Year

Feb 28, 2020 ·

So, if you missed it – I’m working on the project called the “Homegrown Year” where I will be living off what we produce on our urban farm for an entire year. Much of my life has been consumed with logistics – building a “poultry palace” chicken and duck house, getting a pig pen up, fencing the front so we can let the animals graze the whole property, even learning to use our new Harvest Right freeze dryer.

I’ve started to think about where I will be getting things I can’t produce here that I want over the year, like citrus. I’m trying to plan for the other things for which I’ll need to barter, like wheat, beef, honey and sugar.

A cosmic joke

But, it was finding out that an IN-N-OUT was moving in about a quarter-mile from my house, just in time for my year to start, that made me remember there will be things I just can’t make from scratch. No matter how hard I try, there will be no “animal-style” for me for an entire year. But luckily I’ll get to smell it – thanks to this huge cosmic joke being played on me just to make this a *little* bit harder.

What I *CAN* make

The good news is that with some creativity, a growing network of people who are interested in the project, my husband’s kitchen prowess, and some bartering skills, I’ll be able to make a LOT of things. I got off a flight a few weeks ago and texted Emily (my friend from the rules committee) that I had no idea if I could survive a year without Stroopwafels – as United has made me hopelessly addicted to them since they give them out on flights.

She asked, “Could you just make some?” I already make a killer “cajeta” caramel with goats milk, and if I get some flour – and assuming I have sugar or honey – I could probably swing some little wafer cookies. Will they be an actual Stroopwafel? No, but I bet I could get close enough to satisfy myself for a year.

Some things will just be impossible

There are some things, though, that will just not be in the cards. I unabashedly see the need for from-the-package treats sometimes, and there will be no way to replicate them. So, although I want the focus of the year to be on what I CAN make – just like you need darkness to see stars – I’m starting a list of all the things I’ll miss. So here we go:

Reese’s Peanut Butter Cups

Reese’s Pieces

Velveeta (I’m sorry, but there’s no better queso than just the Velveeta-based kind)

IN-N-OUT

Wendy’s Frosty – chocolate, not vanilla, vanilla is dumb

Chick-fil-a

Those stuffed Krispie Kremes

Top Ramen

Noosa (I make yogurt but Noosa is something special)

Lobster rolls (does anyone know lobster fishermen?)

Mozzarella Sticks (maybe I can make these?!?!)

Peeps

SPAM – don’t judge – I love it

Tuna salad

Cherry Jolly Ranchers

Starbucks Flat-white

Scotch

Tito’s martinis with three bleu cheese stuffed olives

Silver Oak Cabernet

Sterling Cabernet

Really, all cabernet

Coors Light michelada – again don’t judge

Rockies dogs at the baseball stadium

Pringles

Bacon-wrapped shrimp (anyone know a shrimp fisherman?)

I will update this more as things come up. I’m sure there will be more. What could you not live without? Comment or message me on Instagram (or email me at hungrykelly@realbestlife.com) with what you would miss if you couldn’t have it for a whole year.

The Rules: Homegrown Year

Feb 13, 2020 ·

Homegrown Year Rules

Homegrown Year: The Rules 

There have been a lot of questions about the rules surrounding the Homegrown Year. It’s a challenge made up by my friend Emily, and then supplemented and clarified with several of our other close friends (most of the creation of this challenge happened in Napa – yes, there was wine involved.) Sign up for the newsletter below!

Sign up for updates from my newsletter named: “Kelly hasn’t starved to death . . . yet”
Ha.

[gravityform id=”1″ title=”false” description=”false” ajax=”true”]

The rules are as follows:

Kelly will eat only from food that produced on the little farm, bartered from that food, or hunted, fished or foraged by her or her husband for one year. (Working date: August 1, 2020 to July 31, 2021)

Food produced prior to August 1, 2020 compliant with the rules is allowed for consumption during the year and for barter. Food obtained according to the rules will also be allowed.

Bartering: 

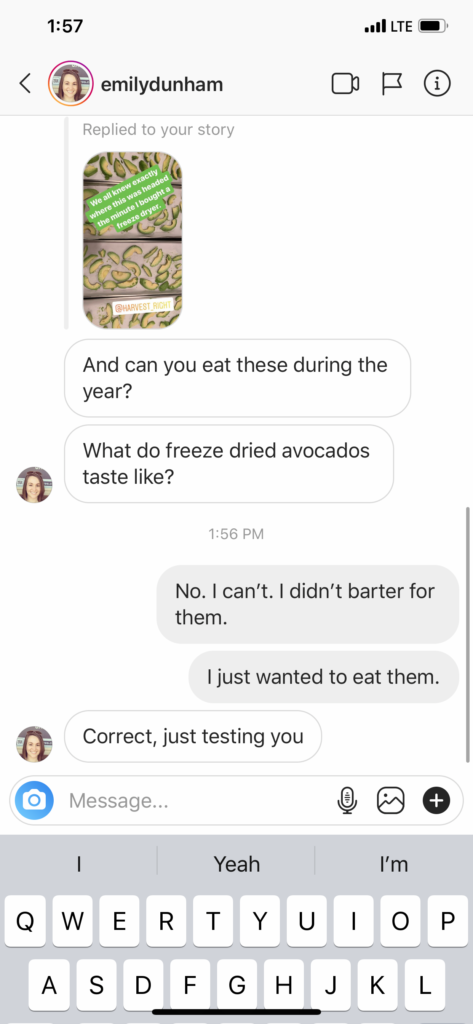
Bartering is allowed, but only with other sources – growers, farmers, ranchers, etc. Although Kelly can pay for shipping, she must use those foodstuffs produced on the farm as payment.

Example: Friend goes and buys Big Mac and attempts to barter for goat cheese. Not allowed.

Example: Friend grows blueberries and makes jam and attempts to barter for goat cheese. Not allowed as the sugar is store-bought. Kelly can barter for the berries themselves and make a jam with either sugar or honey bartered from sources.

Example: Kelly wants wine – She needs to find someone who actually grows grapes and makes wine.*

*Important: if you know anyone who grows grapes and makes wine – HAVE THEM EMAIL ME AT hungrykelly@realbestlife.com because I AM HERE FOR IT. Same with coffee growers.

Oregon Trail Rule:

Kelly will be allowed certain things on a figurative “wagon” needed for the year – these will include things like salt and white vinegar which are necessary for preserving, cheese cultures and rennet for cheesemaking, yeast and rising agents, etc. Additions to the “wagon” of things needed will be submitted and reviewed by the rules committee.

Break meals:

Kelly will be allowed four (4) meals off over the course of the year. These can be used for weddings, holidays, securing a reservation at a Michelin star restaurant, or if Kelly finally breaks down and eat an entire bag of Reese’s Peanut Butter Cups.

Hunting, fishing and foraging: 

Hunting, fishing and foraging off-property is allowed to contribute to the Homegrown Year. This only applies to animals, plants and fungi obtained by Kelly or her husband. All other food must be bartered for with the hunter, fisherman or forager. This rule is necessary to ensure Kelly’s husband agreed to this insane thing and will likely be used as an excuse from said husband to plan as many hunting and fishing excursions as possible.

Food inputs:

Inputs are allowed (i.e. seeds, seedlings, compost, animal feed, etc) but animals for meat must be grown on the farm (no finishing).

Personal care products:

The year is for food only, personal care products will be allowed. Kelly’s nice face cream will be wrestled from her cold, dead, hands.

Clothing:

This challenge also doesn’t apply to clothing. Hopefully, Kelly will need some smaller clothes by the time this is over.

Family:

The rest of the family will continue to eat normally. The kids will eat mostly Mac and Cheese, and the husband will enjoy this opportunity to eat whatever he wants and use this as a year-long trolling opportunity.

Coffee meetings, lunch, or drinks for work:

Kelly will have to meet and order water. Like a lame-o. Or waste one of her break meals. Because as one of her buddies said at the formulation of this challenge, “if you’re going to do this, you need to commit and do it right.” Please still invite her to stuff, she’s still fun even if she’s drinking water.

Travel:

Kelly will have to send food ahead or pack it. Luckily Kelly and her husband bought a freeze dryer and can now pack food in mylar bags like those camping meals you take hiking, or meals you keep in the basement for the zombie apocalypse.

When life hands you lemons – preserve those suckers

Feb 12, 2020 ·

lemons Homegrown Year Kelly Maher Farm Living Life

I published the intro post on the Homegrown Year. Although there’s been prep work happening in the background, hitting the “publish” button felt like a huge step. (Sign up for my newsletter to hear about how it’s going)

The first post was only live for a few hours when I called my brother, Gregory, to check-in. He lives in Arizona but we still talk several times a week. He informed me the conversation would have to be short because he was driving over to my Aunt and Uncle’s house a few miles away.

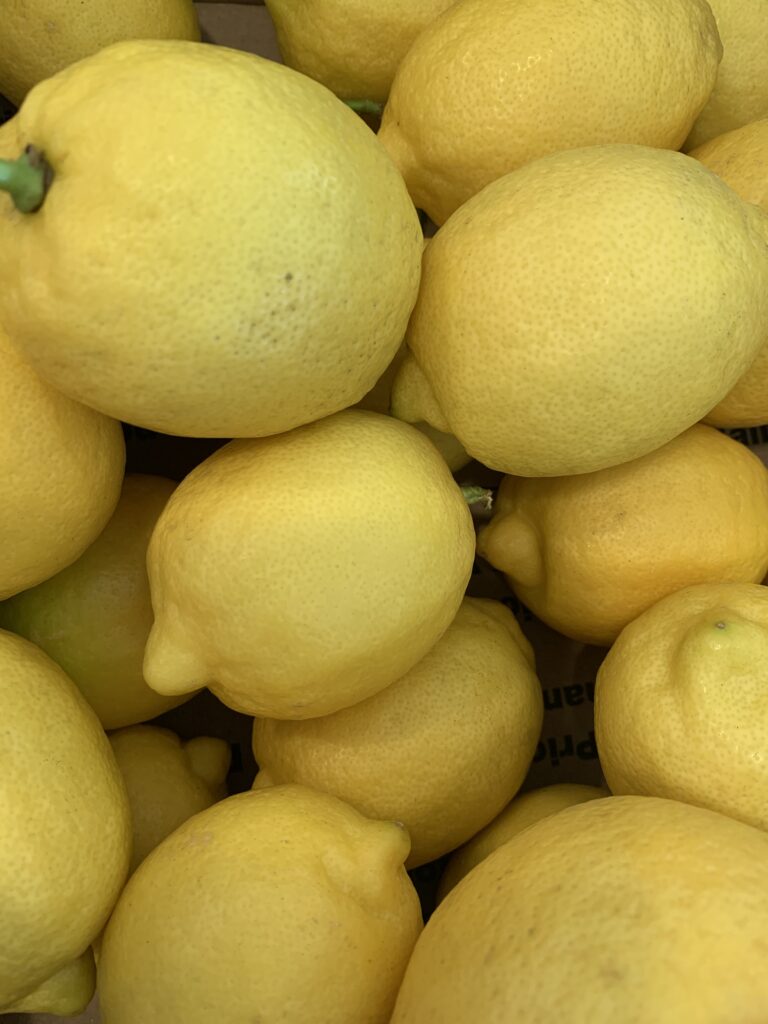
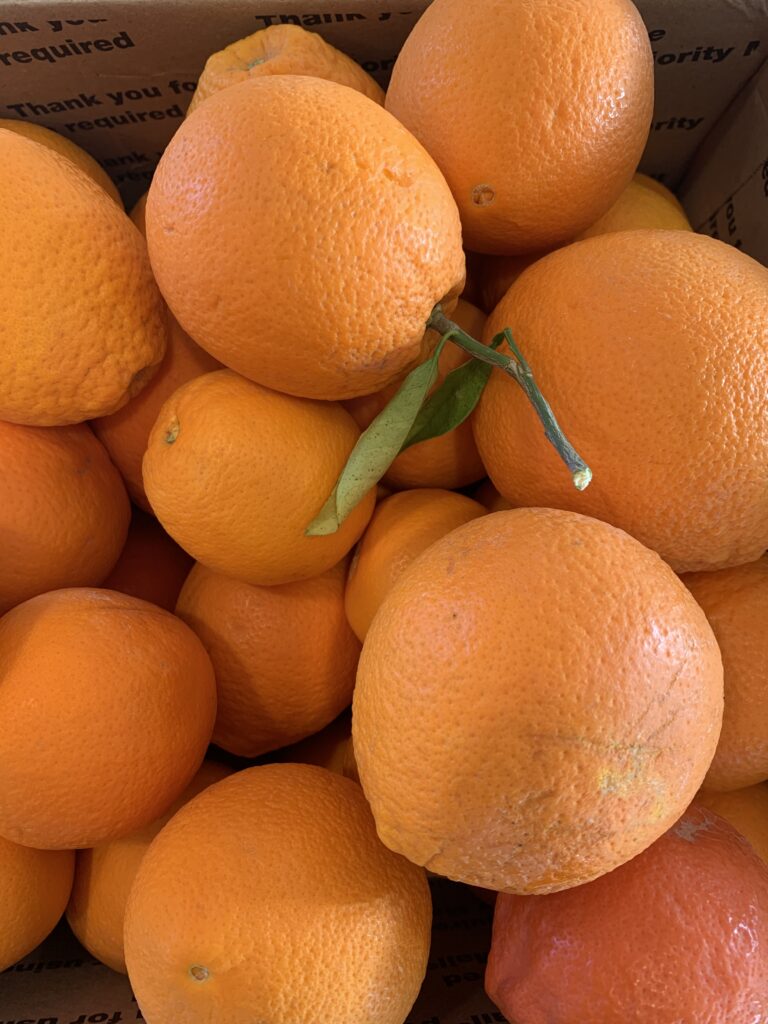
The oranges and lemons on the trees in their backyard were fully ripe and they had a huge year. Gregory was heading over to pick what was left. In our entire lives, he’s never gone to pick produce, so the fact this call occurred right as I had announced the project felt like a jolt to action.

What seemed like a fun activity for him sent me into an immediate state of anxiety. I knew that in order to have citrus for the Homegrown Year I would have to barter for it. Yet, for some reason, I never considered citrus would need to be in season in order to obtain it. It’s common sense, I just hadn’t thought about it.

We’re so conditioned by shopping at the grocery store where there’s access to perfectly ripe fruit year-round we don’t think about the seasons. It just hadn’t occurred to me that in 3 or 6 months when I want them, oranges might not be in a state to be picked. It’s an importat reminder to get things when they’re available, not just when I want them.

I must procure all the citrus I’ll need to stave off scurvy from August 1, (my year start date) until they’re ripe again starting In January 2021. Next January, I’ll once again be able to reach out and barter for more with family and friends (if I can manage to make something they want.) For the five months at the start of this challenge, all my citrus options must be already squared away.

Colorado, as I write this, is blanketed under eight inches of snow. It’s perfectly nice to happily blog about the theoreticals of the year while sipping tea. However, the lemon situation forced me into the stark realization that I need to move on action items so this doesn’t turn into “the 53,426 ways Kelly makes zucchini.”

The immediate need to secure citrus took this whole project from a fun thought experiment and made it suddenly very real. What did I sign up for?

Of course, Gregory completely understood when I demanded he ship me everything he picked. Luckily for me, he loves my cheese and supports me in this endeavor – so it wasn’t a tough sell.

After Gregory assured me that I would have at least some citrus for the year – that raised new anxiety. How would I keep it until August? My fruit bowl is full of shriveled lemons and limes that eventually get tossed into the composter.

That anxiety drove me to a 3 am lemon preservation googling session. I’ve made plenty of marmalades and lemon and lime curd in the past – but haven’t yet figured out what I’m going to do about honey or sugar. The lemons and oranges my brother sent are all I have at my disposal along with the few items I know I will be able to access from the rules committee (this includes salt). 

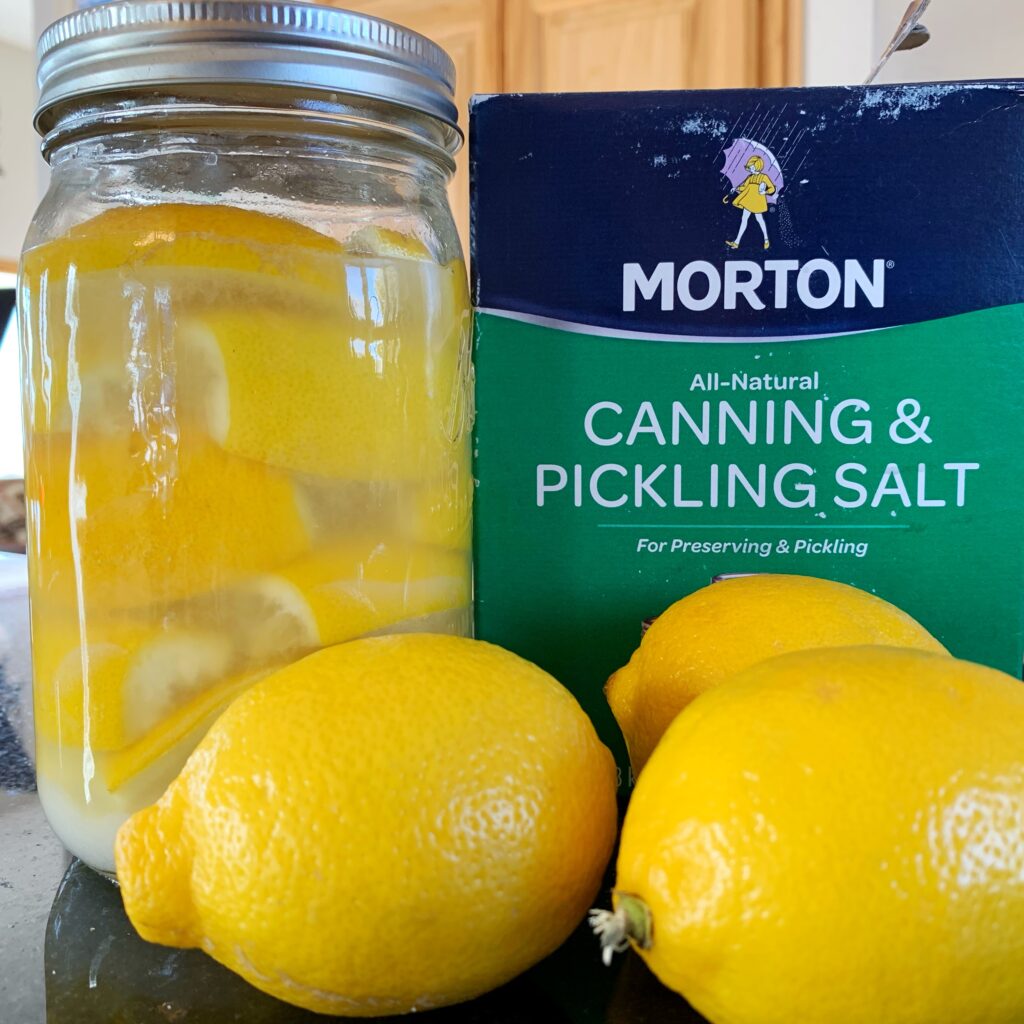
One of the simplest ways to preserve lemon, apparently, is to salt it prior to canning – like a lemony refrigerator pickle. The thought of salted lemon makes me want to gag. I’ve never tried it, so maybe it will be better than I imagine. Or maybe not. I could add preserved lemon to chicken, salad dressings, or as a marinade for veggies and meats.

This could be a great way to add some brightness to recipes in the middle of winter. I found a simple preserved lemon recipe here – and am trying it out to see if it would be an acceptable way to use those precious few lemons I can acquire for this week to use for the challenge.

It doesn’t look like there are choices for shelf-stable salted lemon (everything I found requires refrigeration) but if it’s not terrible, I could freeze the salted lemons then defrost them at the start of the challenge so it would last longer than the recommended 6 months.

Other good news: in anticipation of the year, we bought a freeze dryer. I tested it first on apples and bananas, but will certainly see what happens with lemons as well. From what I’ve read, though, they seem to retain more of the stickiness than other fruits that are structured differently.

I could also just peel them and take all the fruit and put it in the blender and freeze it in ice cube trays. Then when I want lemon or orange for a recipe I could just pop out a cube. I could also retain all the rinds and freeze dry just those for when I need them for zests or to add to teas. That would be the option with the least waste of something that will be a scarcity for me. It seems like the easiest solution. 

Anyway, clearly, this will require bags of store-bought lemons for experimentation as I want to have a concrete plan of what to do with those lemons and oranges bartered for with precious cheese. Those will be the ones I’m actually able to consume during the year. So, off I head to the store for another bag of “sacrificial lemons” to make sure I have my plan perfected before going near the ones I’ll be able to eat during the challenge.

Why did I just sign up to do this crazy thing – a Homegrown Year?

Feb 7, 2020 ·

homestead homegrown kelly maher

I’m going to live by eating almost entirely off our little “homestead farm” . . . for a year.

Why, you might be asking, would someone sign up to do something so – objectively insane? Humans have spent the vast balance of our history on this planet living in a state where food scarcity was one of the greatest threats to our existence. For most of us, as recently as three or four generations ago – and sadly for far too many of us even today – the wolf of hunger is constantly scratching at the door.

Why, after generations of innovation in the pursuit of the caloric plenty we currently enjoy, would I willingly throw myself backward into a world where my food intake is reliant upon the whims of the clouds as the break over the Rockies, the sun as it penetrates the soil in my garden, and those animals in our care? Also, how am I going to manage an entire year without a Reese’s Peanut Butter Cup? 

The answer to my “why” lies in the same vein as why people who run, run marathons, (incidentally, I am approximately as likely to run a marathon as travel to Mars). There is something inherent in our humanity that drives us to pursue the goals that are just a little harder, faster, or further than we’ve been before. For me, this means taking the hobbies I already love – gardening, gathering the eggs from my flock of various fowl, hunting, fishing, milking, gourmet cooking, and food preservation – and shifting them into a structure aimed at a specific goal – namely, not starving for a year.

All the new skills I’ve gained over the last few years to grow and harvest my own food have made me feel more connected to myself and in awe of God than I can ever remember. Although I love what I do professionally, there is a unique gratification in the creation of the tangible. Growing and harvesting your own food engages the brain, soul, and all the senses in a way that almost nothing else can. 

It’s so easy to get into a pattern of scrolling and swiping, living vicariously through other’s experiences, and becoming a mere observer in our own lives. It’s almost as if we forget what actual living even feels like. Our phones present us with a strange dichotomy – people have become simultaneously the most, and least, connected we’ve ever been. 

This project year is a manifestation of the hope that both sides of the connection coin will improve with a more deliberate approach to time and communication. By sharing with you, my friends, this challenge in all the mediums available to me – I hope to have a better connection with you, but also with myself (sign up for the newsletter I’m doing about the challenge – “I haven’t starved to death . . . yet).

I have never felt more complete than after a day that begins with milking goats at sunrise, a breakfast made entirely off that which I can gather on my way back to the house, and which concludes by making cheese with my husband after our boys are tucked securely in their beds at night (does that sound like a euphemism? I’m being literal here).

First, and most importantly, cheese is delicious – and NOTHING tastes like homemade, stunning cheese. Secondly, going through all the steps and paces to make a truly delicious cheese feels like paying homage to the tens and probably hundreds of thousands of people who have done this before. Some are probably lost to time, but their experience has been taught to others, replicated, tweaked, and perfected. It’s so easy to slap a piece of cheese on a sandwich, but when you stop to consider all the knowledge that went into just that one slice, it takes on an almost magical sheen.

Incidentally, my way of connecting back with “real life” is not the same way other people connect. I have friends who feel fulfilled when they have a group of interesting and engaged people around their kitchen island sipping champagne and nibbling off a perfectly assembled cheeseboard. Others feel it when they’re at the top of a mountain, or under the sea. I know people, (crazy ones) who feel it when they’ve somehow miraculously pushed past mile-18 in a run, or when they lose themselves in a colorful marketplace across the globe.

Whatever it is that reminds you why life is such an amazing gift, my hope for you is that you can reach out and grab and hold it in your hand for a few minutes, in the place your (and my) phone usually occupies. Examine it with all the love and wonder you remember from the day you found it.

My little farm is that for me. I’m equal parts nervous and excited to try this challenge – one entirely made up by me and my friends – but I’m also looking forward to meeting the person I’ll be on the other side of it. I can’t wait to find out how she struggled, what she learned, and how she sees the world differently. 

Sign up for updates from my newsletter named: “Kelly hasn’t starved to death . . . yet” Ha.

[gravityform id=”1″ title=”false” description=”false” ajax=”true”]

A Homegrown Year

Feb 5, 2020 ·

homegrown homestead kelly maher

I’m going to live off of that which I can produce on our small “micro-farm” north of Denver, Colorado – for an entire year. It seems like such a bizarre thing to type it out loud, but here we are. Wondering about the rules of this crazy year? Here they are.

By “live” I mean “eat,” I can still leave, I’m not becoming a hermit. In fact, much of this social experiment will consist of trying to figure out exactly how close I can get to living my normal life while relying entirely on the food I produce here. This doesn’t extend to clothing or personal care products – depending on how this goes I might need all the comfort I can get. Because I’m going to eat off what I produce. Every day. Literally, every day – for an entire year. You may wonder “why” and I try to answer that, here.

Ever since moving to our urban micro-farm we have been adding plants, animals, and employing strategies to produce our own food on site. This has included a small herd of goats, chickens, ducks, guinea fowl, quail, and an aggressive garden strategy. We have also planted fruit trees and have learned to milk the goats (seriously). We make our own cheese, yogurt, gather eggs in the morning – and yes, I have even slaughtered my own animals (only birds, so far) for meat. I’m not a vegan so I’m going to have to figure that out, too.

So, that’s the plan – become self-producing of my own food for an entire year. This challenge feels like a hard – but doable – goal that will allow me to take all these new-found hobbies and point them in a specific direction.

Once my friends get over the initial shock as I announce my intention to live like this for a whole year, the questions start:

What will you do about those things you can’t produce? Barter. My friend Emily, whose crazy idea this was, has formed the “rules committee” of this year to help me navigate what I can and can’t do. Obviously, there are things I’ll need to procure that aren’t here. According to the rules committee I need to find the people who make them and barter.

I will only be able to use those foodstuffs I produce here to barter with other sources – so no, if you go buy a Big Mac I won’t be able to trade for that with some goat cheese. That said, this isn’t constrained by geography – so if you grow or produce something (especially wine, avocados, wheat or sugar beets or cane) email me at hungrykelly@realbestlife.com if you’re interested in a barter. I think this will be both a study in self-production and in how difficult it is to live without the support of a societal network.

What are you going to do about coffee? (I’m a serious coffee addict.) Unclear, as of right now. I guess I need to find a coffee grower or consider giving it up? The logistics of an international barter could be challenging though. This could be an opportunity to try to dial down my coffee addition, which is something I’ve needed a push toward for years.

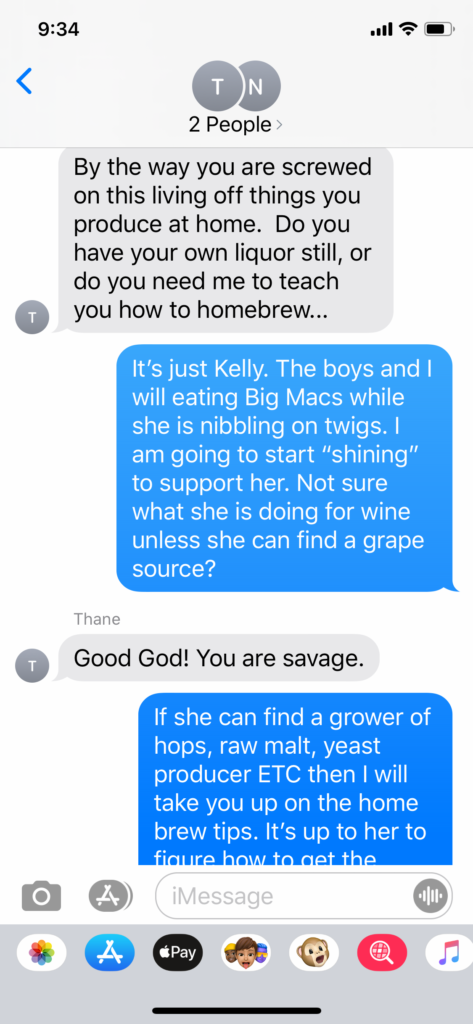
What about wine? Also, barter. The Husband also wants to start – literally, this is how he said it – “shining.” Oh man, I hope I don’t end up blind.

Speaking of Husband and kids, are they doing this with you? No, our kids are basically made entirely out of mac and cheese. Although the Husband is being incredibly supportive, he is not signing up to do this with me. He did appoint himself to the rules committee, though. 

When does this year start? The working date as of right now is August 1st. There’s a lot of prep work that has to go into getting this place ready to sustain an entire person.

How can I follow along with this epic disaster? I’ll be posting here, on RealBestLife as we prepare and get underway. We started a youtube channel for videos (make sure to subscribe), I post all the time on RealBestLife Instagram, especially the stories, and on Facebook. More ways to connect will come, but I will also be sending out an update newsletter (working title: I didn’t starve to death, yet) so sign up for that, too. 

The thought of really digging in on the small-farm, homesteader life is both scary and so exciting. Thanks for joining me on this journey.

If you give your goat a pancake, hire a professional waxer

Jan 20, 2020 ·

pancake goat life farm

Not all days on the little farm go as expected.

Yesterday, for instance, was like something straight out a National Lampoon movie. It’s a bit of a twisty story to get there – so stick with me.

So many predicating factors went into me literally and accidentally tarring and feathering myself:

Last week our buck goat, Patches, came home after a month of vacation where his job was to “service” does at another farm. After a buck does his job, the owner of said buck fills out a “service memo” to present to the owner of the does for the registration of the resulting kids. Seriously. I am literally a pimp now. 

Upon his return home, Patches had to be moved down in the far pasture by all the ducks and chickens. All our girl goats are together in the upper pasture and there are some does in our herd who are either already pregnant or who aren’t yet ready for servicing, so Patches spends most of the year across the property from our does.

Patches is such a sweet boy, and I love to take him little treats and spoil him. None of the rest of our goat operation would function without his “contribution.” Although he’s not alone in the far pasture, he doesn’t get as much socialization as all the rest of our herd so I single him out for special love.

A few days ago I had some leftover pancakes from a batch we’d made. I smeared one with peanut butter and took it down to him for a little snack. I could have sworn it was his personal goat heaven. 

Patches enjoys playing and rearing. Although he is always funny and gentle with me, he’s also very strong for his size.

Then, yesterday I decided the brief overlap where both sons were napping would be the time to attempt to wax my legs. For the first time ever I attempted to DIY the procedure. In the past I have always paid a professional, but the kit was only $12 at Walmart. I’m trying to be more frugal this year and how hard could it be, right? 

As I was microwaving the wax a neighbor stopped by with a large box of lettuce for our chickens. He had procured 40 pounds for his own flock to help overcome the mid-winter greenery lull and offered to share. It was such a neighborly gesture and my chickens appreciate the variety, as they have been molting. There are mounds of snowy looking feathers strewn all over their pens and the pasture.

As soon as I thanked him and he left, I changed into a pair of shorts to get the waxing underway. The clock was ticking. I was down to maybe 10 minutes with both boys asleep, if I was lucky.

Anyone who has tried to wax themselves probably knows it’s not a good idea to try it under the gun. That said, with two boys under three, all self-care has to occur in short spurts during the magical time they are asleep simultaneously.

So, I slathered the wax on the first leg with the enclosed popsicle stick, pressed the sheet onto the wax, counted to three, and tried not to flinch as I tore it upward.

Amazingly, I managed strip the skin off while also leaving the spot covered with both hair and a sticky wax residue. It defied comprehension. At this point, though, I was committed. Maybe the next slather and yank would be more fruitful. Nope.

I heard the baby start to stir and felt the panic of an asymmetrical, (and exceptionally subpar) waxing job coupled with a huge box of lettuce calling to me. I knew I had to get him before his cries would wake his brother.

I scooped out the remainder of the now too-cool wax and gooped it onto the other leg in the hopes it could make it marginally even-ish. As I pulled back on the strip I saw the blood start to drip from my calf.

By this point the baby was just on the edge of fully awake. I had a large box of lettuce on the kitchen island wilting by the second, was wearing shorts, bleeding, and was starting to feel a little light-headed. I had maybe five minutes until a full baby-meltdown, and needed to get in the shower to remove the wax residue off my lower extremities. 

First thing first – I spread a little peanut butter across a piece of bread and wolfed it down in an effort to quickly stabilize my blood sugar before attempting Momming. This left just enough time to run down to the chickens and toss the lettuce to them, as I wouldn’t want to after the necessary wax-removal shower.

In my shorts and a pair of garden boots I carried the box of lettuce down toward the chickens. The wax cemented my ankles awkwardly to the inside of the boots and forced me into an unnatural duck-march to the gate. 

Once I entered the lower pasture with the large box of produce balanced precariously in my arms, Patches, who smelled peanut butter on me, assumed I must be there with special treats to play with him. It never occurred to me that going down smelling like peanut butter would send him that message, because apparently I’m an idiot.

He reared up and playfully butted the box with his head. At that exact moment, the pressure of the awkward stance forced my ankles and lower legs to release their glued-on grip from the boots. The whole exercise sent me toppling over into a pile of feathers.

I stood up and brushed myself off.

Once I walked back inside and caught sight of myself in the mirror, it was impossible to stop laughing. Feathers were plastered to my skin with discount wax mixed with a little blood. I was fully tarred and feathered as if I had been caught robbing a King or had ratted colonial smugglers out to the British army.

The baby was fully awake and in the process woke his brother as well. “Momma, you ok?” my sweet older son asked. “Not just yet, but I will be. I just need to make a professional waxing appointment.” 

5 reasons you’re not doing the thing – and why you’re wrong

Jan 16, 2020 ·

Maybe it’s a function of the current schizophrenic state of our society, but it seems as if many of the people I know are all languishing a strange kind of “life purgatory.” We’re all perched right on the precipice of pulling the trigger on some major project or decision, but just haven’t yet been able to take that all-important first step.

I can’t quite put my finger on the root cause of this mass paralysis. Maybe it’s just a collection of anecdotes, but almost to a person, my friends have the next step in front of them and, for whatever reason, can’t do it.

So here I am to declare this as the year that we will do the thing. What thing? THE thing. Start the podcast. Quit the job. Start the blog. Buy the house. Take the class. Write the book. Whatever the thing is – do the thing.

Although I am not particularly good at sales, I married someone who is a true expert salesman. When he goes out to meet with potential clients he always spends time before the meeting anticipating both their potential objections and how he will shoot each down. Luckily for our family, he’s a superior marksman.

I’ve heard several objections to taking the first step from my friends (and admittedly from my own internal dialogue). Here are those popping up with the most frequency:

The “who am I?” objection

Who am I to start the company/have a podcast/write a book/quit my job? This objection is the inverse of an appeal to expertise. You may feel like you’re surrounded by people who are in a better position to do what you’d like to accomplish.

There will always be someone richer/freer/younger/older/smarter than you who can do whatever it is you want to do. Let it go. The difference between them and you is that you will do the thing in a way that only you can. So do it.

Also, “who are THEY?” Even the best in the world at their respective endeavors, the kings and queens of industry, the best writers – are just people.

The next time you say to yourself: “Who am I to do this thing?” remember that everyone else who has accomplished anything asked themselves that very question. Somewhere inside of them came the answer, “I am me, and here I go, doing the thing.”

The “what if I’m laughed at?” objection

You will be laughed at. There’s no way around it. Anything you do that’s big, bold, special, or different will result with someone laughing at you.

We all understand intellectually that their mocking is a product of some deep-seated insecurity and they’re probably just jealous of you, but that doesn’t always seem to make it easier emotionally.

So, sadly the only real answer is: buck up. Let them laugh. F$%k ’em.

The “what if I fail?” objection

Like being laughed at, this is an eventuality. You will fail. It will happen. The whole project might not fail, on the other hand, it might. It’s impossible to accomplish anything without failure.

One of the tricky things about failing is that if you do it enough, it can eventually lead you to success. If you fail enough, you will learn enough lessons through that process to figure out what works. That will only occur, however, if you approach failure with a mind open to the lessons it can teach you.

Failure is not the worst thing that can happen. The worst thing that can happen is never starting.

The “perfect is the enemy of the good” objection

I am the WORST at overcoming this objection with myself. Invariably, the moment I post a video to YouTube and it gets some views, or as soon as I have a tweet with some likes – I find a mistake or a typo. This, of course, seems to happen most often on the platforms where there is no option for an edit.

Balancing the desire to create a superior output with the need to put something out at all is a constant struggle. If you’re in sales there’s the term “always be closing” and when you’re in any kind of development it’s “always be shipping.”

Realize the first thing you put out will not be perfect. It just won’t. Put it out anyway. Just hit the “publish” button. Tweet the thing. Fill out the application. Buy the url.

It won’t be right. You may have to do it again. And again. And even again. It’s ok. Keep going. The next one will be better.

The “I’m too tired/overwhelmed/busy” objection

This objection speaks to my soul. As of this writing I have a 2-year-old, a 5-month-old, 7 goats, a seemingly endless number of chickens and ducks, a garden that I need to pull together, a to-do list that just won’t quit, a pet wallaby, 20 extra pounds that will not go away, and earlier this week I threw my back out merely because I tried to pick up a baby and sneeze at the same time. There are some (many) days where I step back and ask myself “what the HELL am I doing?”

I also know, I will never again be this young. I will never again have this exact set of circumstances in my life. I am at a place where if I stretch enough, even when it makes me uncomfortable, I can do things this moment I will never be able to do again in the same way.

Just like being laughed at and failing, it will happen. You will be tired. You will get overwhelmed if you do it right. Do it anyway. Just keep going.

_________________

So, I say all that to say – I have my own insane thing, friends. Here is the thing I haven’t put out into the aether because I have been afraid I will be laughed at, or I will fail at it.

This is my thing that I ask myself, “who am I to do it?” It makes me wonder if I should just try in 2021 when my kids, (of the human variety) are a little older, and I’m a little less busy, and our finances are a little better. Here is the thing I have four draft blog posts about, in various states of the writing process, but can’t publish because none of them are good enough.

I am going to try to live off the fruits of our little farm for a year.

There are lots of details to come. Yes, I will be able to leave. Yes, I am allowed, (according to the rules committee comprised of my husband and friends) to BARTER for things I don’t have. But, overall, I’m going to try to do this very hard, but very cool thing.

So, there you go. I put it out there. I’m going to hit publish on this piece about overcoming our objections and pulling the trigger on big and crazy things and then there’s no going back. I’m going to take my own advice.

Do the thing. I’ll start. You next.

Holiday Eggnog Panna Cotta

Dec 23, 2019 ·

panna cotta dessert italian
Easy fast fancy eggnog panna cotta

This festive twist on an Italian favorite dessert is sure to wow kids and adults alike.

Although it feels like a luxurious indulgence this panna cotta requires little investment in terms of time, skill, or effort. An almost foolproof recipe, it takes maybe 10 minutes to prepare (and 4 hours to overnight to chill). Plated with some fruit and a sprig of mint, people will think you slaved over a complicated recipe.

Heading to the store? Grab two ingredients. Literally, that’s it. Two.

Ingredients:

1 envelope (.25 ounce) Knox unflavored gelatine (orange label, next to Jello at the store)

2 tablespoons water

3 cups premium Egg Nog (buy the good stuff, it’s worth it)

Directions:

In a tiny saucepan (the smallest one you have) mix water and gelatin. Allow the gelatin to hydrate. Over low heat and stirring constantly, mix to a glue-like consistency. Pull off heat and reserve.

In a larger saucepan, bring eggnog to a low boil, stirring to ensure it doesn’t scorch. Add gelatin mixture and continue to stir, ensuring it is completely distributed.

Remove mixture from heat and ladle into 8 ramekins/bowls/wine glasses/cups.

Chill for at least 4 hours or overnight.

If removing from a mould or ramekin, submerge the bowl in warm water (without letting the panna cotta to become wet) for a few minutes to allow it to release. Serve with berries, jam, or a marmalade.

Quick and healthy farm-fresh​ (Keto friendly) zucchini/squash hash

Aug 9, 2019 ·

Zucchini hash egg
Egg zucchini keto hash

We have entered that time in the growing season – you know the one – where everyone across the country is asking themselves, “Why in the actual world did I think that I could eat this much zucchini?!?!?”

If you’re not growing them yourself, I’m sure you have a friend or two who have tried to pawn off the prolific gourds. How can such a little seed make so many veggies? In the wake of all the delicious zucchini bread, muffin, and zoodle recipes out there – one meal not many people think to add zucchini or squash to their breakfast. However, adding some veggies can be a great way to start your day. Replacing traditional breakfast potatoes with zucchini or squash slashes the carbs while still filling you up and giving your the energy you need.

Zucchini hash egg

Ingredients:

1 – Medium to large zucchini or summer squash (if it’s young enough leave the skin on if it’s older and the skin is tougher peel it)

1 Tablespoon butter

2 teaspoons red wine vinegar

1 teaspoon garlic salt

1 – 2 farm-fresh eggs

Pinch of sea salt

Optional – 3 to 4 cherry tomatoes for garnish

Egg hash zucchini

Directions –

Chop zucchini or squash into 1/2 inch cubes. Remove seeds if desired.

Combine butter and red wine vinegar in a skillet. When the butter is melted, add zucchini or squash. Sauté over medium heat until just soft, then crank the heat to high to brown and caramelize your veggies (this is what will give it a really nice finish and flavor.)

Remove from skillet and reserve.

Lower temperature of stove to medium. Fry egg(s) over leftover butter in skillet. If desired add 1 teaspoon water to pan and cover until the top of the old covered in white just barely gets a skin. Ensure yolk is runny. Sprinkle a pinch of sea salt over yolk.

Add a few cherry tomatoes if desired.

Pierce yolk and enjoy!

Zucchini egg hash squash

Did you cut your goat’s ears off?

May 17, 2019 ·

baby goat farm homestead

After adding new babies to the mix here in recent weeks a theme has emerged. None of them have ears. They are all cute, but what’s up with the lack of lobes?

Internet people started sending questions – as they do. Do I dock them the same way some people dock the tails and ears of some dogs? People had heard of disbudding (dehorning) goats before, but did I sign up for a deearing? Is it for aesthetics? Am I a cruel goat overlord who took shears to the top of their poor little heads? Nope. Just like Lady Gaga, they were born that way.

Unlike the most common miniature goat breed for milk, the Nigerian Dawf, I have gotten into breeding Miniature Lamancha goats (here we call them mini-manches). They have naturally tiny to basically non-existent ears. With a sleek, almost dancer-like appearance, long graceful lines, a loving personality, and amazing milk – I looooove them.

Why?

I started off with Nigerian Dwarves (check with your zoning, fencing, and the state of your marriage before trying this at home) which is the most common kind of homestead milk goat. I was thrilled with them, but didn’t fully appreciate what I was in for. Outside of a lot of reading, online research, and a love of goat’s milk I didn’t know what would be right for me and our family. Some things you just have to learn by doing – goat ownership is one of those things.

Then, a few months into the process of having our small goats, we got a goat boarder. We found a woman who keeps milk goats but lives in a normal suburban home, so she boards her herd on other’s land the same way some people board their horses. She also makes goat lotion. Cool hobby.

As she was looking for a new home for her herd I was looking for someone to teach me more about goat-keeping. It became a great set-up for us both.

Unlike me, she has legit dairy goats. Big ones. These aren’t the same as the little goats you see in viral videos or the ones I have. Her goats are basically like mini-cows. They can give a gallon of milk a day. They’re hardcore and for people who need enough milk for their entire family, or even several families.

Two of her big dairy does are American Lamanchas. Lamanchas are a breed that was developed in the U.S. of Spanish goat stock and they’re best known for their distinctive ears (or lack thereof). Ears aside, they were bred for their hardiness and consistent milk production in varying conditions, their fabulous temperament, and the relatively high butterfat content of their milk for a dairy breed. As soon as I met these sweet girls I fell in goat-love. However, I don’t want giant legit dairy goats, at least for now. Minis are plenty of goat for me.

All I really want is enough milk for my morning coffee and to make some cheese for my child who could literally subsist solely on that. I’m not at the point where I’m looking to make cheese to sell, make my own lotion, or sell milk – any of the activities that require the serious volume that comes with dairy-sized goats.

Unless you want a ton of milk, mini goats are the way to go. They eat less than their dairy counterparts, they’re better for lap sitting, and their milk is (in my opinion) yummier. As a general rule, the smaller the goat, the higher the butterfat percentage of their milk. Butterfat is what gives it the sweet and delicious flavor. Nigerian Dwarves, for instance, have a butterfat percentage that is anywhere from 2% to 3% higher than their volume-producing counterparts.

So, here I am loving the temperament, udders and hardiness of the Lamanchas, but also loving the small footprint, reduced appetite, and high butterfat content of the milk from the Nigerian Dwarves – enter mini-manchas.

After some research, I learned there have been breeders for years who have been cross-breeding dairy goats with minis in an attempt to get the best attributes of both. Miniature Lamanchas have all the best things from their larger dairy versions, but also eat less and offer creamier and tastier milk.

Because mini-manchas were created by combining Nigerian Dwarves and Lamanchas, the offspring of my Nigerian does – Foxy and Copper – with a registered mini-mancha buck will be registerable mini-mancha kids. They’ll just have a higher percentage of Nigerian and lower percentage of Lamancha than their Dad.

So, this year I acquired one mini-mancha doe, and bred both her and my Nigerians to our mini-mancha buck – and now we have four beautiful earless babies who bring all the attributes I wanted in a mini dairy herd to the table.

Goat lattes, chèvre, and feta for all!

Pavlova with fresh fruit

May 6, 2019 ·

pavlova fruit recipe fresh

Is there a more perfect dessert than a pavlova? It’s light and airy but, when well executed, has a depth and complexity that snaps all your senses to attention. It’s perfect as the centerpiece for a brunch, or as the final note to any meal with friends or family.

One of my favorite things about the pavlova is that the ratio of realtive difficulty to perceived fanciness is quite high. It’s an impressive dish to serve to a table of people who think you’re basically a genius at first bite and yet it’s relatively easy to make.

A perfect pavlova will have a satisfying crunch from the meringue but a soft and springy interior. Topped with curd, cream and/or fruit, it creates a perfect fusion of textures and flavors.

You can mix up the fruit you choose to add for whatever looks ripest – there’s no wrong answer.

Optional – This recipe calls for egg whites – I took the yolks from them and made a quick homemade lime curd, which I then added in a thin layer while assembling. It added a little more bite and a fun twist. This recipe would be perfectly good without it, but traditional pavlovas have cream, fruit, curd, or any combination thereof on the top.

Ingredients –

Merengue –

4 large or 5 medium egg whites

2 teaspoons corn starch

1 teaspoon white vinegar

1/2 teaspoon vanilla

1 cup granulated sugar

Pinch salt (fine, not rock)

Topping –

1 cup heavy whipping cream

2 tablespoons powdered sugar

1 teaspoon vanilla

Pinch salt

1 1/2 to 2 cups fresh berries or fruit of your choice

Optional curd

Directions –

Preheat oven to 250 degrees.

Draw a 9″ circle in pencil on a piece of parchment paper (I just used a plate as a template). Flip the parchment paper over so the circle is on the bottom side of the paper and not on the bottom of your pavlova (ask me how I know).

When separating eggs, be very careful to make sure no yolk or other fat comes in contact with the whites. Ensure all beaters and bowls are clean to maximize egg white fluffiness.

Beat egg whites to stiff peaks.

Dust the top of the eggs with corn starch and gently fold in.

Drizzle vinegar and vanilla over the top and fold.

Using a sifter or other disbursement method (I put it on a plate and use the edge of the plate to slowly shake across the top), dust the top of the egg mixture with sugar and salt and fold in, spreading about 1 – 2 tablespoons at a time before stirring. The more slowly and carefully you add the sugar, the more your eggs will retain air bubbles. After all the sugar is added, your egg mixture should be shiny and glossy.

Spoon eggs onto parchment, using your trace as a guide. Eggs should be about 1″ high – when spreading try to make a bit of a lip around the rim of your pavlova.

Bake at 250 degrees for 1 hour and 15 minutes.

Turn off oven, but DO NOT OPEN IT. If you allow the meringue to cool for at least an hour in the oven, it will emerge much less cracked on the edges than if you just pull it straight out.

The meringue can be made up to two days in advance of serving, just make sure to store it in an airtight setting (like a ziploc) because any humidity is the enemy of a crunchy meringue.

Whip cream, powdered sugar, vanilla and salt together until stiff.

Assemble – spread a thin layer of optional curd over the meringue (I used about half of my recipe), top with whipped cream and fruit. Serve immediately.

Accept praise and awe. Pretend like it’s impossible to make. Feign modesty while knowing on the inside you killed it in the dessert department.

Easy homemade lime curd – 10-minutes

May 3, 2019 ·

lime curd homemade recipe

Lemon or lime curd seems to be a staple ingredient for so many summer recipes – as a topping or side to almost any baked good – a thick and smooth curd can add both weight and a satistying bite to your recipe. For years I bought jarred curd from the store before learning how simple, and frankly much more delicious, it is when made from scratch.

In life you have to do the “is the time worth it to make this thing from scratch or should I buy a jar and move on?” analysis. It’s a constant balance of time cost and flavor benefit. I look at people who make all their own condiments like they’re insane – but I will tell you, make this once and you’ll spend the extra 10 minutes to make it yourself forevermore.

Some people use a double boiler to make curd – I don’t, I just start it over low heat and pay close attention and stir constantly to keep the egg from getting chunky. I’d rather pay closer attention while cooking than have more dishes to do afterward. You can make this call for yourself.

Ingredients –

5 large limes (or about 15 key limes) zested and juiced (about 2-3 teaspoons zest and 1/2 cup juice) – if you’re making lemon curd, it’s probably about 4 lemons

1 cup of granulated sugar

5 medium or 4 large egg yolks

1/2 cup butter (I use salted but if you prefer not, I would add a pinch of salt)

Directions –

In a bowl, use your fingers to mix and rub the zest and sugar together until it becomes aromatic. You’ll know it when it happens – it gets nice and limey. It will feel almost like a fancy spa sugar scrub. You’re trying to infuse the citrus oil from the zest into the sugar.

Combine juice, egg yolks, and butter to a medium saucepan and, starting over very low heat, constantly stir and slowly increase the heat until it reaches a thick sauce consistency.

Add citrus sugar mix and stir in until all granules absorb. Stir for another 1 and a half to 2 minutes to ensure all ingredients are well-blended and smooth.

Pour mixture into your preferred jar or storage container.

If it contains chunks this is probably from the egg getting too warm before it was totally whisked. Don’t throw it out, just pour it through a mesh strainer and use a spatula to press the remaining mixture through. Slow down a little more next time.

Cover with plastic wrap over the surface as it cools to prevent a skin from forming on top (or just do what I do and scrape the skin off the top before serving and eat it, it’s delicious – don’t judge me.)

Can keep in the refrigerator for two weeks.

Shout your average childbirth

Apr 30, 2019 ·

labor childbirth

One bizarre sociological trend we all need to reconsider is the seemingly pathological need some women have to impart childbirth horror stories on visibly pregnant women – even complete strangers. I have no idea why this is a thing, but without exception, every one of my friends who has been pregnant has experienced some nosy/oversharing woman who, as well-meaning as she might be, has added undue stress and anxiety to a situation that is already fraught.

The first time I was pregnant I was intimidated by the whole process. I was in an emotionally stressed state, as is literally every pregnant woman in her own way. Women who I barely knew, or didn’t even know at all, upon seeing my growing bump, would feel the need to tell me their often horrific stories of traumatic childbirth.

This odd sharing/scaring ritual is a common occurrence among the women I know. From the excruciatingly-long-sounding labors to the emergency cesarian section nightmares, for some weird reason, the worse the experience, the more there is a need to tell complete strangers about it.

These stories are usually combined with either some kind of advice or judgment. Because of some woman’s trial-by-fire birth experience, she magically now is able to discern not only what’s best for you, but also pass judgment on your life and experience as well.

These conversations can happen anywhere, they even occur in the line at the supermarket. “Excuse me, please pass me a pack of the spearmint gum behind you.” “Sure, here you go. After 87 hours of labor, that’s when I learned that not ONLY do you have to drink a gallon of castor oil, you ALSO need to ride an ATV through the woods on the bumpiest road you can find and that cervix will open right up.”

God forbid you’re either planning a cesarian section or something outside the norm. If you are, you learn quickly to just not talk about it with anyone outside your tight circle. I remember a woman in the nail salon asking me if I felt like a failure because of my section. I don’t, thanks for asking.

It’s not like the women making these statements are ill-intentioned – for they most part they’re not. We have the need as social creatures to bond with others over shared experiences, to feel heard and understood. Our origin stories are part of who we are and where we came from. Even the banalest childbirth story has some interesting nugget associated with it that becomes a part of the story and the stuff of family lore.

Some women do have truly traumatizing birth experiences. This combined with the need many people have to process experiences externally can become a recipe for oversharing. Who better than someone who is obviously about to go through childbirth to tell your story to? Anyone. Preferably, a therapist.

Here’s the actual truth – the vast majority of childbirth is completely fine. Women don’t walk around and say to pregnant women “I had an uneventful childbirth after a relatively short labor and it was all okay. You got this.” Although, frankly, maybe they should. There’s no social incentive to share the mundane – but that’s exactly what pregnant women need.

Childbirth becomes so much scarier, especially to first-time Moms, because there’s such a selection bias toward the most sensationalized versions of birth stories.

Is the writing of this post going to stop the trend? No. Clearly, it’s ingrained into our society and our need for storytelling and connection with others. However, if most women understood what a small percentage of births were horribly traumatic events, they might feel less intimidated by the whole thing.

Just like everyone else, I have my own story. I went into early labor after my tire blew on the freeway on the way to a doctor’s appointment. I tried to convince the doctor that I needed to go to work and instead was told to go to the hospital for monitoring. Literally, as I was decrying the ridiculousness of being monitored while in the hospital, my water broke. So I had my cesarian section a week earlier than scheduled.

However, despite what will be a story my son will have for the rest of his life, it was all fine from there. The surgery was much easier than I had expected as someone who had never had a major medical procedure before. I walked within a day. It didn’t really hurt. Everything was okay. By the way, if you’re pregnant, you’re statistically vastly more likely to be just fine too.

A strange woman might walk up to you while you’re just trying to buy some Triscuits and tell you she was in labor for 28 hours, forcing you to wonder – “OH MY GOD WHAT AM I DOING?” Here’s the secret, “labor” means from the first twinge on. Just because you’ve seen movies and TLC shows of women screaming, it’s highly truncated/dramatized. Most of your labor you can just play Candy Crush or read a book. You’ll be okay. This is fine.

To women who have had a “normal” birth experience – tell your story. It’s still an amazing creation and origin story, and there are millions of women out there who need to hear it. It’s time to take the drama and put it in a proper context.

We tasted the Peeps flavors so you don’t have to

Apr 19, 2019 ·

peeps easter holiday review

Walking down the candy aisle at the last minute to put together Easter baskets, you’ll see an entire section dedicated to a marshmallow icon – the Peep. They used to just come in just one flavor – semi-stale marshmallow (which are MUCH better toasted or in a pie).

Now, in a naked attempt to make you buy MORE of the “edible” little sugar-coma-inducing foam chickens and rabbits, they have rolled out all kinds of flavors, from “pancakes and syrup” to “sour watermelon.”

This obviously calls for a tasting flight. “Flight” is classy for “one (or some) of each kind of a food or drink arranged obnoxiously for comparison purposes.” These are the most fun when you create them ironically for things like flavored sugar death-marshmallows. I added expensive Williams-Sonoma cheese-tasting chalkboards to impale their heads to amplify this effect. Never take yourself too seriously.

I bought one of each flavor available at our local store. Packing my cart with Peeps garnered me some serious side-eye from the other Moms in the Easter candy aisle, as I am now quite obviously pregnant.

“Can it, size-zero, Kristi-with-an-i. I probably won’t give myself gestational diabetes because I’m not going to actually EAT all of these . . . in a single sitting . . . probably.”

When there are flavored peeps what do you do? Make a tasting flight, obviously.

In our tasting, we included the following flavors: Party Cake, Cotton Candy, Blue Raspberry, Sour Watermelon, Pancakes and Syrup, and Fruit Punch. Our tasters included me, a 23-month-old child with limited language skills, and my husband, who, and I am not even joking about this – took this tasting so seriously he used a spit bucket. Either he took it seriously or he just didn’t want to actually eat them and suffer the subsequent blood sugar spike, not sure which.

Ranked from best to worst – here are our flavor picks:

Pancakes and Syrup – This seems like the high wire act of potential Peep flavors. It could either turn out very well or very poorly, but there’s nothing in between. There’s no “meh” when going outside the box with something like this. These Peeps are a nice coffee color with matching interior marshmallow.

Husband: Wow, that’s spot on. Wow. How did they do that?

Baby: Lick. Small bite, look of confusion, shove whole Peep in mouth. Runs over and jumps on couch.

Me: They stuck the landing on this one. Certainly the most gourmet of the bunch. Also, they are slightly unexpected in that they’re so good. There’s no chemical aftertaste and going for a baked good like a pancake was a smart move with the marshmallow base. Not overpowering, but the appropriate balance between the pancakey and maple. Serving idea: serve with a sprinkling of bacon salt on top. It could be like a terrifying marshmallow version of a breakfast-food sea salt caramel.

Sour Watermelon – This seems like a safe bet as long as they stick with a Jolly Rancher watermelon, which is firmly either second or third-best of the Jolly Rancher flavors. This Peep comes with a green exterior surrounding a red interior marshmallow. Cute.

Husband: These are surprisingly good. They taste like watermelon candy, not watermelon, but I’d eat them.

Baby: Watches Dad’s approval, takes the whole Peep and shoves it in his mouth. Runs around in circles.

Me: As predicted, this is basically a fluffy watermelon Jolly Rancher. That’s a perfectly fine place for this flavor to fall. Also, extra points for the cute color scheme. The flavor doesn’t overpower the fluffy consistency. Nice finish.

Cotton Candy – Cotton candy is very close in terms of a flavor profile to actual marshmallow. The entire point of a flavored Peep is for it to taste different than an actual Peep. Selling Peep-flavored Peeps would defeat the purpose, would it not? These are cute pink Peeps with blue speckles made of what looks like rock candy? broken glass? Unclear.

Husband: I mean, it’s good. It’s probably the most spot-on flavor. It’s probably the least of a stretch of the bunch.

Baby: Bites head off Peep. Leaves the body. Runs away.

Me: As predicted this isn’t particularly impressive. Cotton candy is not that far off from marshmallow, and although there is that spun-sugar tang to the Peep, it’s very subtle. They’re good though, in that they taste very close what cotton candy tastes like.

Fruit Punch – This is another one that could go well or poorly with very little room for middle ground. It feels basically the same as standing in front of the soda fountain where fruit punch is a drink option. Is it the semi-tangy and oft satisfying version, or the sickeningly sweet kind they make you drink after you give blood to ensure you don’t pass out? It’s like playing fruit punch roulette. This bright red Peep with red marshmallow will dye every child’s face and expensive Easter dress in a 5-mile radius if left unattended.

Husband: Spot on flavor again! This tastes just like the Hawaiian Punch with that guy in the hat on the front. Punchy! That’s his name, (why does he know this?)

Baby: Licks it. Small bite. Spits out the small bite. Takes the remainder of the Peep, and shoves it in his mouth. Runs away.

Me: It’s the good fruit punch version. Perfect. This is a great flavor if you like Hawaiian Punch. A little bit of the front of the palate bite, and the nice acidity and flavor on the back-end. Overall a solid reproduction of a fruit punch flavor in a marshmallow candy – if that’s a thing you need in your life for some reason.

Blue Raspberry – This tends to be a bad bet. There are very few things out there that make you think “this is good, but what it really needs is a “blue raspberry” version. This blue-sugar-coated blue marshmallow is guaranteed to make you wonder all of Easter Sunday if your child is experiencing frostbite regardless of the temperature.

Husband: Overall this is way better than I thought it would be, but it’s still terrible and I didn’t expect to like it at all. They could have gone a little more on the sour and a little less on the sweet and it would have been better. Are my lips blue?

Baby: Takes a bite. Starts to put the remainder back on the plate. Changes mind. Shoves remainder in his mouth. Runs off.

Me: These aren’t terrible, but I was expecting to hate them as I strongly dislike most blue raspberry things. It’s not even a raspberry-tangential flavor.

Party Cake – I have the highest hopes for this one. I could never pass up a confetti cake cupcake as a child. There’s somthing nostalgic about the flavor. Birthday cake flavored things (especially ice cream) are usually amazing. These cute off-white Peeps with multi-colored sprinkles look like small chic confetti-cakes. So cuteeeeee.

Husband: This tastes nothing like cake.

Baby: Shoves entire Peep in his mouth. Spits entire thing back on the plate. Runs off.

Me: What a disappointment. This was the flavor that made me decide to try this whole thing in the first place. They manage to be both overly sweet and have a chemical-tasting finish on the back-end. Sad.

Morning wake-up mantra for energy and attitude

Apr 18, 2019 ·

morning mantra inspiration


Today is a great day. I am full of life, energy, and enthusiasm. I can choose to have a great day, and I choose to have a great day, today.

I have struggled all my life as a person who needs a lot of sleep.

This sounds like a silly problem to worry about. If your biggest problem is that you are tired and need to sleep a lot in order to function, you have a pretty great life, right? Well, yes. However, over the course of a lifetime, it can really add up.

When I was a child, watching my friends at sleepovers able to stay up late and not be totally destroyed the next day made me jealous. In college, the late-night study sessions would kill me for a week. As a young adult, I couldn’t socialize the same way some of my friends could.

Once I got pregnant, the one thing that made me most afraid wasn’t the actual childbirth, it was that I would never be able to sleep again, and would therefore go completely insane.

Now, as a Mom, it seems like the only time I can be productive is when the baby’s asleep or someone else is caring for him. I know amazing women who somehow can give their child attention and accomplish things simultaneously, I am not one of those people.

With a second child on the way I am legitimately concerned I may never accomplish anything again when not covered by childcare. Such are the worries of a person who needs a lot of sleep but also aspires to be productive.

Over time and with the assistance of LOTS of coffee, I’m generally better off in dealing with my need for rest than I was when I was younger. I get up earlier than I ever have before, and use that time as wisely as possible. Still, I don’t feel as productive as those counterparts who need less sleep than I. It still makes me jealous.

The thing about living with a deficit, whatever it is, is that you either allow it the power to keep you down, or you figure out how to compensate. I work hard to overcome feelings of fatigue and a need to sleep. We all have challenges to overcome, and strategies to deal with them.

One coping mechanism that works well for me, came from, seriously, a fifth-grade life coach session my parents sent me to in anticipation of the middle school transition (it didn’t work, middle school was still terrible).

It was from this coach, who later became a mentor, that I learned the power of a mantra. Self-talk can be a hugely powerful force in your life.

Before you just dismiss this off-hand as hippie-dippy ridiculousness, try to imagine yourself looking in the mirror. When you tell your reflection you’re beautiful – your eyes light up, you stand up straighter, and your face glows. When you tell yourself that you could stand to lose a few pounds, that’s what you see – the pounds to lose. You engage in self-talk all day – even if you don’t pay attention to what you’re saying – and it changes the way you see the world.

Try a self-audit of your internal dialogue. Really listen to what you tell yourself for an entire day. Only once you bring into focus your internal messaging can you begin to use that dialogue to shape your narrative – and by extension, your behavior.

This may sound insane at first blush. If you’re tired, you can’t simply talk yourself out of being tired, right? Yes and no. We all exist in a world of physical reality. However, with practice, we can start to control how we choose to interpret those realities. Although you can’t control all the inputs into your day, you’re the only one who can control how you react to them.

Yes, some days are going to be “drag yourself through with a gallon of coffee, dry shampoo, all the concealer, and do the bare minimum to survive” days. They happen to everyone. But if you wake up every day and tell yourself that you are going to have a great day, you’ll notice a change. I promise.

So, here’s the mantra I tell myself every morning. Without fail. Print it out and put it next to your bed (on top of your phone). If you read it every morning before you scroll your feed, you’ll notice a huge difference in your life. It will be memorized in a few days – then just tell yourself this every morning and, more importnatly, start to believe it.

Today is a great day. I am full of life, energy, and enthusiasm. I can choose to have a great day, and I choose to have a great day, today.

Let me know if it helps you too!

  • « Go to Previous Page
  • Page 1
  • Page 2
  • Page 3
  • Page 4
  • Go to Next Page »

Footer

Follow REALBESTLIFE

  • facebook
  • twitter
  • instagram
  • youtube
  • pinterest
  • wordpress
  • Food, furniture flipping, and farming – making urban farming a lifestyle
  • Hi, let’s be friends
  • Blog
  • Homegrown Year

Copyright © 2026 RealBestLife on the Seasoned Pro Theme