• Skip to primary navigation
  • Skip to main content
  • Skip to footer
RealBestLife
  • Food, furniture flips, and farming – making urban farming a lifestyle
    • food
    • furniture flips
    • farm
  • Stories
  • Recent Posts

Blog

DIY Distressed Whitewashed Farmhouse Vanity Refacing for Under $40

Apr 23, 2020 ·

This is the perfect project for a weekend. I did the white stain wiping on Saturday and the poly coat on Sunday and the whole project took me less than two hours of total work.

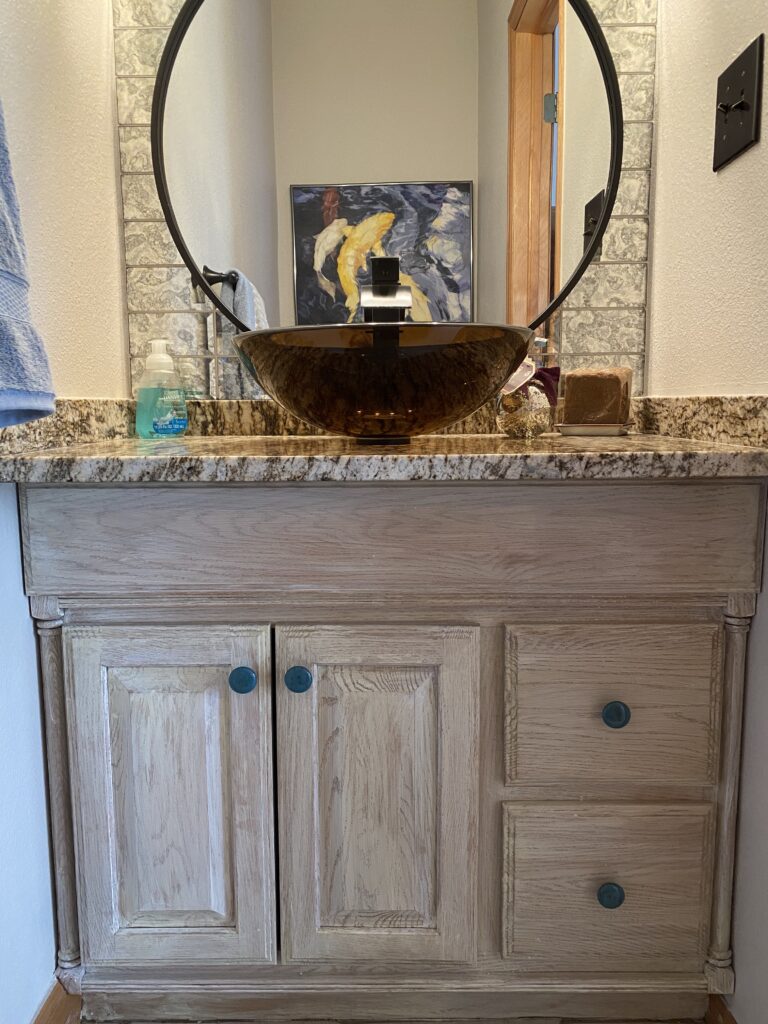
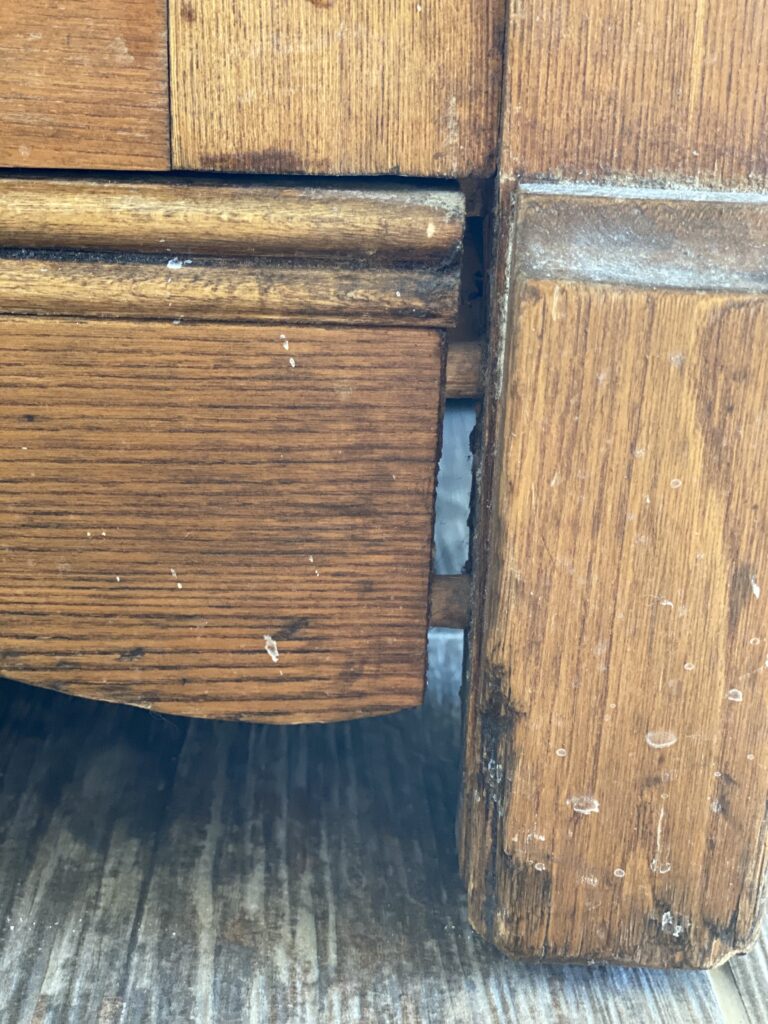
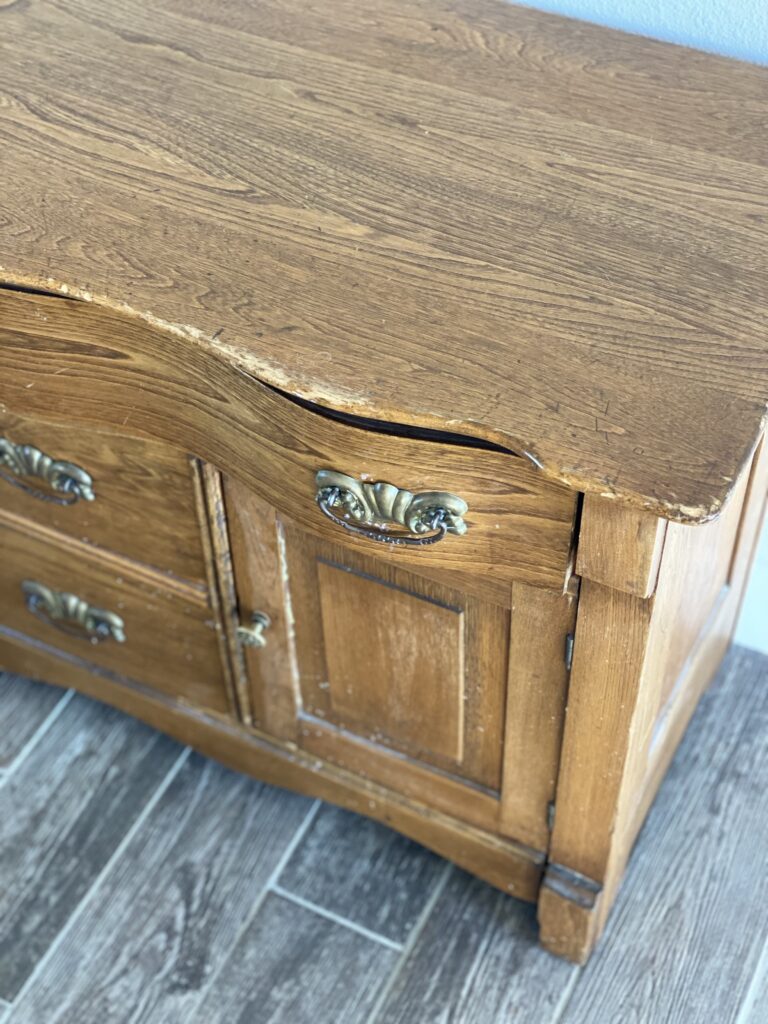
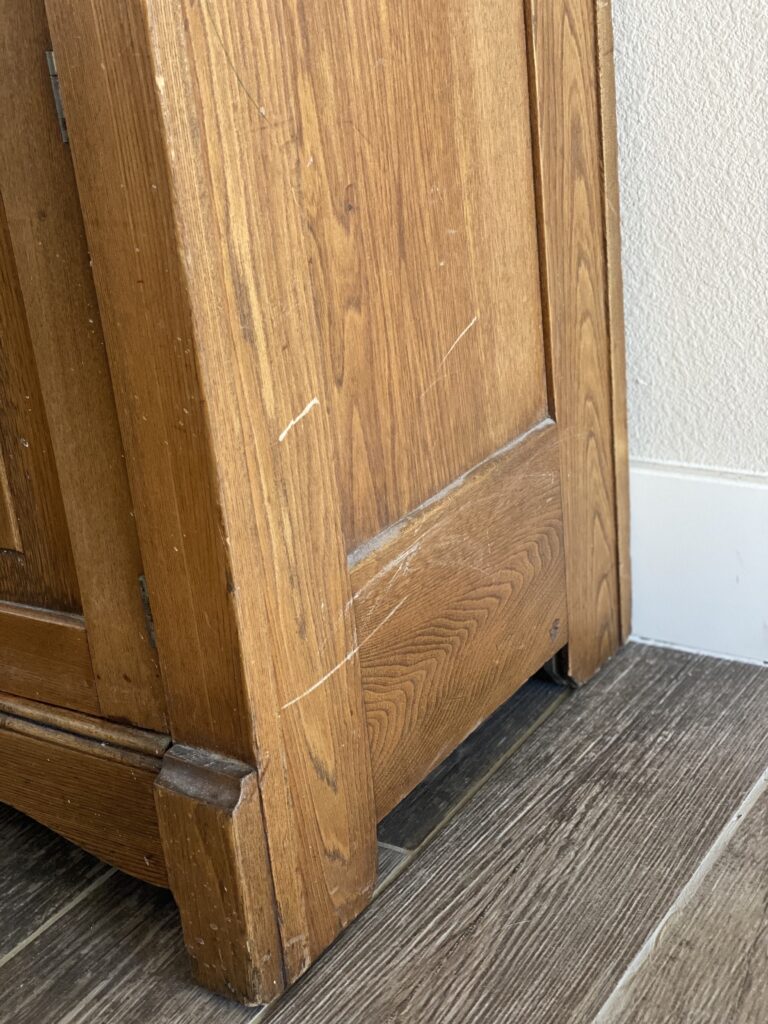
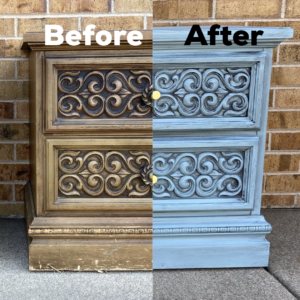
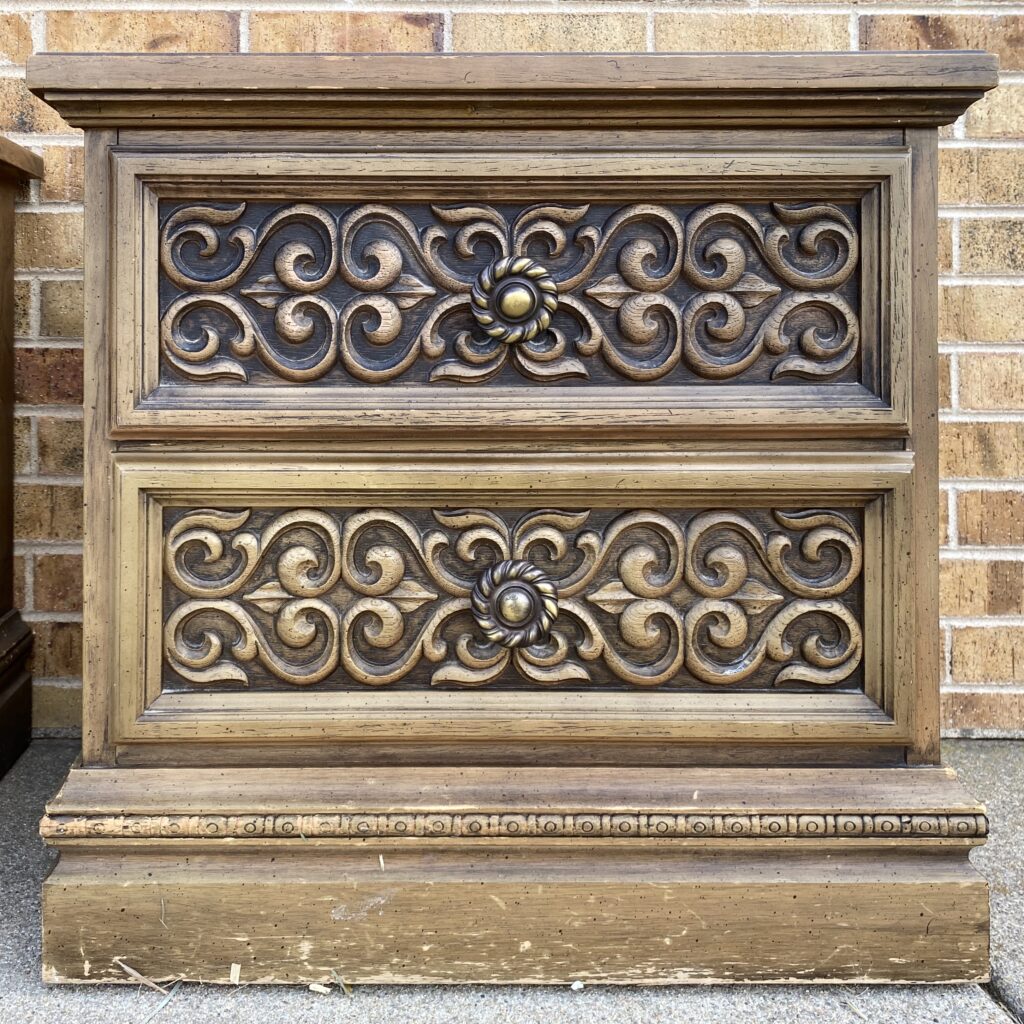
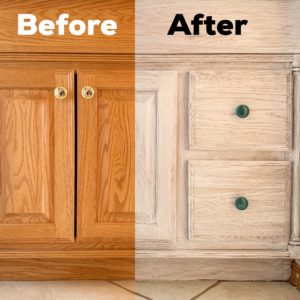
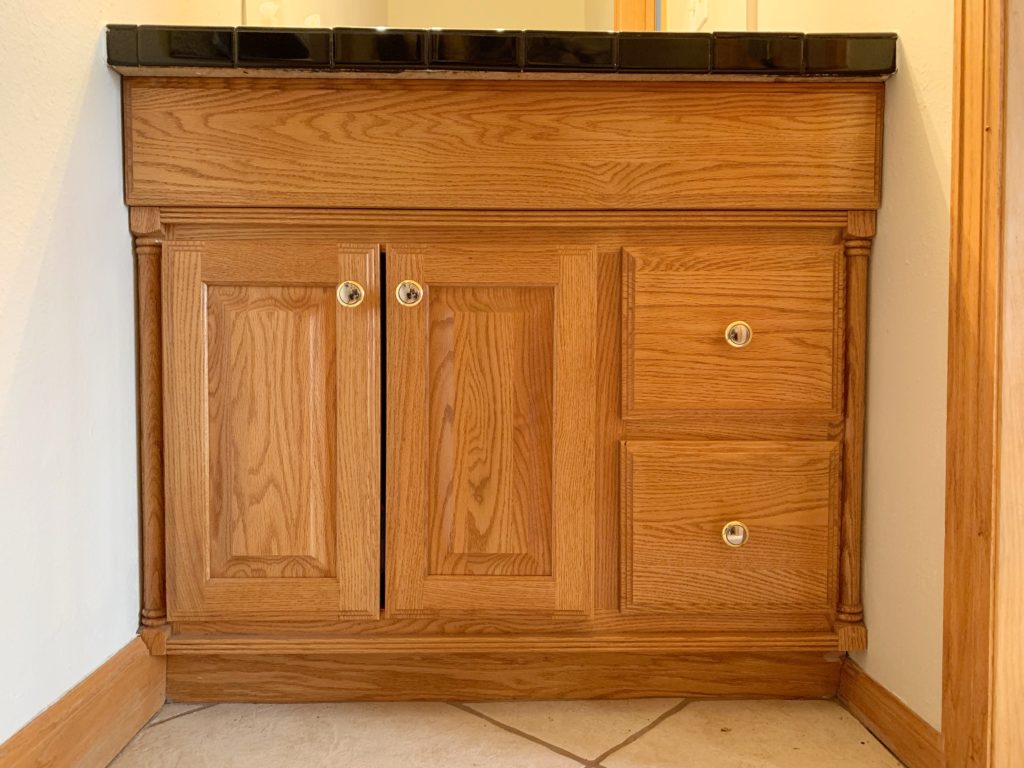
Our guest bathroom is fine-ish. It’s functional, dated, and generic. Like so many generic bathrooms across America, it contains the standard contractor-grade “built-in” yellow oak vanity. I realized, though, that ripping it out would require major drywall work, and by extension, a redo of the entire bathroom – no.

Check out the web story of this process here!

Considering the major work that needs to be done across our entire house, a full remodel of just the small guest powder room is low on the priority list. That doesn’t mean that there’s no room for a small upgrade with a big impact – until we win the lottery.

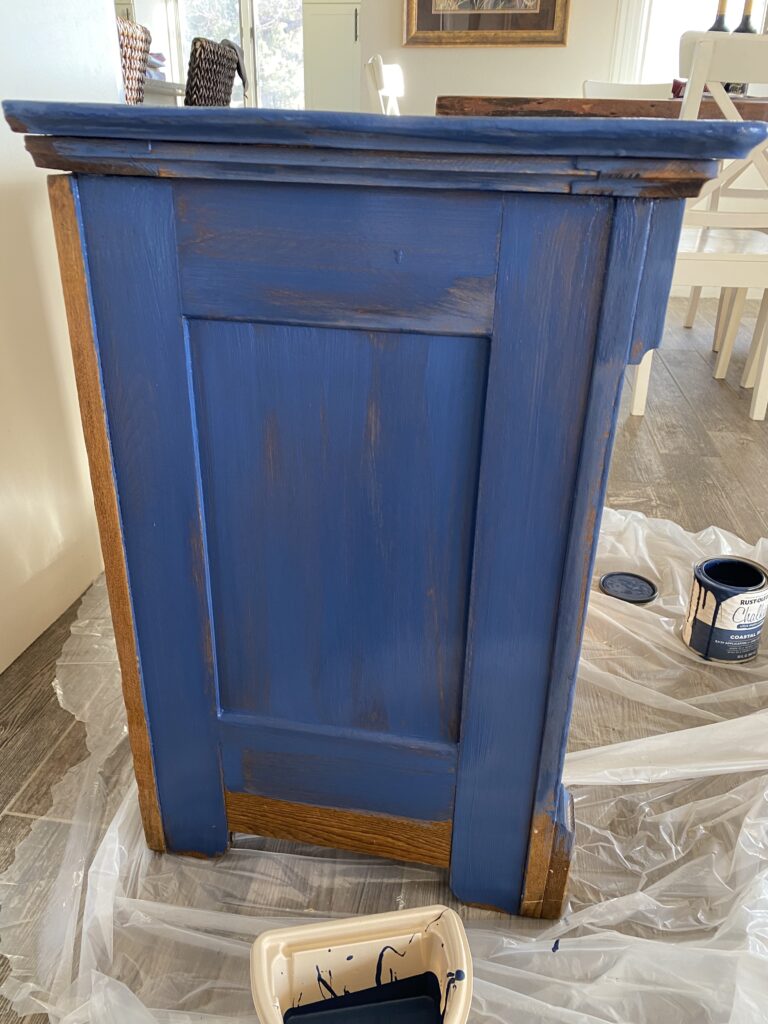
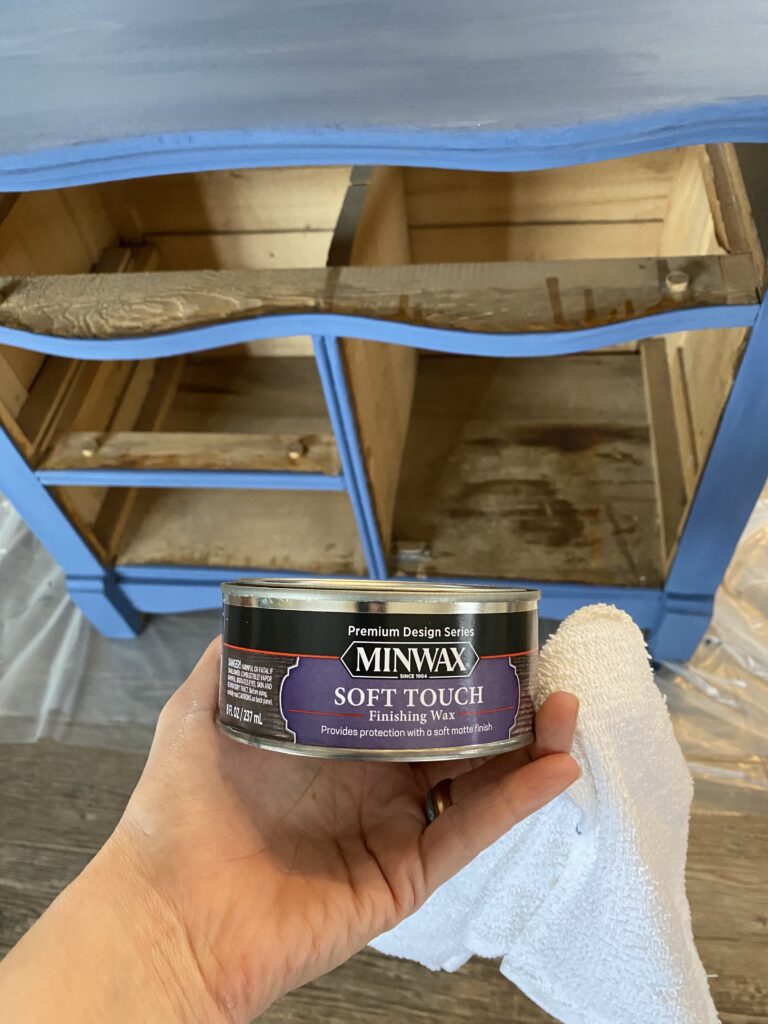
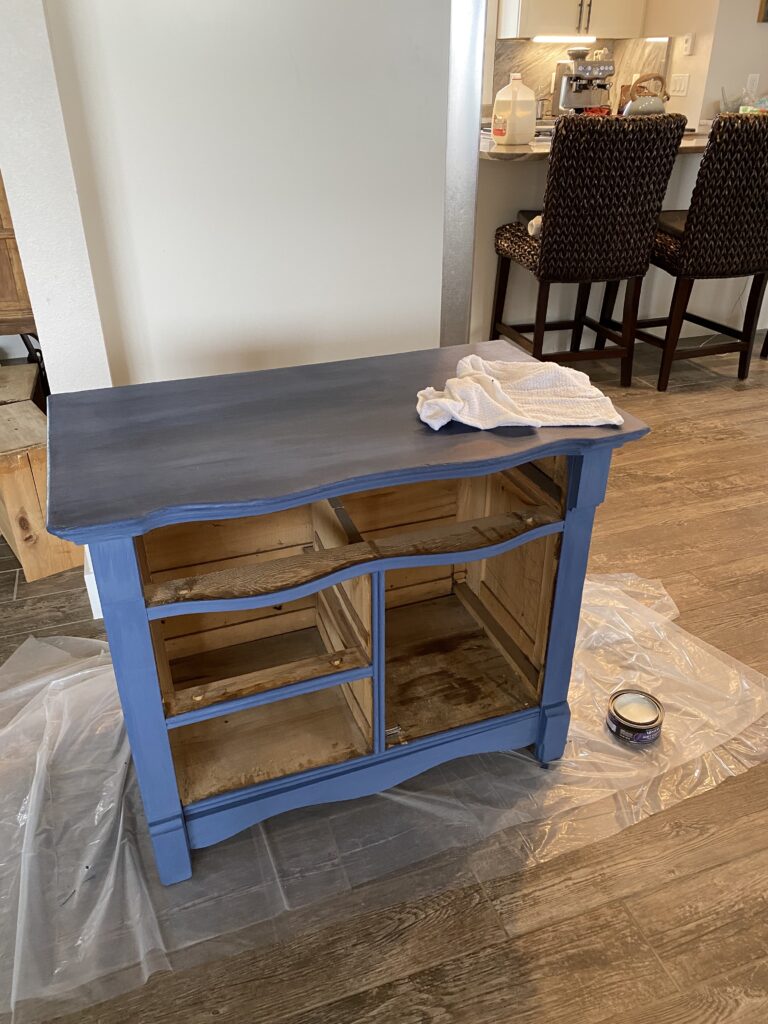
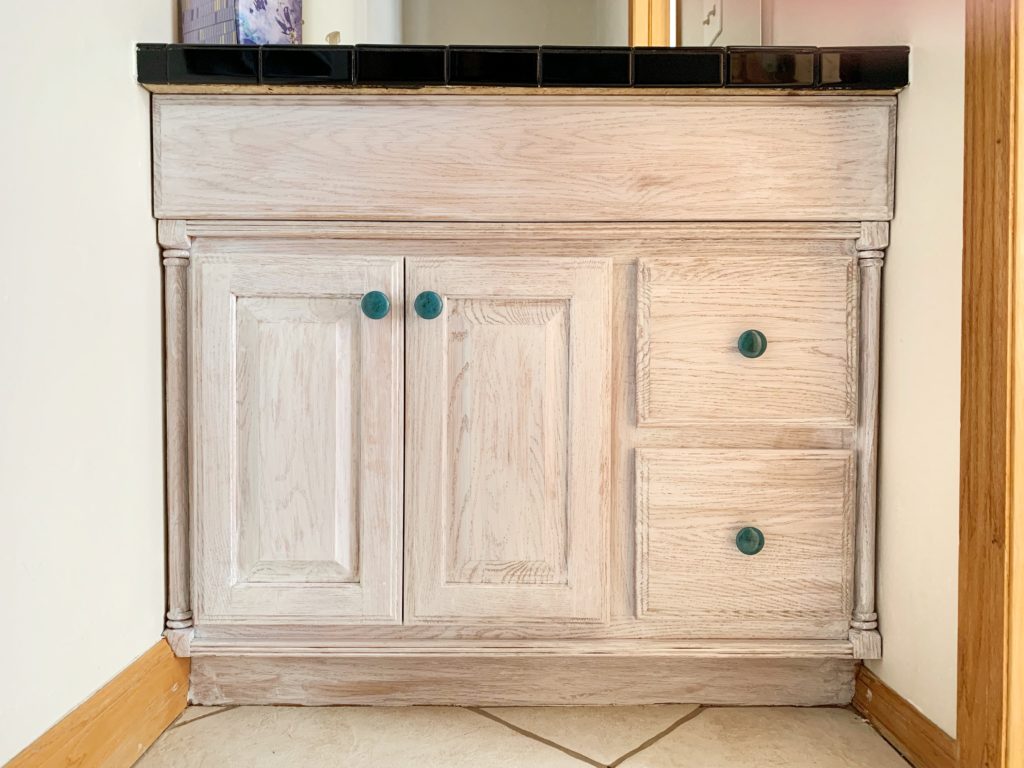
Rather than just painting this vanity, I wanted a distressed farmhouse “shabby chic” look. I went with a glaze because I like the grain of the wood to show through. Also, I am super lazy and I was NOT interested in the multi-step process of stripping/sanding/filling that is required to paint an entire piece. Luckily, I achieved exactly the look I was going for with this method. Using a wiping glaze gave it the right consistency, the best color, and the least work.
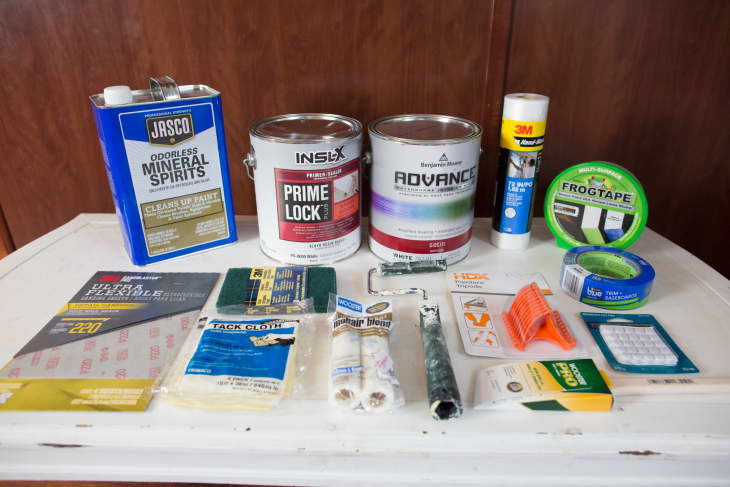
What you need:

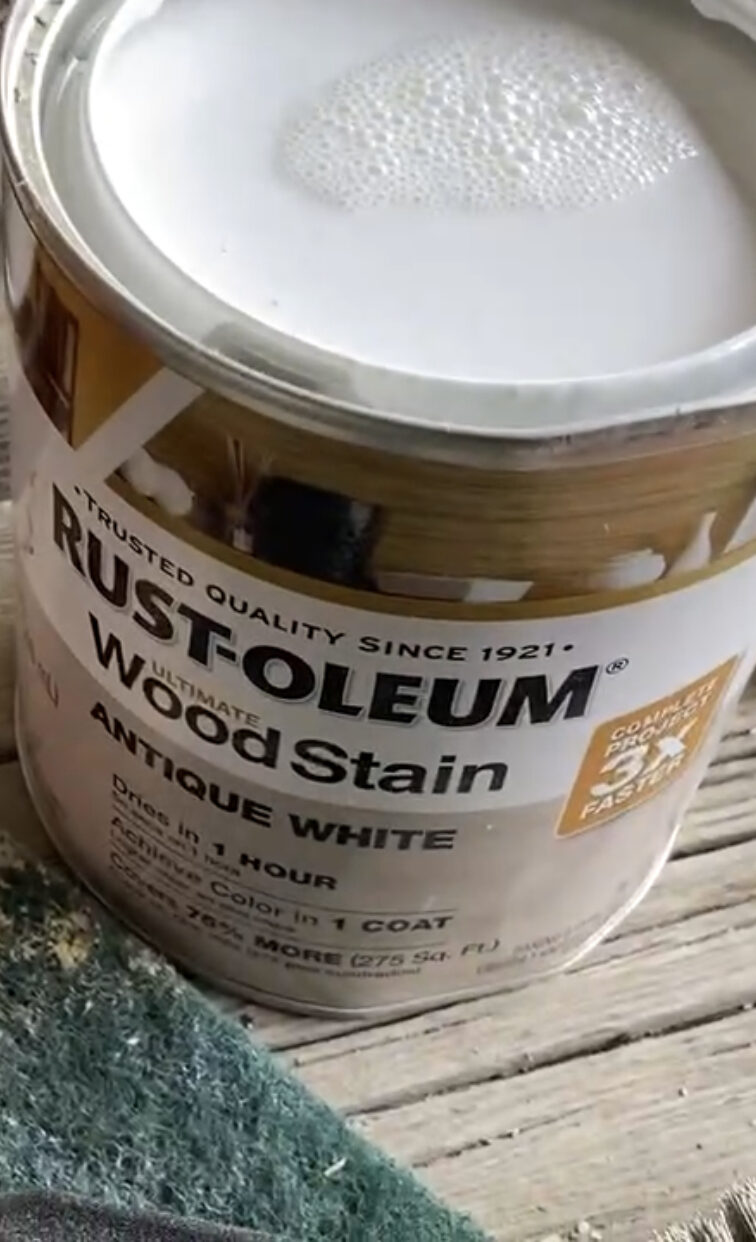
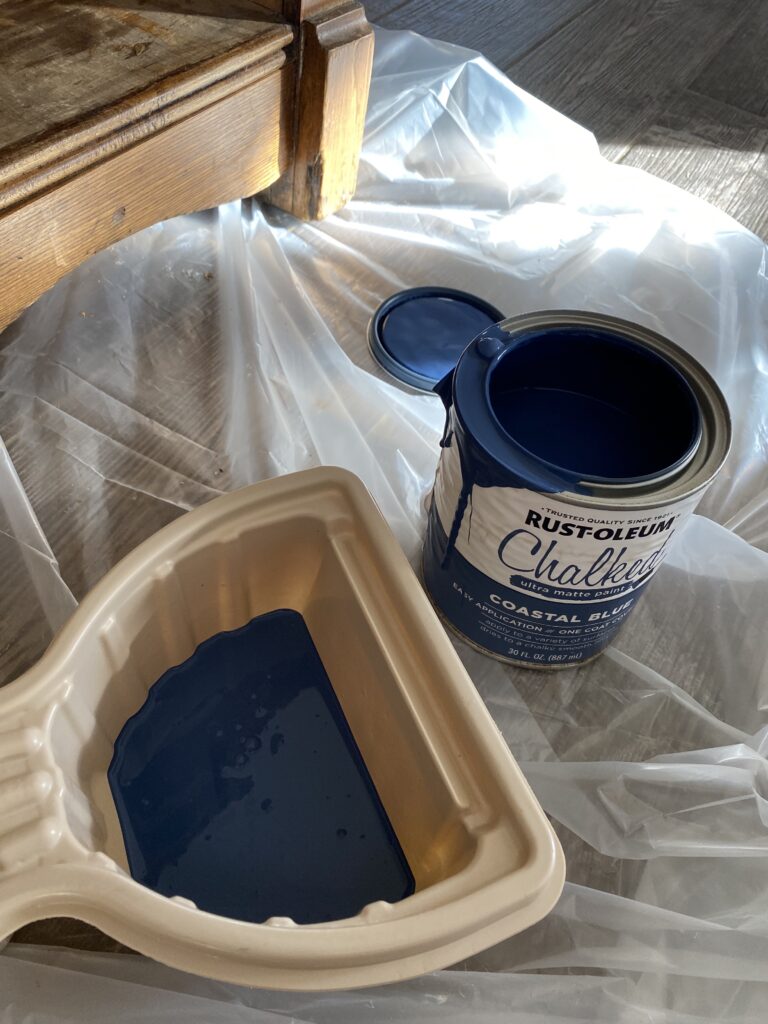
Wiping glaze – I spent a LOT of time looking for the perfect thing for me – this is what I used. It’s the “pickling white” color. I was skeptical of getting paint via Amazon, but it was delivered totally fine.

Polyurethane top coat – you can find this anywhere

A no-pilling rag to wipe stain with – I used an old cheese cloth, make sure it’s something you can throw away when you’re done

A paintbrush – for the topcoat

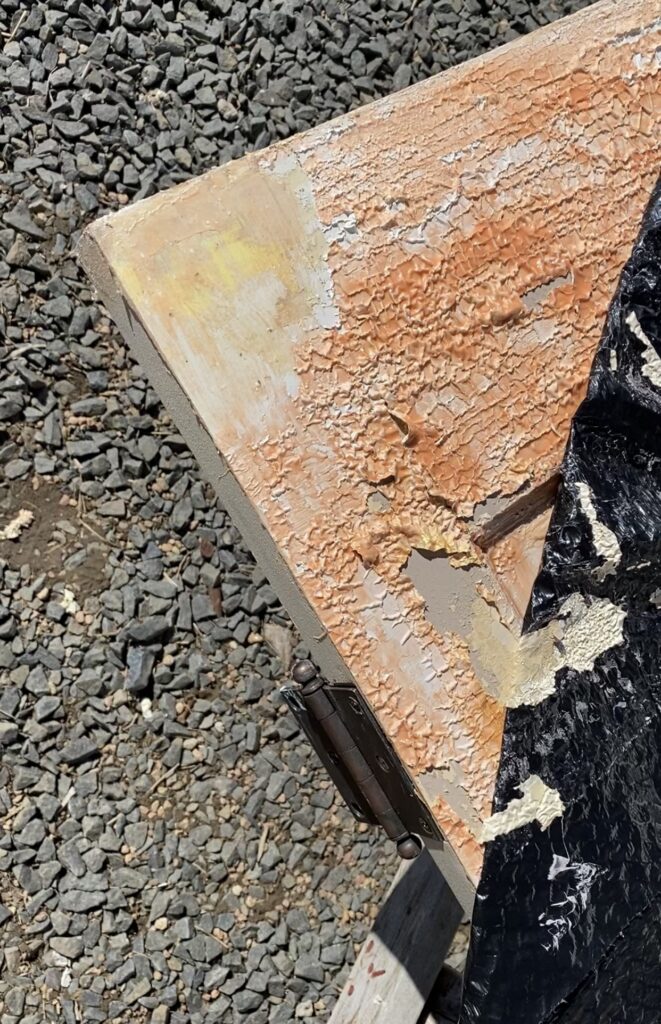
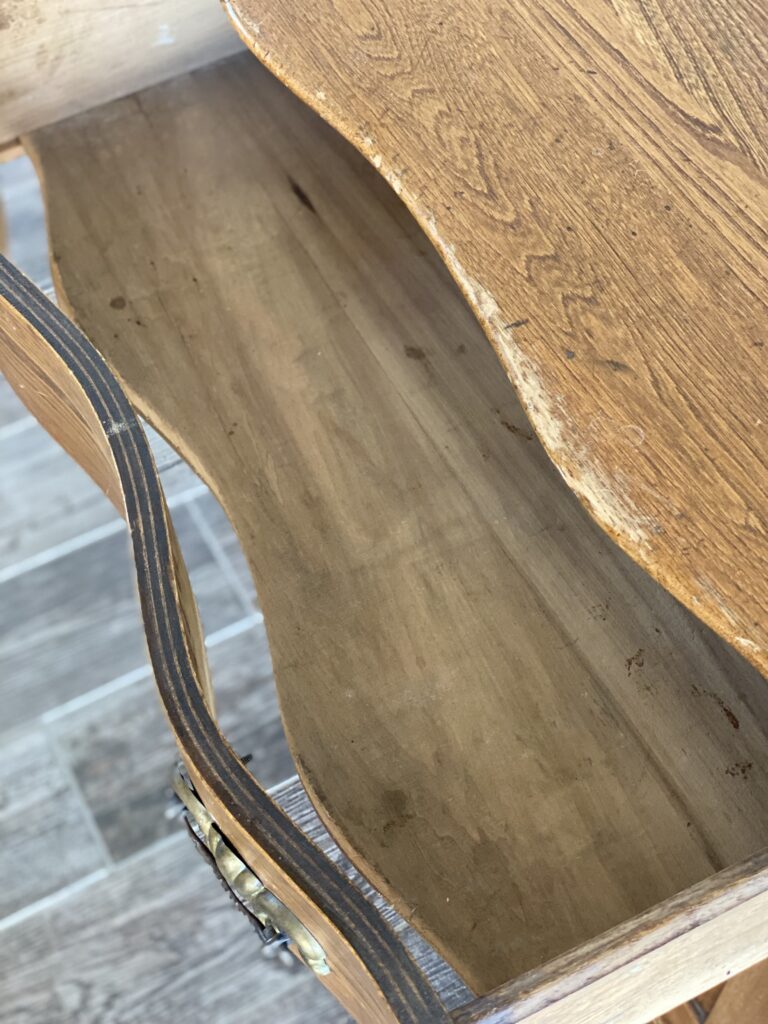
A really good cleaner – this is prep step you do not want to skip. There’s probably years of who knows what on these vanities. I rubbed every surface down with denatured alcohol. Based on what came off the wood, it was much grosser than I had thought.

Painter’s tape and plastic – even if you’re extra meticulous, you will drip.

Plastic gloves – you’re wiping this stain on with a cloth. White nails are trendy, but not that trendy.

New knobs – my husband went with me to Hobby Lobby to pick out ours, I kid you not. He picked the turquoise – this was both a surprise and impressive. $12 total.

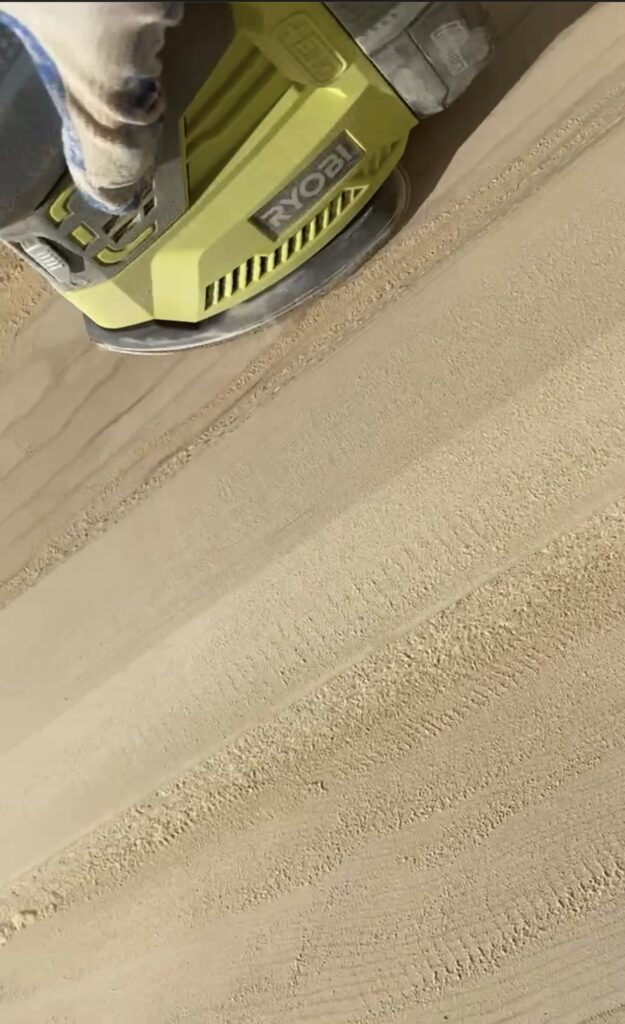
Optional: A piece of large-grain sandpaper – if you decide to rough up the wood to make the glaze adhere better. I chose not to and it was fine. I picked specifically this wiping stain because it looked like it would stick to anything, and it did. Again, I’m lazy.

What to do:

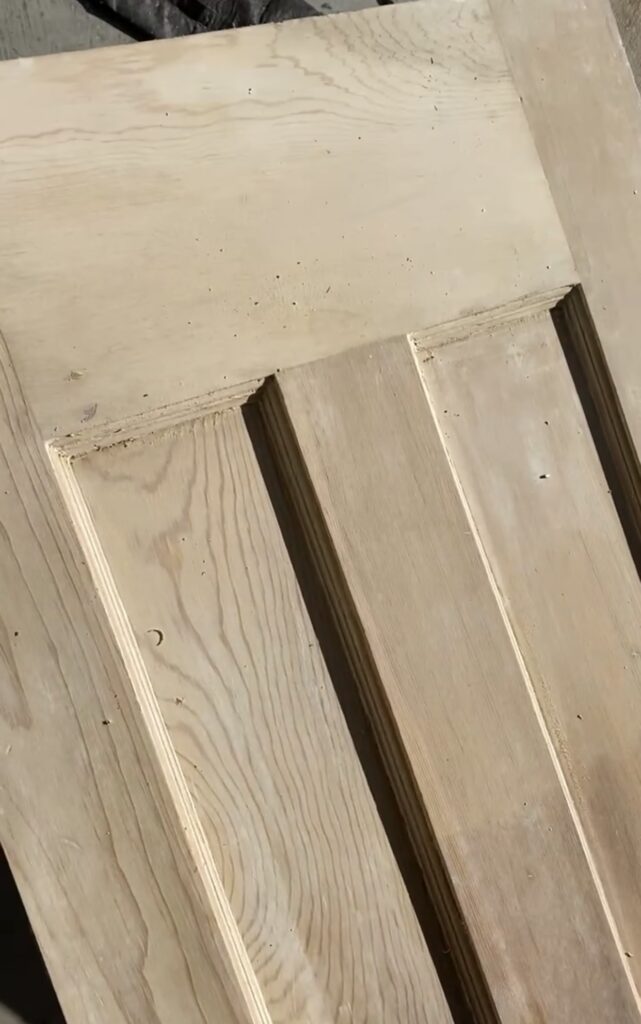
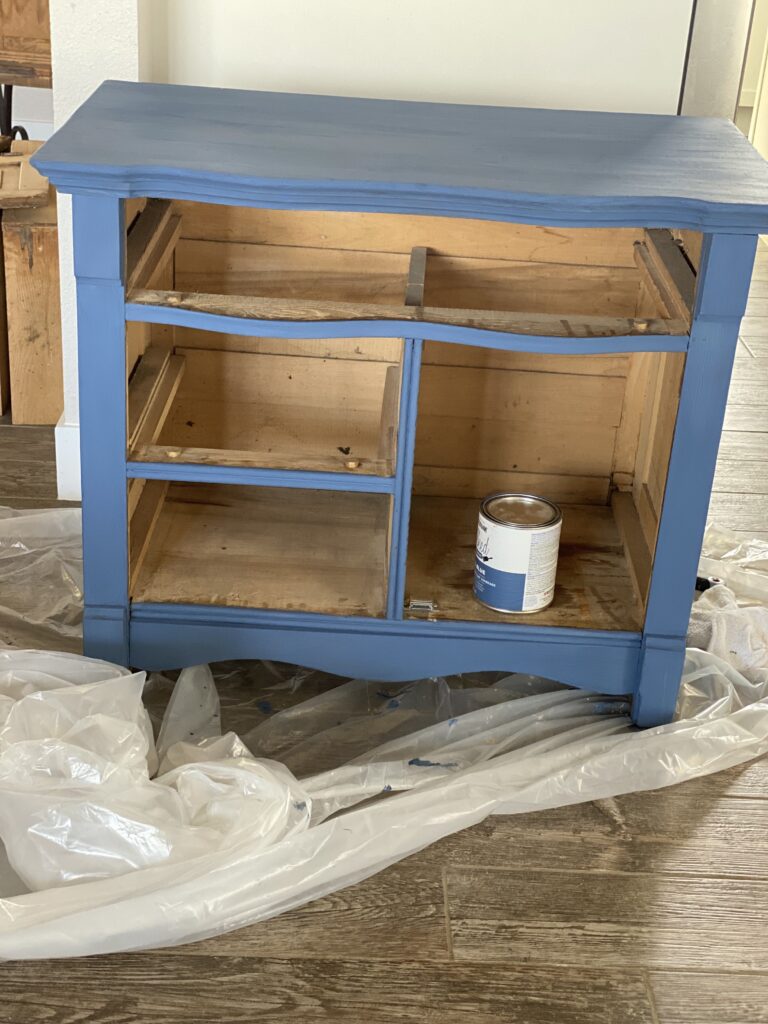
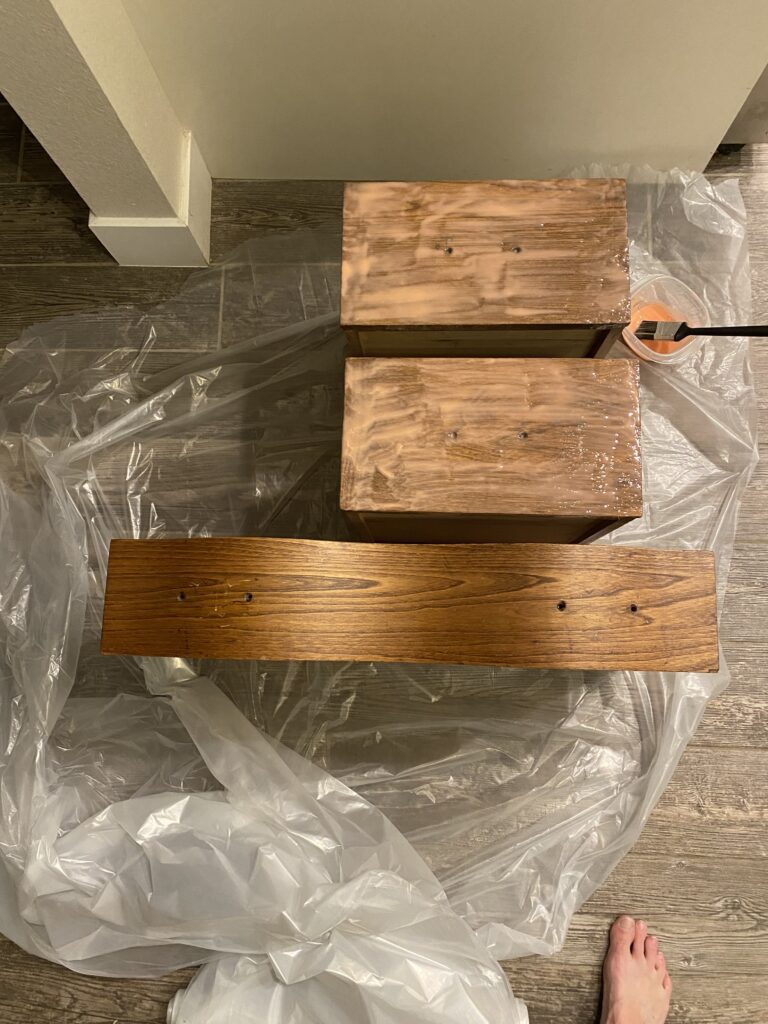
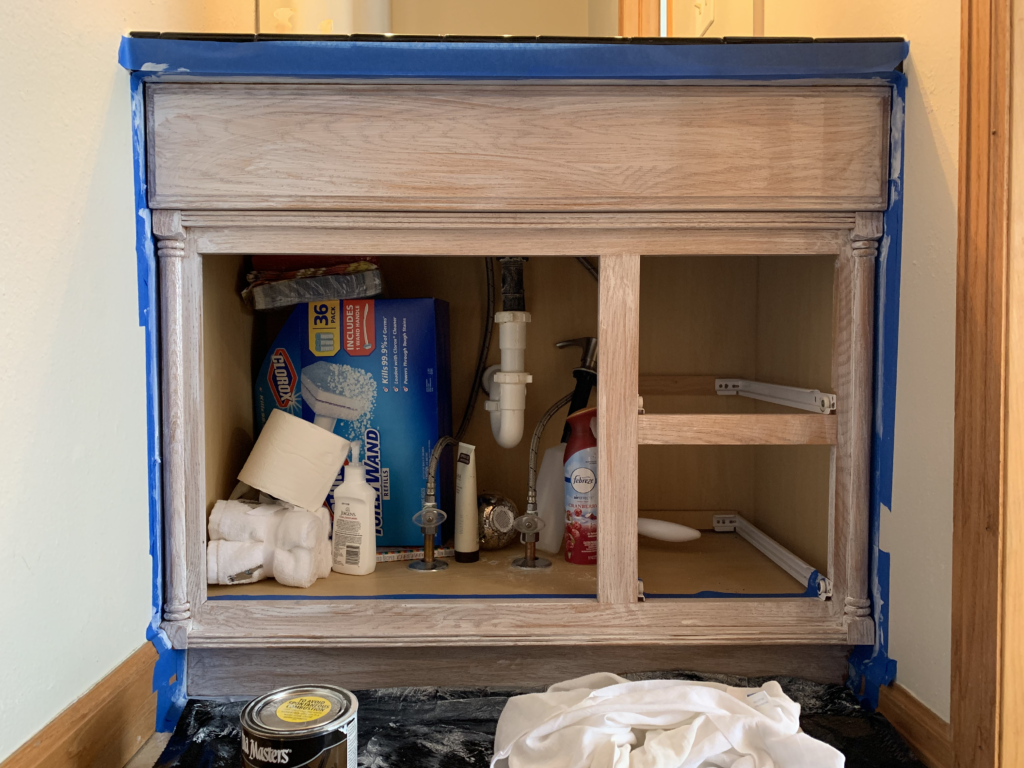
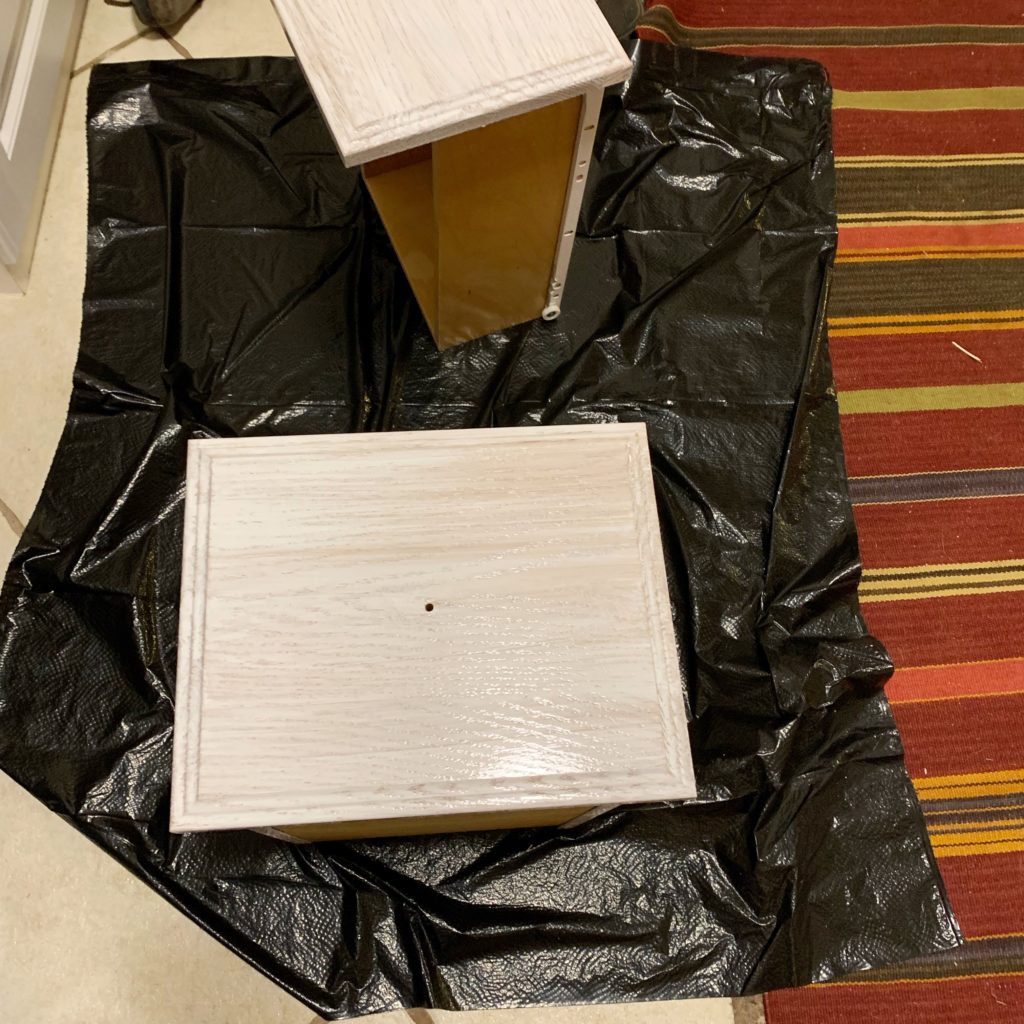
Remove all doors and drawers. Lay then out on plastic. Thoroughly clean all surfaces with denautred alcohol or another grease and dirt cutting cleaner.

Tape and cover all surfaces you don’t want white splotches on.

Optional: Rough up wood with large-grain sand paper. Then clean again, (pass).

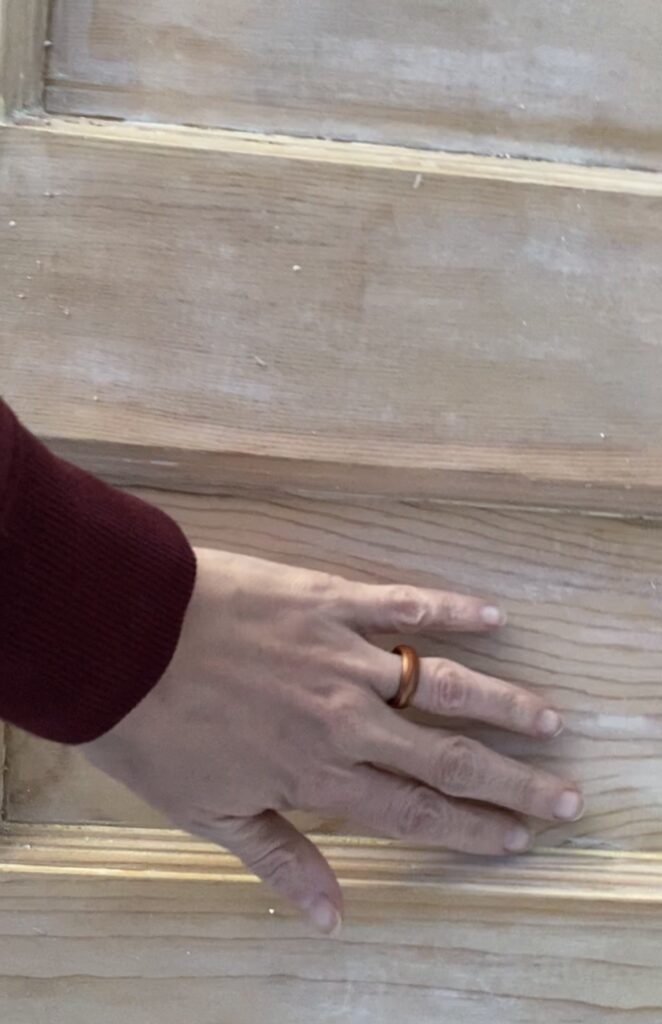
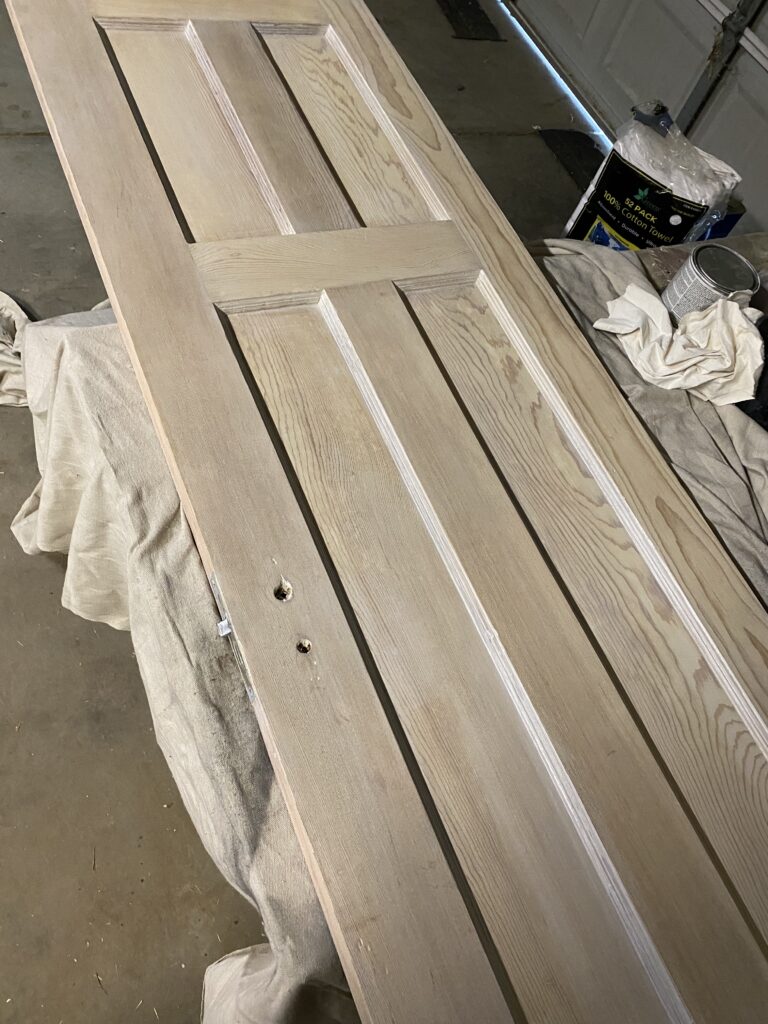
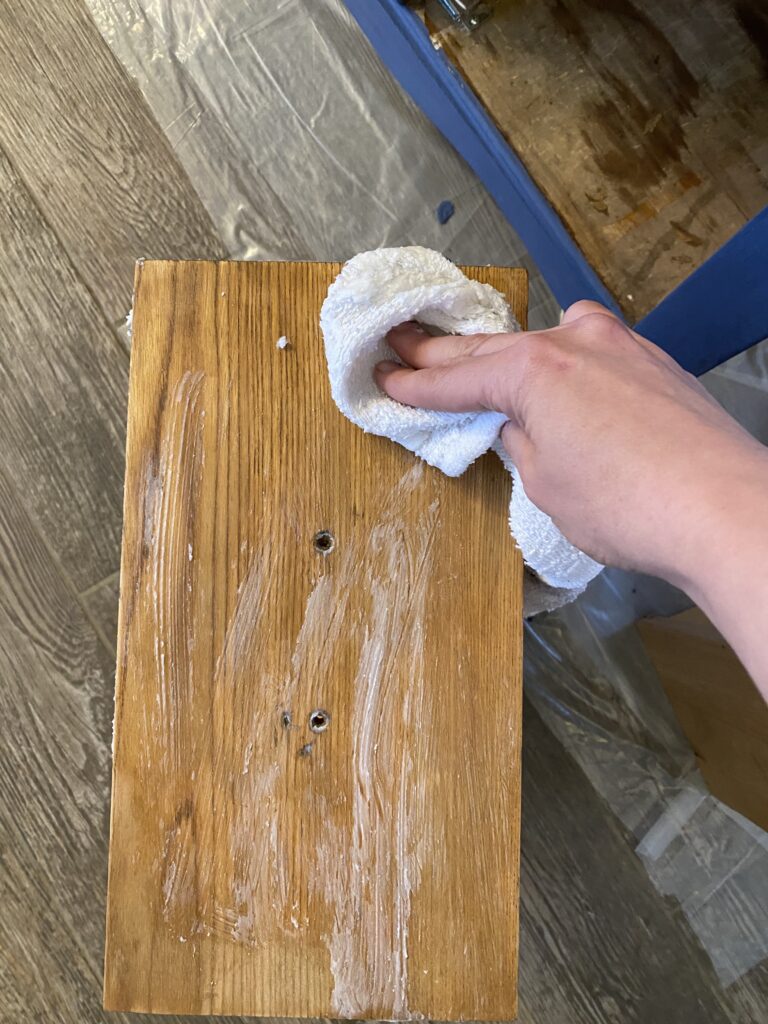
Wipe stain over all surfaces to color. Wipe with the grain of the wood. You can wipe on and wipe off several times to achieve the desired look.

Do a second coat of stain if you so choose after a few hours. This allows you to get a more uniform look over the whole piece and touch up where you need.

Let dry overnight.

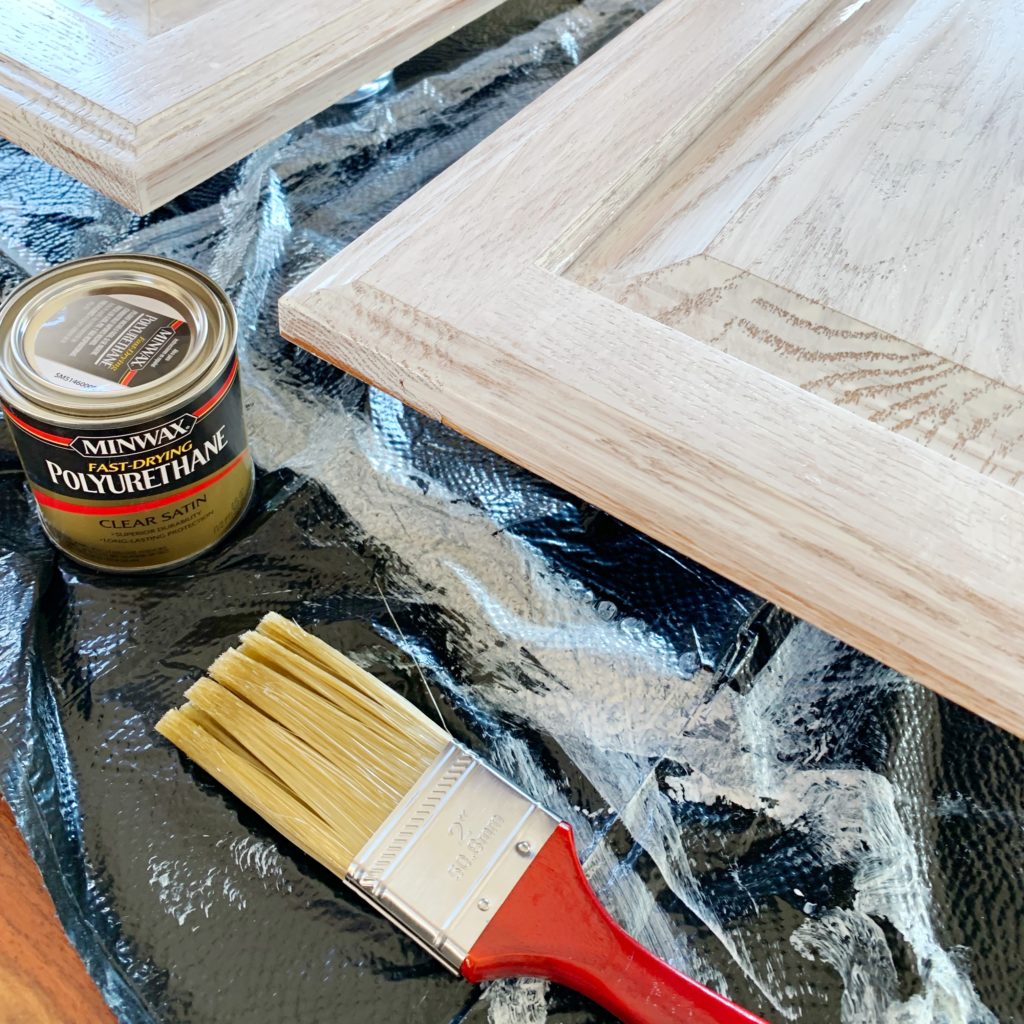
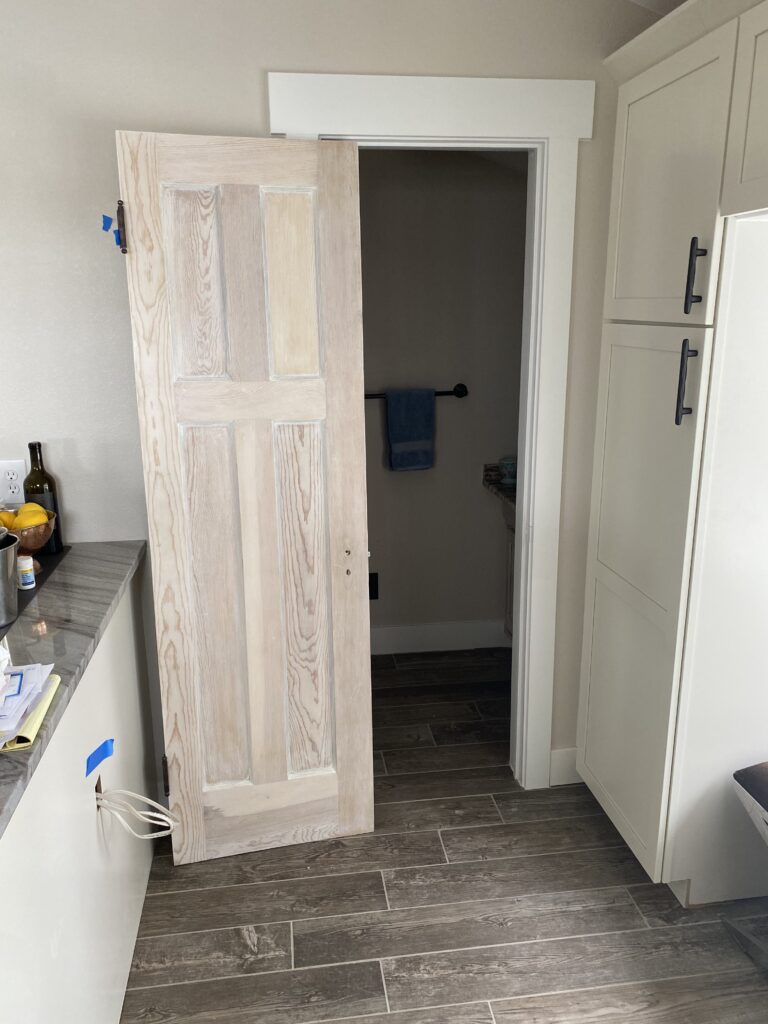
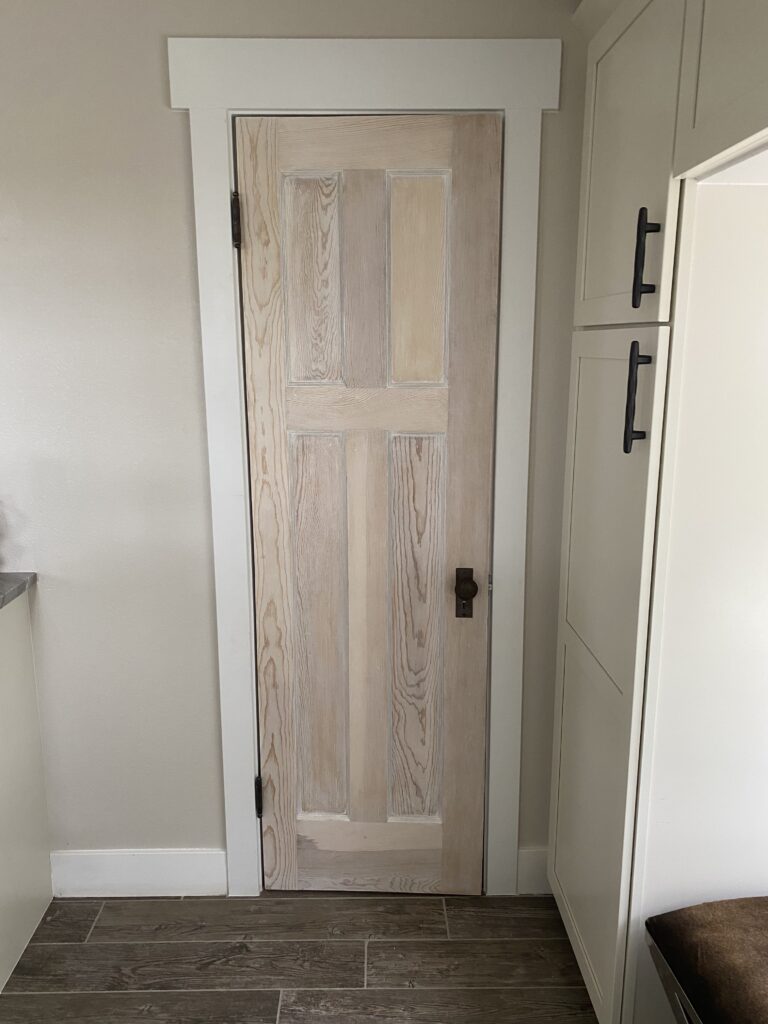
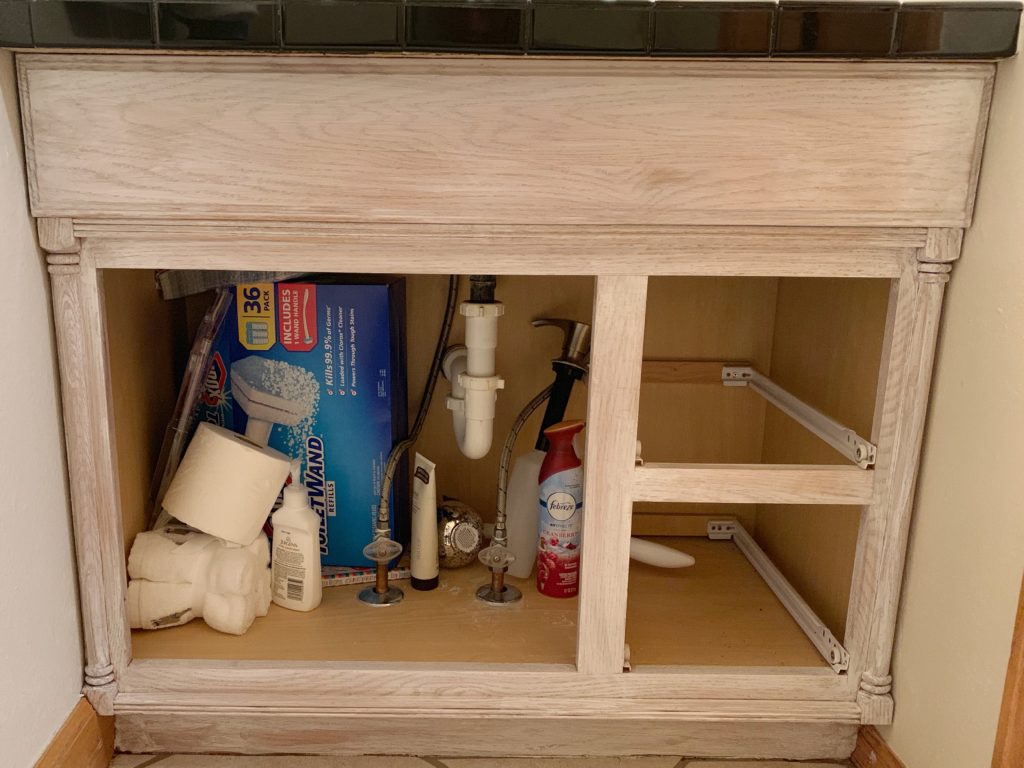
Paint one to two coats of polyurethane on every stained surface. Let dry completely.

Replace doors, drawers, knobs.

Take photos for Insta. OBVIOUSLY – if you don’t photo it, it didn’t happen.

Hard lessons:

Do not skimp on taping or covering of other surfaces. I found that I’d gotten a few splotches on the trim surrounding the vanity. Luckily we like the look enough that staining the trim in that bathroom is next on the list.

Wear gloves. It takes a long time for this stuff to come out from under your fingernails. I may or may not still trying to get it off.

Clean well before you stain. This stain is a great consistency and adheres well, but years of wear – even if it doesn’t look dirty – leaves a film on wood that will make the stain not stick.

Update:

So, it’s now been over a year with this treatment on the cabinets. I still LOVE it. It looks just like it did the day I did it. In fact, I love it so much that I had a granite guy come out and replace what was a tile counter for a legit granite one and even added a snazzy vessel sink. Now our guest bath looks AWESOME. Also, if you enjoyed this post I just did some bedside tables/nightstands (I don’t know what the difference is between these two things) that you should check out.

Goat cheese and lime individual cheesecakes

Mar 22, 2022 ·

A picture of lime and goat cheese cheesecakes

Goat cheese and lime individual cheesecakes

A picture of a lime and goat cheese cheesecake with a slice of lime on top

I really love these goat cheese and lime cheesecakes – they’re also perfectly proportioned as a treat for a single individual. (Not, by the way, that a whole big cheesecake isn’t sometimes also the correct portion for a single person – but that’s a different story.)

Goat cheese and lime - the perfect flavor combo

A picture of goat cheese, limes, pie shells, and eggs
A picture of a mixing bowl with cream cheese, goat cheese, and sugar before it's mixed with limes, eggs, and pie shells in the background
A picture of a mixing bowl with creamed goat and cream cheese mixed and a spatula sitting on a cutting board with the mixture
A picture of a mixing blow filled with mixed goat and cream cheese with an egg cracked over the top

I love the combination of goat cheese and lime. These cheesecakes are not over-the-top sweet, so the flavor combination is front-and-center. The creaminess of the cheese and the subtle goat flavor combined with the brightness and acidity of the lime makes for a perfect twist on a classic.

Picking goat cheese

A picture of lime and goat cheese cheesecakes

I am your kind of crazy goat friend who makes her own cheese. You don’t have to be like me to end up with a great goat cheese cheesecake, though. The kind of chèvre that you can get at most grocery stores is great for this recipe. I do suggest adding it to this recipe at room temperature, though, it will blend better and be creamier.

If you ARE a crazy cheesemaking goat person like me, a chèvre is nice, but so is a creamy goat fromage blanc for these lime cheesecakes.

A picture of mini cheesecakes ready for the oven next to a cutting g board with cut up limes
A picture of mini cheesecakes about to go in the oven
A picture of individual cheesecakes right out of the oven

Tips for these easy-to-make cheesecakes

  • I added the optional step of baking these with a pan of water on the lower rack of the oven. I find that increasing the humidity inside the oven makes them less likely to crack.
  • These are easy to freeze and thaw. They keep really well. 
  • Although in this recipe I call for at least 4 hours of cooling in the refrigerator, I like them better if they can sit at least overnight. The flavors settle and meld in a delightful way.
  • This recipe is really easy to double, and you’ll be surprised how quickly a dozen of them can disappear. 
Goat cheese and lime individual cheesecakes
Pin
Print

Goat cheese and lime individual cheesecakes

Recipe by RealBestLifeCourse: DessertDifficulty: Easy
Servings

6

servings
Prep time

30

minutes
Cooking time

25

minutes

These simple and delicious goat cheese and lime cheesecakes are unbelievably delicious. The tartness of the lime perfectly offsets the goat cheese to make this twist on a classic a dessert to remember. They're not too sweet, but not too tart, an ideal balance. Easy to double recipe.

Ingredients

  • 4 ounces goat cheese

  • 4 ounces cream cheese (softened) 

  • 1/4 cup sugar

  • 1/2 teaspoon vanilla

  • Juice of one lime (about 2 Tablespoons)

  • Zest of one lime (about one teaspoon)

  • 1 large egg, room temperature

  • 6 Ready Crust Mini Graham Pie Crusts

Directions

  • Preheat oven to 350 degrees. Optional: Place a shallow dish filled half way with water on the bottom rack (baking cheesecakes in an oven with a dish of water helps to prevent cracking.)

  • Cream goat cheese, cream cheese, sugar, vanilla, lime juice, and lime zest.

    A picture of a mixing bowl with creamed goat and cream cheese mixed and a spatula sitting on a cutting board with the mixture
  • Add egg and continue mixing until smooth. 

    A picture of a mixing blow filled with mixed goat and cream cheese with an egg cracked over the top
  • Gently ladle mixture into the crusts

    A picture of mini cheesecakes ready for the oven next to a cutting g board with cut up limes
  • Bake on the rack above the dish with water (if you decided to add that step) for 25 minutes, or until centers are just set.

    A picture of individual cheesecakes right out of the oven
  • Chill for at least 4 hours (I prefer at least overnight as it helps the flavors to permeate) and garnish with lime slices or zest.

    A picture of lime and goat cheese individual cheesecakes with lime zest on top

    Refinished Salvaged Door DIY

    Mar 14, 2022 ·

    A picture of a before and after of a tacky 90s door and a refinished salvaged antiqued door
    A picture of a before and after of a tacky 90s door and a refinished salvaged antiqued door

    Finding the perfect salvaged door

    I was intimidated by the idea of refinishing my own salvaged door – then I did it and I love it!

    During our kitchen and pantry remodel I realized how out-of-place the old 90s-style hollow core yellow door would look with all the other nice finishes.

    A picture of a 90s yellow tacky door before it was replaced with a salvaged door

    The supply chain issues on building supplies made it almost impossible to find something that would fit with all our other doors anyway, so I decided a cool contrast was the way to go.

    We found Queen City Architectural Salvage, just north of Denver, and decided to head over to see what we could find. Since it’s only open Mondays, Fridays, and Saturdays, we had to schedule enough time to ensure we wouldn’t be in a rush.

    The doors were all organized in a shed by width, so we flipped through them like a deck of giant cards. Since we needed an odd size, there was really only one door that fit the bill. Luckily, it was perfect.

    A picture of a salvaged door from an architectural salvage yard

    It was a little dirty but definitely solid. Based on how it looked, it had to have about 40 coats of paint over the years. The proprietor of the yard told us he had pulled it out of an old hotel where it was a closet door. I was in love.

    Check out my web story on this door refinishing – it includes video of the process.

    A picture of a man holding a white door in the middle of a salvage yard

    I would recommend reserving several hours to look for gems in an architectural salvage yard – there’s something new and exciting around each corner.

    Inside the shop, they had hundreds of sets of doorknobs, plates, and hinges. We picked out a knob and plate that wasn’t original to the door, but tested and knew would fit. The intricacy of the knob was such a fun detail.

    A picture of a woman holding an intricate antique doorknob

    Looking for the wood underneath

    When I got the door home, I knew I needed to see what was underneath all those coats of paint. Since I’d already redone the vanity for that small powder bathroom in a whitewash finish, I hoped there was beautiful wood grain underneath.

    A picture of a door covered with Citristrip and exposing various layers of paint

    Because of the many, many, MANY coats of paint on this door, I used CitriStrip several times to get all of them all off. It was days of painting it on, letting it sit covered with a garbage bag (a way to make it more effective), and using a putty knife to take a few coats.

    By the way, if you want to know why I use CitriStrip instead of oven cleaner, I cover it in the post about this raw wood dresser.

    During this process, I learned that at one point the door was painted a bright yellow (maybe the 60s?) a forest green, and several coats later it was painted a beautiful, rich, coffee.

    A picture of a keyhole that shows the different coats of paint colors on the door

    Mostly, it was just coat after coat of white. After days of stripping, I found the beautiful wood grain that I was hoping for.

    A picture of an antique salvaged door in the process of having coats of paint stripped off
    A picture of a hand running along the wood grain of a salvaged door
    A picture of a stripped door showing the beautiful wood grain
    A picture of a hand sanding a salvaged door

    I used a fine-grain sandpaper and my sander to get down to the beautiful bare wood. It was really soft, so I was very gentle to not do any damage to the underlying wood.

    Because it had been so long since the wood was exposed to air, I used a rag to do several coats of pre-stain wood conditioner. The wood drank it in like it was parched.

    Staining the salvaged door

    I used an antique white wiping stain to pull the color lighter to a really nice finish. But wanted to do so while still maintaining that stunning wood grain. I painted it on with the grain of the wood. Then I would pull it back off with a non-pilling rag until I got the color I wanted.

    A picture of and open can of antique white wood stain
    A picture of a salvaged door after an antique white wiping stain

    Once the color was achieved, I sealed it and got it ready to hang.

    A picture of framing an antique salvaged door into an opening

    Once it was framed in, the door looked absolutely perfect. It was the perfect fusion of antique salvage and a modern farmhouse.

    A picture of a refinished salvaged antique door in a modern farmhouse

    Roasted parmesan, zucchini, onion, and tomato

    Mar 8, 2022 ·

    A picture of roasted zucchini and tomatoes with parmesan

    Roasted parmesan zucchini, onion, and tomato is simple delicious

    This roasted zucchini, tomato, and parmesan dish is perfect. As veggies ripen, combining and roasting them creates a fabulous medley of fresh flavors. This makes a healthy meal that’s full of flavor but that you can feel good about eating.

    A picture of roasted zucchini and tomatoes with parmesan

    Every year I end up with too much zucchini at the end of the season, roasting them is a perfect way to get the entire family to eat them up. Zucchini is packed with vitamins and minerals, and adding it to a balanced diet is a great way to add more veggies.

    Check out my web story about this dish!

    Parmesan and herb roasted zucchini, onion, and tomato
    Pin
    Print

    Parmesan and herb roasted zucchini, onion, and tomato

    Course: SideDifficulty: Easy
    Servings

    4

    servings
    Prep time

    10

    minutes
    Cooking time

    45

    minutes

    These crispy and flavorful veggies are the perfect side dish. They're so simple to make and will fill you up. The combination of roasted zucchini, onions, and tomatoes, are delicious together.

    Ingredients

    • 1 medium zucchini (chopped)

    • 1 half yellow onion (chopped finely)

    • 2 large tomatoes

    • 2 Tablespoons Olive Oil

    • 1 teaspoon Italian seasoning 

    • 1/2 teaspoon garlic powder

    • 1/2 teaspoon salt

    • 1/4 cup parmesan cheese

    Directions

    • Pre-heat oven to 375 degrees. Chop zucchini, onions (finely), and tomatoes into wedges. Layer in a baking dish.

      A picture of chopped zucchini, tomatoes, onion, and a bag of parmesan cheese
    • Layer zucchini and onions in an oven-safe dish

      A picture of zucchini and onions layered in a baking dish
    • Top the zucchini and onion with tomato slices and drizzle with olive oil.

      A picture of zucchini and onions topped with tomato slices
    • Sprinkle with Italian seasoning, garlic powder, and salt

      A picture of zucchini, onions, and tomatoes, topped with seasoning
    • Top with parmesan cheese.

      A picture of zucchini, onions, and tomatoes, seasoned and topped with parmesan cheese
    • Bake at 375 degrees for 30-45 minutes or until the veggies are soft and the nicely browned. Cool and enjoy.

      A picture of roasted zucchini, onion, and tomatoes, topped with seasoning and parmesan cheese

      Painted and raw wood dresser refinishing DIY

      Mar 6, 2022 ·

      A picture of a side-by-side before and after of a painted and raw wood refinished dresser

      I love the trend of the two-tone painted and raw wood refinishing for furniture pieces. It’s a fun twist that includes the best of two different styles, and I dig the way that the two looks perfectly set one another off.

      Check out my web story about this refinishing that includes some video!

      A picture of a dresser before and after refinishing with painted and raw wood styling
      A picture of a refinished dresser that has been painted and had the drawers stripped to raw wood.

      Finding the dresser for a raw wood refinishing

      This small piece was in a “trash pile” after a family member’s last move. The wood grain was beautiful, but it was coming apart, and had dent and burn damage all over. The drawers were also coming apart, and needed some love an attention. Given its perfect size and good bones, this is a keeper piece once it’s redone.

      Fixing structural issues

      A picture of the broken back of a dresser that requires fixing.

      This little chest had a lot of problems, it wasn’t square, so the drawers wouldn’t open and close. The back was falling off. The drawers themselves were totally falling apart.

      A picture of the broken drawer of a dresser that was coming apart.

      The first order of business was to use some wood glue, clamps, a rubber mallet to knock the pieces back in place. I even used a ratchet strap to get the piece put back together – square, and functional.

      A picture of different pieces of a dresser that have come apart before fixing for a painted and raw wood refinishing

      Painting

      A picture of the damaged top of a dresser before it was painted and refinished.

      When I first looked at it, I was hoping I could do the whole piece in the trendy (and beautiful) raw wood refinishing look. Upon closer inspection on the top and sides I realized there was just too much damage to do the whole piece that way. I’ve seen some pieces in the combo pained/raw style and decided this would be a great one to try it with.

      A picture of the damage to the side of a dresser before it was refinished

      I used Rust-oleum Costal Blue for this piece. Although with a chalk pain I technically only need to do a single coat, I did two. I loved the rich an deep color that came from the paint. I also loved the contrast with the blue and the painted and raw wood refinishing look. The combination sets off each element more beautifully.

      A picture of an open can of rust-oleum chalk paint in costal blue over a tarp

      I painted with the grain with smooth long and even strokes, was careful not to let the paint pool or drip.

      A picture of the painting process of a dresser being refinished with rust-oleum costal blue
      A picture of the side of a dresser being painted in rust-oleum costal blue. It shows the depth and variation of the color.
      A picture of a dresser painted costal blue before the drawers are added.

      Stripping for a raw wood refinishing

      There’s a new trend to use oven cleaner to strip wood. Will it work? Technically, yes. Will spraying peroxide straight into your hair strip the color? Technically, yes. It’s basically the same thing. In my experience, oven cleaner leaves the wood dry and damaged.

      I prefer to use Citristrip over oven cleaner because it’s actually designed to strip wood and the other thing is designed to . . . clean your oven.

      A picture of drawers painted with Citristrip to do a raw wood treatment on them.

      When I use Citristrip I prefer to paint it on, put a plastic sheet or garbage bag over it to prevent it from drying out, and then let it sit overnight. I use a scraper to pull the rest of the stripper and gunk (that’s the technical term) off, and the drawers were almost done.

      A picture of drawers that have been stripped of their varnish to reveal the raw and natural wood underneath.

      The beauty of the raw wood look is that once you get the years of finish and wear off you can see the real beauty of the wood underneath.

      Light sanding

      After I stripped the drawers and cabinet door I used a light sand to even out all the tones. It was fast and easy, but worth it to get that beautiful, soft, and smooth finish. When I ran my hands over the drawers they had an almost buttery feel. I used a wire brush on the details, but the light hand sand gave the drawers and door a perfect look and color while still retaining the beautiful wood grain.

      A picture of a dresser that is painted and has raw wood finishing on the drawers before it's waxed.

      Waxing

      The final product is sealed on both the painted and raw portions with a Minwax furniture wax. The raw wood drank it in and ended with a really pretty natural exposed wood look. The painted wood got darker and deeper with the waxing. The piece just came to life with that final step.

      Waxing also ensures the color and finish will last.

      A picture of a hand holding a can of minwax soft touch finishing wax in front of a blue painted dresser.
      A picture of a hand applying wax to a dresser drawer.
      A picture of a coastal blue painted dresser that has been freshly waxed before the drawers and doors have been added.
      A picture of a dresser that has been freshly waxed and refinished with the painted and raw wood styles before the hardware has been replaced.

      Hardware

      A closeup picture of antique dresser hardware after it has been replaced on a refinished chest.

      Luckily with this piece the original hardware was in great shape and fit the piece well. So, I just replaced the same drawer pulls and knob.

      Done with the painted and raw wood refinishing!

      A picture of a dresser that has been redone with a painted and raw wood refinishing style.
      A picture of a dresser that has been painted and the drawers stripped to raw wood for a refinishing treatment.

      What do you think? Do you have a piece of furntiure that could use the painted/raw wood treatment?

      Corned beef and cabbage sandwiches – delicious!

      Mar 4, 2022 ·

      A picture of a corned beef and cabbage sandwich
      A picture of a corned beef and cabbage sandwich with a bun, sauce, cabbage, and pulled corned beef.

      Try these corned beef and cabbage sandwiches! I love the way this whole recipe comes together and you will too.

      Every year as we approach St. Patrick’s Day the stores start to put the corned beef briskets in the coolers next to the cabbages. This year, rather than serving your family dry corned beef and soggy cabbage, mix it up with these delicious sandwiches. The mayo is what makes them extra-yummy.

      Check out my web story about these amazing sandwiches!

      A picture of a pulled corned beef and cabbage sandwich open-faced as it's being assembled with potatoes in the background.

      Ingredients:

      Pretzel rolls

      Beef

      1 small/medium corned beef brisket

      3 ounces of beer (don’t worry it cooks off)

      Juice from packet

      Seasoning packet

      Cabbage

      1 medium head cabbage

      2 Tablespoons butter

      1/4 cup beer

      Celery salt to taste

      Mayo

      1/4 cup mayonnaise

      1 Tablespoon horseradish

      2 ounces heavy whipping cream

      1/2 teaspoon Worcestershire

      1 teaspoon mustard (dijon or stone ground)

      Pinch celery salt

      3 dashes Tabasco 

      A picture of a corned beef and cabbage sandwich on a plate laying open-faced with potatoes.

      Directions:

      In a Dutch oven or another pan with a tight fitting lid, add brisket, all juice, seasoning packet, and 3 ounces of beer. Cover the brisket with a single layer of cabbage leaves from your cabbage head (this will help steam the brisket and lock in the flavor).

      Cook at 300 degrees for 4-5 hours, checking fluid level half-way through to ensure no liquid is escaping. This “low and slow” approach will give you a fork-tender brisket that’s easy to shred. (You can also do this in a crockpot) Shred.

      Slice and chop the remaining cabbage. Sauté until lightly translucent in butter and 1/4 cup beer sprinkle on celery salt to taste. (Don’t overdo the cabbage so it adds a little crunch to the sandwich.)

      A closeup picture of corned beef and cabbage sandwich.

      Mix mayonnaise, horseradish, cream, Worcestershire, mustard, celery salt, and Tabasco.

      Lightly toast buns, and assemble meat, cabbage and mayo. Serve with potatoes or fries. Delicious.

      A picture of a sandwich sitting on a plate.

      Update: I still make these sandwiches every year and the entire family LOVES them. It’s so easy and just a delicious way to serve classic corned beef and cabbage.

      The secret to these corned beef and cabbage sandwiches are really in the sauce. Just like other classic sandwich combos the “special sauce” is in the special sauce, so don’t skip that part!

      Recipe for Spiced Goat Chops With Cumin, Garlic, and Paprika

      Jan 6, 2022 ·

      raw goat chops on cutting board
      Jump to Recipe

      raw goat chops on cutting board

      Goat meat is not typically eaten in the United States, but this recipe for broiled, spiced goat chops might just change your mind.

      Goat is not a common source of protein here in the US. We are a nation of predominantly beef and poultry eaters (Americans consistently rank as #1 in beef consumption worldwide). In fact, goat meat is so exotic here that it is difficult to find outside of specialty grocery stores. We are more likely to eat elk or bear than we are a goat. 

      The reasons for this are, as far as anyone can tell, purely cultural. Many Americans are descended from Europe where sheep, cows, and pigs were domesticated. While goat is, today, eaten in many parts of Europe, it is still more commonly consumed in South and Central America, Africa, the Middle East, Asia, Australia and New Zealand. 

      Goat Meat is Healthy

      It is a shame that we don’t eat more of it, because goat meat is delicious and healthy. It is considered a red meat but actually has less cholesterol and fat than chicken breast:

      • 3.5 oz of goat meat has about 143 calories, 3 grams of fat, and 75 mg of cholesterol. 
      • 3.5 oz of chicken breast has 165 calories, 3.5 g of fat, and 84 mg of cholesterol. 

      Goat Meat is Environmentally Friendly

      Not only is goat meat delicious, but raising goats is sustainable and more environmentally friendly:

      • Goats are “browsers,” which means they will eat shrubs and weeds in addition to just grass. 
      • Goats need less space to thrive than other forms of livestock. One acre of land will support 10-15 goats (one cow needs a whole acre of land to itself). 
      • Goats are more efficient and productive with their digestion. A female goat will produce more milk on less food than a cow. 

      Goat Meat is Sustainable

      In the US, goat milk products are all the rage: goat cheese, goat milk lotion, goat milk soap. But the meat is still a mystery to many of us. Without demand for their meat, male goats are often slaughtered young, since it is unprofitable to raise them to adulthood. They are simply used for breeding female goats in order to obtain goat dairy. 

      What this means is that goat meat is actually a “byproduct” of the goat dairy industry. And what THAT means is that it is a sustainable source of protein. 

      What Does Goat Meat Taste Like?

      Goat meat has a texture and flavor quite similar to beef, but with a little earthy sweetness. It is similar to mutton, but milder and less gamey.  

      How to Cook Goat Meat

      With all this in mind, let’s do our part to get Americans on board with eating goats. As I mentioned, basically the rest of the entire world eats this animal. There are hundreds of traditional recipes that incorporate local flavors and cooking styles. Ultimately, there are two main ways to cook goat: low and slow or quick cooking. The style you choose will depend on your cut of meat.

      Many cuts of goat respond well to slow cooking since it breaks down the chewy, tough connective tissue. The Caribbean and parts of Asia like to stew the legs and shoulders in curry sauce using pressure cookers. Our chops, however, do better over or under high heat for just a few minutes. 

      Spiced Goat Chops With Cumin, Garlic, and Paprika
      Pin
      Print

      Spiced Goat Chops With Cumin, Garlic, and Paprika

      Servings

      6

      servings
      Prep time

      15

      minutes
      Cooking time

      10-15

      minutes

      Ingredients

      • 1 lb goat loin chops (about 6 chops)

      • 2-3 tablespoons extra virgin olive oil

      • 1/2 tsp salt (or more to taste)

      • 1/2 tsp freshly ground black pepper

      • 1/2 tsp ground cumin

      • 1/2 tsp garlic powder

      • 1/2 tsp paprika (not smoked)

      Directions

      • Mix your olive oil and spices in a bowl. In a shallow dish, pour the mixture over your chops and rub it into the meat so it is evenly coated.

      • Allow your meat to marinate at least four hours and up to overnight.

      • Take your chops out of the fridge and allow to come to room temperature for about two hours.

      • Turn on your broiler (500 degrees Fahrenheit)

      • Place your chops on a lined sheet pan about 6 inches from under the broiler. 

      • Broil for 10-12 minutes, until the internal temperature reaches 145 degrees (medium rare).

      • Rest the chops for five minutes and then enjoy. 

        These chops pair exceptionally well with whipped mashed potatoes or roasted, sweet root vegetables (turnips, onions, and sweet potatoes are very good). 

        While I highly encourage you to find a local source of goat meat, I understand this is easier said than done. If you are having difficulty finding goat chops, this recipe is easily applied to pork or lamb chops. 


        What Grows Well In Colorado?

        Dec 9, 2021 ·

        Homesteading in Colorado can be a little challenging, thanks to the bipolar weather and high elevation. Nonetheless, the state is home to nearly 32 million acres of farmland, predominantly turning out cattle, dairy, wheat, hay, and corn. Colorado also ranks in the top ten for production of barley, millet, sorghum (animal feed), sheep, lambs, and peaches. 

        But what about us homesteaders? We are not looking to churn out massive amounts of product, just enough to get by. And we can’t really survive on millet and peaches (maybe we could, but I don’t want to try). So, what are our options? 

        Luckily, there are a few tried-and-true crops that homesteaders can grow on urban or rural farms. Hardy fruits and vegetables can be successfully planted even in the mountains, despite the high altitude, harsh weather, and poor soil. 

        First Things First: Prepare Your Soil 

        The soil at higher elevation is usually alkaline, and most crops prefer neutral or slightly acidic soil. It is also rocky and can have a lot of clay, which can make it difficult for plants to take root. It will be well worth your time to take a few extra steps to enrich and soften your soil before planting. 

        How to Amend Soil in Colorado

        Determine What Soil Type You Have

        There are generally three types of soil in the mountains: clay, sand, and rock. To determine which type you have, squeeze a handful of it. If it clumps together and feels sticky, it is clay soil. If it breaks apart and is crumbly, you have sandy soil. If there are small rocks present, you have rocky soil. 

        Add Organic Material

        Add ⅓ of organic material like compost or manure* to ⅔ of the existing soil. 

        If you have sandy or clay soil, you will want to use a tiller or shovel to break up the soil and incorporate the organic matter. Till it at least 8 inches, but ideally 12. 

        If you have rocky soil, rake small rocks off the surface with a straight rake. Then, break up the soil, removing any large rocks as you go. You may need to use heavier equipment or break the soil up by hand, since the rocks can break the tines on your tiller. 

        *Use manure that is at least one year old to avoid adding too much salt to the soil.

        Add Topsoil

        Topsoil is a blend of soil and compost. Sprinkle an even layer over the top of your newly tilled soil and organic matter. 

        Mulch 

        This will technically be done after you plant, but you will want to have mulch on hand to help retain moisture.

        What to Plant in Colorado and When

        With your soil now ready, you can look forward to planting your first seeds. The kind of seeds you plant and will depend on the weather. Some plants do better when planted in the cool, wet spring. Others are best planted when the weather is consistently warmer. 

        Early Springtime Planting

        Colorado’s springtime tends to be cool, with persistent sleet and snow. Even after the last frost has passed, the weather remains relatively cool and damp. This climate is actually ideal for growing greens, like kale and spinach. 

        Cruciferous veggies, in general, do very well here when planted in the spring: chard, Brussels sprouts, and cauliflower are all good choices and will give decent yields.

        Onions, potatoes, leeks, and herbs like parsley, rosemary, and mint also do quite well when planted in spring. 

        Late Springtime/Early Summer Planting

        SQUASH. Squash is not picky, and it does particularly well in Colorado’s dry climate. Pumpkins, zucchini, spaghetti squash, and pumpkins are all great options to plant when the warm season arrives. 

        Fruits to plant in the warm season: tomatoes, cucumbers, eggplant, and melon. 

        Don’t Forget the Sunshine

        You will, of course, need to ensure regular watering and plenty of sunlight for your plants to grow. Shady gardens, unfortunately, have additional challenges when growing food. If your garden is heavily shaded, you may want to opt for growing your plants in containers where they can be moved, as necessary, to ensure optimal light. 

        Luckily, most of the vegetables we mentioned can also be grown in containers, as well as many more since you will presumably be working with potting soil.

        A Final Note

        There is nothing more rewarding than growing your own food. You develop a deeper connection with and appreciation for what is going into your body when you have sweat and sworn over growing it. That appreciation extends even further when you have relied solely upon it for nourishment. 

        I encourage you to give growing your own fruit and vegetables a try, even if you’re not a homesteader. Please let me know about your experience in the comments! 

        Happy Planting!

        The perfect puffy pancakes recipe

        Nov 5, 2021 ·

        A stack of puffy pancakes dripping with syrup

        Perfect puffy pancakes straight from the skillet to your mouth

        A stack of puffy pancakes topped with a pat of butter being drizzled with warm maple syrup.

        For me, the perfect pancakes are about the size of my palm, and I love puffy, fluffy, light pancakes. I want them like little pancake clouds. Here’s my personal recipe for just that.

        These pancakes require the extra step of separating egg yolks from the whites, but it’s so worth it for the outcome. Try them once and see.

        The whole process only takes about five more minutes than if you just added eggs straight to your batter, but beating the egg whites into a meringue and folding it in adds a ton of loft to your batter.

        Check out the web story, which includes video, for my favorite pancakes here!

        Ingredients: 

        Puffy pancake ingredients laid out to start the process, flour, baking powder, salt, milk, eggs, vegetable oil, and sugar
        • 1 1/4 cup flour
        • 1 teaspoon salt
        • 2 teaspoons baking powder
        • 1 cup milk
        • 1 Tablespoon vegetable oil
        • 2 egg yolks
        • 4 egg whites
        • 2 Tablespoons sugar 
        • Butter to grease your skillet, and to top your pancakes
        • Syrup – the good kind – this is worth splurging on

        How to make perfect puffy pancakes

        Mix all dry ingredients except for the sugar together in a large bowl.

        Add milk, oil, and egg yolks to dry ingredients and mix. 

        In another medium-sized bowl, using clean beaters, beat egg whites and sugar until stiff peaks form.

        Puffy pancakes egg whites and base batter in two separate bowls

        Fold 1/3 of the egg whites into the larger batter and combine. Next, fold the second 1/3 of the egg whites into the batter more gently until just combined. Finally, fold the final 1/3 of the egg whites into your batter very gently, until the streaks are barely gone. 

        The start of the folding process with the batter and egg whites for the puffy pancakes
        Continuing to fold egg whites and batter for puffy pancakes
        Showing the fluffy consistency of the batter for puffy pancakes

        Using a 1/2 cup measuring cup, pour approx 1/4 cup dollops onto a prewarmed skillet greased with butter. Once you pour the batter, wait a few minutes but watch them constantly. Flip when bubbles just start to form in the top. The bottom should be golden brown.

        A puffy pancake on the griddle from the side

        Makes 12 pancakes depending on how big you make them.

        Puffy pancake tips

        This recipe works for a family of four for a big weekend breakfast or is a great one to make for two or three weekdays to grab a pancake and run for my two boys.

        A stack of puffy pancakes before being drizzled in syrup

        If you have a bigger family, like six kids, (Katie) you might want to double this recipe. 

        Start with a pre-heated skillet to start your pancakes.

        I like to give the two extra egg yolks to our dog, but the egg ratio really makes this batter work. 

        Serve these pancakes with heated syrup to pour over your pancakes. Also, I like to add a pat of butter to the top and let the warm syrup melt the butter.

        Farm Sayings Make So Much More Sense Now

        Oct 29, 2021 ·

        chicken with thought bubble

        Obviously, many of the idioms popular in everyday speech come from our roots as an agrarian society. People who have never seen or raised chickens casually comment on counting them before hatching or what they’re like when decapitated.

        I, too, have used farm sayings all my life, even when I lived in a highrise in the middle of a city. However, now that we have moved to a small urban farm, I have a whole new appreciation for these common turns of phrase.

        Kicked the bucket 

        There’s the literal “kicked the bucket,” as in a foot met a receptacle, and then there’s the figurative “kicked the bucket,” as in somebody died. I always thought it was strange to say that someone passed on in such a casual and flip way. 


        Now that I go out in all weather to milk my goats twice a day, I deeply understand what “kicked the bucket” means in a literal sense. It always seems to be the last goat of the day who will do it, and it’s always once my filled bucket is about to spill over the brim. She’ll kick and slosh her and everyone elses’ milk all over the floor while I hit the roof. 

        This will happen because she’ll run out of grain, or a fly will land on her wrong, the breeze will imperceptibly change direction, or for no reason at all – and the milk, the bucket, and the last shreds of my patience will all go flying. I now have an appreciation for the murderous frustration that accompanies a bucket full of milk hitting the ground. 

        I have no idea how it all started, but have a very specific picture in my head.

        I imagine a farmer walked into the kitchen after a long day of backbreaking labor. His ornery cow finally toppled the bucket one too many times. He came in just long enough to grab a bag of salt and head back out to the barn. Dinner was getting cold on the table. His wife saw the fury behind his eyes and heard the single shot ring out a few minutes before. “What happened, John?” she asked meekly. “Daisy kicked the bucket,” he replied in a clipped and measured way. They both knew exactly what he meant.

        I feel you, Farmer John. 

        Don’t count your chickens before they hatch

        I am the queen of improperly counting pre-hatched chickens. By now, I should know better. After a few years of carefully tweaking the incubator to the perfect environment to optimize our “hatch rate,” I can still be off. My incubator is full of temperature gauges and hydrometers. I have a google calendar solely dedicated to what eggs are in the incubator at any given time.

        I “candle” eggs at regular intervals to track embryo development. “Candling” means shining a very bright light through the eggshell while in a dark room to see what’s happening inside. This process used to involve literal candles, but I have a high-lumen led flashlight-like device designed specifically for this purpose. 

        Even with all that technology, the calendars, the spreadsheets, and modern tools at my disposal, sometimes chicks die. Being born is arduous work, and not everyone makes it. Sometimes they’ll start the process and pip a small breathing hole in their egg and not have the energy to continue. Sometimes they don’t even make it that far. It sucks when you have an egg that you think is about to pop and it just . . . doesn’t.


        No matter how much you set up a situation for success, sometimes it won’t come together. Don’t count your chickens, but rejoice in the fuzzy peeping chicks once they’re darting around. 

        Bleeding like a stuck pig

        Woooo, buddy. This one is a “cringe emoji” meets “vomit emoji.” All I’ll say is that this is a phrase for a reason. We all learn things that we wish we could go back and not know.

        We had two pigs. One died of natural causes, which was heartbreak in itself. For the other, we hired a “mobile butcher” to come out with his refrigerated truck and handle the slaughter. Kudos to my fantastic neighbor who found a mobile butcher; by the way, I didn’t even know that was a thing.

        I’ve hunted birds, and Mark (my husband) has hunted big game for years, but a giant domestic pig was different. 

        I didn’t name our pig because we knew her purpose was for food when we got her. We referred to her as the “Oreo cookie pig” as she was black and white. When the mobile butcher came out, I gave Oreo cookie pig her favorite grain. My hopes for her were to primarily have a great life, and secondarily, have a quick and painless death, which is why I wanted a professional. Although Oreo cookie pig was very mean, I still cried when the butcher pulled in.


        Anyway, suffice it to say, I am so glad to have hired someone who knew what he was doing to handle it. Oreo cookie deserved that. And the phrase “bleeding like a stuck pig” is a thing that people say which is both metaphorically and literally correct. Yikes.

        Birds of a feather flock together

        I was interested to learn that no matter how they’re raised, “birds of a feather flock together” is an accurate phrase. Last year I had baby ducks, chickens, and guinea fowl that were all raised together. They now share our large bird outbuilding, affectionately named “Big Jim’s Poultry Palace” (after my late Dad.) 


        All the birds will run around together and sleep in the same building, but it’s funny to watch them out in the pasture. Somehow, even though they all get along fine and grew up together, they know which species they are. They stick with their own kind.

        I have no idea what about them evolutionarily makes them know “I am a chicken” or “I am a duck,” but even as I write this and look out the window, the six ducks are all lying in a big pile together while the chickens orbit them, pecking the dirt. They all keeping to their respective species, even when sharing a yard.

        Horny as a goat

        If 17-year-old boys were an animal, they would be male goats in “rut.” The “rut” is a time during the year, usually fall, where uncastrated male goats get a surge of hormones that make them ready to breed. It’s a kind of a borderline suicidal single-minded maniacal obsession with sex that grips their entire existence.

        They get stinky and so incredibly dumb I’m often amazed any goats are still alive on the planet. If you’ve met a male goat in rut you would think they would all have been eaten by predators and none would have been left to perpetuate the species. Of course, I’m surprised most 17-year-old human boys make it out alive, too. 

        We’ve even had one buck who spectacularly broke his leg trying to jump a fence to get at the girls. He just stood there with his leg jutting out sideways, pretending like nothing happened. Horny goats will ignore barking dogs and sometimes forget to eat or drink they’re so hopped up on hormones.

        Every fall in the goat pasture is like a scene out of Night at the Roxbury. It’s any of the cliche 90s or early-2000s clubs named with a single word like “Dazzle,” “Lime,” or “Monarch.” These boys are all ordering bottle service they don’t need and can’t afford, hoping that some young woman will sit with them for a few minutes in exchange for a vodka soda.

        Running around like a chicken with its head cut off 

        It’s such a visual phrase, but so true. Unlike the pig, Mark and I dispatch with our own poultry. Once decapitated, chickens are not in any pain, but their nerves will still twitch. It’s a kind of chaotic jerking that is unnerving (to coin a phrase) but indescribable in any other way. I now fully understand why it became a common saying, there’s nothing quite like it.

        Walking on eggshells 

        Until we moved here, I’d never walked on eggshells. Legos? Sure, ow. Pebbles? Yep. I even once walked across hot coals once at a corporate retreat. That was a dumb idea, and I wonder how they got liability insurance, but I digress.

        I grew up with a song about walking on broken glass, many thanks to Annie Lennox. Over the years, I likened situations to walking on eggshells without ever having done it. 

        That all changed a year ago. I was cooking in our kitchen and heard a goat scream. It wasn’t a “horny like a goat” scream; it was a danger or pain scream. Like human children, there are different kinds of goat yells, and you learn them all.

        I flew out the door and threw on the muck boots I keep on the deck. Of course, as I had one and three-year-old boys at the time, random things were often deposited in the bottom of my boots. This time it was the eggshells that had been previously perched at the top of our compost pile.

        I knew precisely what it was as soon as I felt the crunch underfoot. Unlike legos or those evil little stabby goat head (also aptly named) stickers, walking on eggshells isn’t immediately painful. If your foot falls correctly, there’s something almost satisfying about the crackle, like breaking that thin ice sheet that covers puddles of water after a snowfall.

        Because I threw them on at a dead run, there was no time to pour the eggshells out of my boots amidst the goat screams. Walking, or in my case running, on eggshells is not just stabby stabby stabby, like you would expect. There are two or three footfalls where it doesn’t hurt at all; it just feels crunchy until a shell piece shifts at a right angle and stabs your foot. Even then, it’s a blunt pain, not like a sliver of glass. After three or four stabby steps interspersed with the painless ones, you learn how to step gingerly, almost on the sides of your feet. 

        What hurts most about running on eggshells is not when they stab you; it’s that you wonder if this will be a step that hurts every time your foot is about to strike the ground. It’s an anticipatory psychological pain.

        Weirdly enough, the physical act of walking on eggshells perfectly embodies the idiom in a way I never even considered. It’s that ginger footfall and fear of repercussion that comes with randomized and unpredictable pain. Whoever used the phrase the first time definitely had a toddler fill their boots with eggshells. 

        The screamer was fine, by the way; he just got his head stuck in a gate. Chalk it up to his irrational horniness, like a goat. 

        Handle Aggressive Chickens

        Oct 8, 2021 ·

        brown hens looking angry

        How to Deal with Aggressive Chickens

        Most people don’t think of chickens as being overly aggressive. They mostly just wander around their coup making weird noises and pecking at the ground. But what happens when they start pecking at each other or, even worse, at you or your children?

        Why Chickens Become Aggressive

        There are a few reasons why a chicken might become aggressive. Certain breeds, for example, are more prone to being territorial. Hormones and a stressful environment may also be to blame.

        The most important thing to keep in mind with chickens is that they are terribly stupid.They have no ability to make plans or hold grudges, so pecking at you is hardly personal. That being said, it can be very irritating when you are up at the crack of dawn having to deal with an ungrateful turd of a chicken that literally bites the hand that feeds it.

        So What Can I Do If My Chicken Is Biting Me?

        Luckily, there are ways to deal with an aggressive chicken who ignores the, ahem, pecking order. The following is my favorite, because it is so easy and the end result is incredibly satisfying.

        Recipe for Homemade Chicken Stock
        Pin
        Print

        Recipe for Homemade Chicken Stock

        Servings

        4

        servings
        Prep time

        30

        minutes
        Cooking time

        40

        minutes
        Calories

        300

        kcal

        Equipment Needed: Extremely sharp knife Large stock pot Cutting board

        Ingredients - Chicken Stock

        • 1 whole chicken carcass

        • 2 celery stalks

        • 2 Carrots

        • 1 yellow onion

        • 1 head of garlic

        • 4 sprigs fresh thyme

        • 2 whole cloves

        • 8 cups of filtered water (enough to completely submerge the chicken)

        Directions - Make the Stock

        • Humanely kill your asshole chicken and remove the innards and the feathers.

        • Separate out the breasts and thighs and remove the skin. Put these in the refrigerator for later.

        • Place the chicken carcass into a large stock pot.

        • Roughly chop your celery, carrots, onion, and garlic. You do not need to remove the paper from the onions or garlic. Put the vegetables into the stock pot with the chicken and cover completely with water.

        • Add your thyme sprigs.

        • Bring the water to a boil and then reduce the heat to low. Cover, and let it simmer for 6-8 hours. If the water level is getting too low, you can add more.

        • Strain out your stock into a heat-safe container. You can use it right away or save it for another day. It will keep up to two weeks in the refrigerator and up to 3 months in your freezer.

        After Stock is made, move onto the soup!

          Homemade Chicken Noodle Soup
          Pin
          Print

          Homemade Chicken Noodle Soup

          Servings

          4

          servings
          Prep time

          30

          minutes
          Cooking time

          40

          minutes
          Calories

          300

          kcal

          Now that you've made this wonder

          Ingredients for Homemade Chicken Noodle Soup

          • 2 chicken thighs and 2 chicken breasts

          • 1 lb egg noodles

          • 2 stalks of celery

          • 2 carrots

          • 1 yellow onion

          • 8 cups of the wonderful chicken stock you've just made

          • Kosher salt to taste (1 tablespoon or so)

          • Freshly ground black pepper

          • 2 bay leaves

          • 2 tsp of chopped fresh thyme (or 1 tsp dried)

          Directions for Homemade Chicken Noodle Soup

          • Heat a large pot over medium heat.

          • Finely mince your celery, carrots, and onion.

          • Add a tablespoon of olive oil to the pot and sauté the vegetables for three or four minutes, until softened.

          • Put in the chicken breasts and thighs and immediately cover with the 8 cups of chicken stock.

          • Bring to a boil and then reduce heat to medium.

          • Add the bay leaves.

          • After 30 minutes, check the chicken. If it is cooked through, remove it, and shred the pieces with a fork. Leave the thigh bones out, and return the shredded chicken to the broth.

          • Add your egg noodles and cook for another 20 minutes, or until they are soft.

          • Add the salt, pepper, and thyme.

          Enjoy your piping hot and delicious bowl of revenge with a crusty baguette or fresh salad. 

          • Let me know how you like the recipe in the comments below!

          A Recipe for Homemade Goat Milk Lotion

          Sep 20, 2021 ·

          A bottle of goat milk lotion

          Goat milk lotion may not be something you’re aware of, but you should be. When it comes to natural skincare, goat milk is the holy grail of ingredients. It is naturally high in skin plumping nutrients and has the same pH as human skin, which means it is safe for sensitive skin.

          The many beneficial properties of goat milk make it ideal in homemade cosmetics, like soap and lotion. This recipe is my go-to for a hydrating formula that is moisturizing and non-greasy. 

          Lactic Acid Locks in Moisture

          Goat milk contains lactic acid, an alpha hydroxy acid (AHA) that has been shown to increase the production of ceramides. Ceramides are a class of waxy molecules known as lipids. They make up 50% of your skin’s outer layer and act as a natural barrier.

          Lactic is also a natural humectant and provides gentle exfoliation and hydration.

          Probiotics Balance Your Skin

          The probiotics found within goat milk work to balance your skin’s natural flora, resulting in more even skin tone that is less prone to breaking out or over-dryness. 

          The Vitamin A found in goat milk acts as a gentle exfoliant while protecting your skin from sun damage and slowing the breakdown of collagen. 

          Making Lotion With Goat Milk

          This recipe follows a similar procedure to standard lotion making, which is essentially an emulsification of oil-based and water-based ingredients. This recipe incorporates raw goat milk as part of the water-based ingredients. 

          The most important part of homemade cosmetics is keeping everything as clean as possible. Sterilize your equipment and use a naturally-derived preservative (see below) to ensure your final product is shelf-stable.

          Homemade Goat Milk Lotion
          Pin
          Print

          Homemade Goat Milk Lotion

          A creamy, nourishing lotion made with raw goat milk, shea butter, and essential oils.

          Ingredients

          • 9 oz distilled water

          • 9 oz raw goat milk (you can use frozen, just let it thaw)

          • 1.25 oz emulsifying wax

          • 4.5 oz oils (below is what I use)

            • 1.75 oz coconut oil
            • 1.0 oz olive oil
            • 1.75 oz almond oil
          • 1.25 oz shea butter

          • 0.5 tsp Optiphen (a preservative that keeps mold and other yuck from growing)

          • 0.5 tsp essential oils

          Directions

          • Begin by washing everything in hot, soapy water. Make sure you wash your immersion blender, too!

          • Combine coconut oil, almond oil, and shea butter in your pot. Heat them until just melted.

            IMG_8767
          • Add the emulsifying wax to the melted oil mixture and heat everything until it is melted.

          • Combine the oil and wax mixture with the milk and water. Blend everything with the immersion blender for 4-5 minutes until the mixture is slightly thickened.

            IMG_8772
          • Add Optiphen and your essential oils. Blend for 1 additional minute. The mixture will thin back out at this point-that's okay. 

          • Pour mixture into the containers of your choice and allow to cool. The mixture will thicken back up at room temp. 

            IMG_8775

            And that’s it! This recipe makes about 24 ounces of lotion-enough for you and a few deserving friends. Let me know how the recipe works for you in the comments!

            Homemade Goat Milk Soap Recipe

            Aug 27, 2021 ·

            artisanal goat milk soap lined up on cutting board

            Milk-based soaps are popular for their creamy lather and nourishing qualities. Goat milk, in particular, makes an excellent bar of soap. After all, soap involves two basic ingredients: fat and lye. Goat’s milk is rich in both saturated and unsaturated fats, as well as skin-supporting nutrients like selenium and lactic acid.

            I am a big supporter of maker’s markets, farmer’s markets, and trade shows. They offer a wonderful glimpse into the creativity and enterprising nature of human beings. They also encourage sustainability, which is a core value of the urban farmer.

            A staple of these markets is the Artisanal soap stand. Colorful, mis-matched slices of sweet-smelling loveliness are displayed like baked goods: lined up on wooden boards or stacked neatly in baskets. I love the soap stand. I could spend a silly amount of time smelling soap and asking about ingredients.

            That being said, a bar of goat’s milk soap at one of these markets might set you back as much as $12. That is a lot of money for something that is not meant to last. Don’t get me wrong: I have spent my fair share on homemade soaps, and it is well worth it for the joy it brings me.

            When I am feeling more pragmatic, however, I remember that I do know how to make soap. Bonus: I know someone who raises goats. 

            The LaMancha goats my friend, Kelly, raises are known for their high quality milk, which is rich in butterfat. Kelly uses it in all sorts of food recipes, especially cheese (with which she has developed a love-hate relationship after her #homegrownyear).

            La Mancha goat milk also does nicely in cosmetic recipes, including bar soap. 

            The following is my recipe for simple, unscented goat milk soap. If you are a seasoned soaper, you can certainly factor in other fats and fragrances into your soap using an online calculator, like this one. And yes, you can still make it even if you don’t have access to fresh goat milk. You can buy powdered goat milk online or at most grocery stores and water it down according to the instructions.

            Homemade Goat Milk Soap Recipe
            Pin
            Print

            Homemade Goat Milk Soap Recipe

            Yield

            2 lbs (approx 12 bars)

            servings
            Prep time

            30

            minutes
            Cure Time

            2-6

            weeks

            The following is my recipe for simple, unscented goat milk soap. If you are a seasoned soaper, you can certainly factor in other fats and fragrances into your soap using an online calculator, like this one. And yes, you can still make it even if you don’t have access to fresh goat milk. You can buy powdered goat milk online or at most grocery stores and water it down according to the instructions.

            Ingredients

            • 9.6 oz animal tallow*

            • 9.6 oz extra virgin olive oil

            • 8 oz virgin coconut oil

            • 4.8 oz castor oil

            • 12.16 oz frozen goat milk

            • 4.5 oz sodium hydroxide (lye)

            Directions

            • Prepare the Lye Water

              Place your frozen, pre-weighed goat milk into a heat safe pouring container (I use a Tupperware pitcher with a lid). Carefully pour in your lye flakes in 2-3 batches, using a potato masher to mix the lye into the milk slush. When all the lye has been added and mixed in, set the milk mixture aside. 

              *This can take a little time and elbow grease, but it is worth it to start with the frozen milk so you don't scorch it. Lye reacts with liquid and heats up quickly, so freezing your milk helps to slow the process down.

              As it reacts with the lye, you may notice that the milk changes color. Orange or light tan is okay, but you will need to try again if it gets to a dark brown. This means the milk has been scorched and the sugars are burned. 

            • Melt the Oils

              Weigh out your fats and put them in a heat safe glass or stainless steel bowl. Heat the oils over a double boiler until they are fully melted and reach a temperature of about 110-125 degrees.

            • Blend

              On a clean, flat surface, pour your lye solution slowly into the melted oils. Blend using your immersion blender on the low setting at first, taking care to protect your eyes and hands. You will want a long sleeve shirt on, too. When the oils and lye begin to incorporate, you can switch to the higher setting on the stick blender. Mix until you have reached a thick trace that looks like pudding. 

              soap batter at thick trace
            • Mold

              Pour the soap batter into your loaf mold. I like to cover mine with a little cardboard and wrap it in a dish towel to encourage an even cure, but you don’t have to do this. Wait at least 24 hours before un-molding. 

              soap in silicone loaf mold
            • Un-mold and Cut Your Soap

              After 24 hours, you can check to see if your soap is hard enough to un-mold. Tip it out on a cutting board and slice into even bars. Store the bars in a cool, dry place. Let them cure for at least two weeks, then you can use them.

              loaf of soap ready to cut

              These gentle, unscented bars are safe to use on children and sensitive skin types. They keep forever and each batch makes something like 12 bars of soap, so you’ll be good to go for a while. Of course, I will still likely be visiting the artisanal soap stand at the next farmer’s market. I still need pretty soaps for the guest bathroom. Happy soaping!

              It’s ok to turn it off sometimes

              Aug 20, 2021 ·

              Man, it has been a WEEK. As a Mom of toddlers, I realize I say this most weeks. My life is like that meme going around – Adulthood is saying, “things will slow down after this week” every week until you die.

              It feels that way, though. The news has been depressing, at best. Pandemic news and devastating stories from foreign countries abound. It’s easy to get stuck in the doomscrolling downward spiral and hard to not feel constantly compelled to consume news every minute.

              Up-to-the-minute news all the time?

              Even escapism seems to draw me back into current events. Ads on podcasts say “staying up-to-date on the news is more important than ever!” As if it’s a truth we all just accept. Yet, is staying constantly informed every second more crucial than ever, or is it just making us crazier than ever?

              For me, the time has come to let go of the idea that I need to know everything all the time.

              I used to think that being the most unceasingly informed person had virtue – no longer. I prided myself on an encyclopedic knowledge of current events without an awareness that it was wearing down my psyche. That doesn’t mean prolonged willful ignorance is acceptable either; it just means I am now permitting myself to turn it off.

              The confluence of “justifiable distractions” – Twitter, the 24-hour news cycle, the phones (always the phones) – seems to make it impossible to unplug. This week I noticed it particularly with the news. I started getting empathy nightmares of trying to get my children out of a wartorn and dangerous situation. On the one hand, it’s vital that I, and my fellow citizens, know what is happening across the world. But digging in and holding onto the news so tightly that it manifests in my subconscious is helpful to no one.

              It’s too much

              Me having nightmares of trying frantically to get my baby across barbed wire fences doesn’t help the woman experiencing that with her own baby. Internalizing issues I can’t affect or control make it so I’m unable to make a clear-eyed assessment of places where I can make a difference. With a vast firehose feed of information, it’s easy to become overwhelmed to the point of drowning paralysis.

              So, this weekend will be a slew of frivolous posts about goats and chickens and ducks and babies – maybe a few apple trees that are ready to unload their branches. Not because I don’t care, but because I do.

              The #HomegrownYear – Part 1 – Starting the thing

              Aug 4, 2021 ·

              First, some numbers –
              Total weight lost: 82 pounds
              Chickens slaughtered by humans: 21
              Chickens murdered and eaten by pigs: 7
              Zucchini zoodled and frozen: +/-250 pounds
              Tomatoes canned: +/- 750
              Deer shot by Mark: 2
              Pigs who died of natural causes: 1
              Pigs who were slaughtered and consumed: 1
              Freezers that were full of meat and turned off by toddlers who snuck into the garage and flipped the switch: 1
              Greenhouses built: 1
              Greenhouses actually utilized: 0
              Goats purchased specifically for the challenge: 2

              Welp, I did it. I just successfully completed the Homegrown Year Challenge. If you haven’t read or heard about it, one of my best friends challenged me to live off what we produce on our small urban farm (including what we hunt and fish elsewhere) for an entire year. I started August 1, 2020, and as of July 31, I did it.

              First off, I did it. I’m not someone special or uniquely talented at this kind of thing. Besides starting with a slightly greater than average love for gardening, some goats and chickens, and the type of reckless stubbornness for something so bizarre, there’s no real reason this would be the kind of thing I would or could do. I didn’t grow up on a farm or go to school for agriculture. It’s just a hobby, a hobby that has now fed me for an entire year.

              For those who are here solely for the upshot – I lost a total of 82 pounds eating a LOT of goat cheese, meat (mostly deer), eggs, and veggies. Physically and emotionally, I feel healthier than I can remember since childhood and now have a completely different view of life, food, and health. Not that I want to sound like a crossfitter trying to evangelize and make you come with me to pick up tractor tires in the parking lot behind a strip mall. The Homegrown Year was THE HARDEST possible way to lose weight imaginable. Not everyone should do it, but also, if I can do it, anyone can.

              Like many great things, it started as a crazy dare fueled by wine. My friend Emily and I were on a wedding trip in Napa, CA, with many beautiful local meals. But everything served brought my mind back to the small-batch foods we make on our small urban farm. All the cheeses were delicious, but I had to mention MY cheeses. The produce was fabulous, but the veggies I was growing were so special, and on and on. I don’t know if Emily dared me to live off my farm to shut me up or out of intrigue – but after her suggestion, we spent the remainder of the weekend mulling over this very odd but fascinating idea. Could I do it?

              That wedding was in August of 2019. I gave myself almost all of 2020 to prepare. Our garden quadrupled in size, we had a greenhouse and a “poultry palace” built. We added new, bigger producing milk goats to the herd. I submitted a list of “rules” to the “rules committee” (my husband and Emily), and we hammered out the details.

              By the way, there’s no way I could have done this without my husband, Mark. When confronted with a wife explaining why she wants to live off their small urban farm for a year, not many husbands would enthusiastically embrace the idea. He jumped in, and although he and our sons didn’t join in the challenge themselves, Mark was the main source of meat (HA) and lovingly prepared Homegrown Year-compliant meals. There’s no question part of the upside for him was that he could now argue hunting and fishing trips were “for me,” but deer was my primary source of protein.

              I announced my intention to try this weird thing in January of 2020, and once writing it out loud, I was committed. Despite the pandemic (and sometimes because of it), we kept preparing. On August 1, 2020 – I started. The first days and weeks were HARD. I had planned to wean myself slowly off caffeine and junk food but never quite managed it. Every day I thought, “well, I can start preparing my body tomorrow.” Yet, time marches forward, and all of a sudden, it was the day before. It was like preparing for a marathon by not running.

              I got sick. Very sick. I’ve never been in a physical withdrawal before, but I was experiencing all those symptoms. Headaches, shaking, an inability to think, exhaustion, and nausea punctuated the first few weeks. Although I had a few chickens frozen at that point, Mark hadn’t yet shot a deer, so I was on almost entirely fresh veggies from the garden. I went overnight from a coffee, wine, and cocktail drinking garbage eater to eating only fresh veggies, eggs, cheese, and drinking water. Although it sounds great, the constant pounding in my head reminded me that I had approached this wrong. So wrong.

              It was a rough start but got better with time. I also started to utilize the bartering provisions in the rules to get some of the items I couldn’t produce myself. One of the first lessons underscored by the Homegrown Year was that although it is possible to go it alone, it sucks. No man is an island. The number of people across the country who supported me in this weird endeavor is the most humbling part of it.

              People supported me by growing things, fishing, hunting, raising animals, picking, canning, fermenting, pickling, scavenging, tapping maple trees, and shipping boxes all over the country. Individuals I have never met put boxes in the mail to me; I was amazed. Others supported me by facilitating introductions to producers, sharing my crazy story, texting or tweeting me words of encouragement, or even just meme farming (we have a rowdy Facebook group – join it.) One of my besties, Matt, came for the start of the year with cameras in tow to make videos and take photos. Friends in media and those with constituencies of their own told their friends, wrote beautiful pieces, suggested my email newsletter, or had me on their shows. The kindness and support of others was overwhelming.

              The #HomegrownYear was conceived as a kind of self-reliant challenge that managed to underscore how much life is really just a team sport.

              I did an interview early on with my friend, Guy Benson (at whose wedding this whole idea hatched) and a coffee grower in Hawaii named Bill Martin (visit his site and buy things here) heard the interview. He contacted me and offered to send coffee. After nearly a month sans the magical beans that fuel my life, it was almost a “tears of joy” moment at the mere prospect. Although Bill isn’t a huge goat cheese fan, he still sent a box that contained coffee, chocolate, and some dried pineapple. There are strict restrictions on what can be mailed to Hawaii, no produce, so he accepted my paltry freeze-dried cheese offerings. I remember the moment I saw the box from Hawaii on our front porch. It felt like Christmas morning felt at 5-years-old. Santa is real, his name is Bill Martin, and he lives in Hawaii.

              As it went on, more people heard about the challenge, and the food diversified, but the base ingredients mainly stayed the same throughout. Zucchini grows well in Colorado and is a neutral, easy to store, and bulk-adding vegetable. There are many ways to keep zucchini, but I found “zoodling” (spiralizing) it, squeezing out the excess liquid, vacuum sealing, and freezing it to be the best way to store the massive quantities I had to put up to survive. With the zucchini, I tried freeze-drying chips, fermenting it, and even dehydrating it – but just the frozen zoodles seemed to work best.

              Friends joked that the challenge was more of a “zucchini cleanse” than anything else, and they weren’t wrong. Although the start was a shock to the system, the challenge was underway at a good clip once I got over the initial pounding in my head, exacerbated by days of self-doubt. I had no idea what struggles were to come.

              DIY Kitchen Cabinets: Farmhouse Style

              Jul 14, 2021 ·

              before after paint

              DIY Kitchen Cabinets 

              When it comes to kitchen upgrades, you have a few options. Some of the more expensive endeavors may involve new countertops, appliances, or tile flooring. But before you invest in any of these, consider your cabinets. Refinishing cabinets with new hardware and a fresh coat of paint can be a simple and cost-effective way to revive a tired or outdated kitchen.  This is a quick guide for DIY Kitchen Cabinets in a Farmhouse Style, let’s get started! 

              You may have heard horror stories about DIY kitchen projects, especially the cabinets: so much cleaning, so much sanding, so much priming! And while your project will, inevitably, involve a little time and elbow grease, it doesn’t have to be overly complicated, see my previous exploits. When done the right way and with the right attitude, it can be a fun and satisfying project that includes the whole family. Once you finish the kitchen, you may even find yourself scanning the house for other furniture to refinish! 

              In this tutorial, we will be refinishing cabinets to have a Modern Farmhouse feel. However, the same steps can be applied to any color or finish of paint! 

              What Are Some Modern Farmhouse Paint Colors?

              Before you get started, you can have a little fun choosing your paint. Farmhouse colors are traditionally soft, muted tones that reflect the beauty of nature. We will be opting for a soft, slightly off-white color in a satin* finish that is bright, clean, and will easily match with any future upgrades like a kitchen backsplash or new flooring.

              You are by no means limited to white, however! There are literally hundreds of colors to choose from. Some of our favorite Farmhouse hues for 2021 include:

              BLUES

              Breezy by Sherwin Williams

              Distance by Sherwin Williams

              Winter Solstice by Magnolia Home

              GREENS

              Clary Sage Sherwin Williams

              Sea Salt by Sherwin Williams

              Piece of Cake by Magnolia Home

              Yellows

              Ambient Light by Magnolia Homes

              Cottage Feel by Magnolia Homes

              Whites

              White Pepper by Behr

              Silos White by Magnolia Homes

              White Dove by Benjamin Moore

              *If you have young children and your cabinets are prone to fingerprints, crayon marks, or other little touches, you may want to opt for a semi-gloss finish for easier clean up.

              How Much Paint do I Need to Cover My Kitchen Cabinets?

              One gallon of paint is designed to cover 400 square feet in one coat. You will want to use two coats of paint for your cabinets. Even so, 2 gallons of paint is probably more than enough.

              We recommend you get an extra gallon of paint (3 gallons total) just to be on the safe side. There is nothing more frustrating than running out of paint in the middle of a project. Plus, you’ll have extra for any future touch ups or additional DIY projects.

              Getting Started

              Once you have selected your paint, you will need some additional supplies:

              Photo courtesy of: Diana Liang
              • Screwdriver/power drill
              • Painters Tape
              • Sharpie
              • Degreasing Liquid, such as TSP Alternative, such as Savogran TSP Substitute
              • Liquid Deglosser, such as Heirloom Traditions All-In-One Paint Degreaser and Deglosser*
              • Paint Primer
              • Paint brushes: 2-2 1/2” bristle brushes provide a nice, smooth finish
              Step 1: Empty Your Cabinets

              This may go without saying, but you certainly don’t want any plates, glassware, or pantry items inside the cabinets as you are painting! You will also want to remove any shelving.

              Step 2: Clean Your Cabinets

              Using a degreasing agent, preferably one that is phosphate free (see ingredient list), wipe down your cabinets, hardware, and frames. Ensure all grease, dirt, and lint is removed for a clean surface. Note: if you are using an all-in-one degreaser and deglosser, such as Heirloom Traditions, you can skip this step.

              Step 3: Apply Liquid Deglosser

              Dip a clean cloth or sponge into your liquid deglosser and apply it to the cabinets and frames using small circular motions. Be sure to follow the directions carefully-some liquid deglossers require you to wipe them off, some of them do not.

              Step 4: Label and Remove Your Cabinet Doors

              Using a piece of painter’s tape, label your first cabinet door with the number “#1.” Next, label the inside of the space that was covered by that door with a corresponding number “#1.” Remove Door #1 by unscrewing the hardware holding it in place. Place the hardware in a bag or container also marked “#1.” Continue this process until all doors have been numbered, removed and had their hardware placed in corresponding containers.

              image
              Step 5: Apply Primer

              You may be tempted to skip this step, but please don’t! After all the prep work you have already done, you don’t want to short-change yourself by skipping the primer. Primer gives your paint a clean, sealed surface to adhere to, reducing the chance of dark spots and peeling. 

              Apply the first coat of primer, such as INSL-X Prime Lock, to the backside of your cabinet doors and to the framework still mounted on the wall. Allow to fully dry. Times will vary depending on the type of primer you have purchased, to be sure to follow the manufacturer’s instructions.

              Helpful hack: you can prime the front of the cabinet doors while the underside is drying by placing thumb tacks on the corners so the drying side is raised off the ground. This way, both sides will dry at the same time and you won’t have to wait any longer to get to painting!

              When the first coat is dry, apply a second coat to the framework and to the front and back of the cabinets. Allow to dry.

              Step 6: Paint Prep

              Tape off all edges using painters tape. Place plastic sheeting, tarps, or other protective coverings on the floor and on your counters.

              Step 7: Paint!

              At last, the fun part! Using smooth, even strokes, apply your first coat of paint to the framework and doors. Allow to completely dry, then apply a second coat. Don’t skip the second coat!

              Step 8: Re-assemble

              Nothing left to do but clean up, remount the doors, replace any hardware, and enjoy your new kitchen!

              We hope this project has inspired you to try something new in your kitchen! Let us know in the comments how yours turned out!

              Buying a goat: what to consider

              May 17, 2021 ·

              Buying a goat: what to consider

              Do it, buy a goat

              So, you’re considering taking the plunge and buying a goat – congratulations! Goats are the best. Now that I have my little herd, I can’t imagine life without them. Goats have been growing in popularity for the last several years as people worldwide focus on urban farming, self-sufficiency, and sustainability.

              Goats come in all shapes, colors, and sizes. Regardless of what goat-shaped hole you need to fill in your life, there’s a flavor for you.

              Why are you buying a goat?

              The first question you need to ask yourself about your goat purchase is: why? There are as many motivations for goat ownership as there are types of goats. Primarily people get goats for their milk, fiber, meat (yep, people across the world eat goats), or to keep as adorable and personable pets. However, they can be great pack animals for hiking or hunting, as companions for other herd animals, cart pullers (no joke, this is a thing), and even serve as sacrificial lambs for more valuable animals. I’m not making that last thing up; that’s why fainting goats faint.

              So, first on your list is to figure out why you want a goat. Any of the above reasons are fine ones – even if you want a goat just to add some fun to your Instagram account – that’s valid too! I bought goats for several reasons, most of which surround milk. Growing up lactose intolerant, I drank goat’s milk as a child. I grew out of my lactose issues, but not my love for the taste of goat’s milk. Milk is also the base of cheese.

              The Benjamin Franklin quote: “Beer is proof that God loves us and wants us to be happy” would ring more true for me if you replaced the word “beer” with “cheese.”

              What kind of lifestyle do you have?

              Once you decide why you want a goat, the next step is to analyze what will fit practically in your life. This includes all the various aspects of goat ownership, how much time you have to allocate to your goat, what your budget looks like, how much room you have, etc.

              Evaluate the goat housing situation – space, fence, and shelter. If you’re looking for milk but don’t have the room for full-sized dairy goats, look to the miniature breeds. I own, breed, and love Miniature Lamanchas, a smaller version of their dairy counterparts.

              My favorite doe came from a woman who keeps goats in the back yard of her very normal-looking suburban home. Check your local zoning to see what’s allowed. Remember, you need at least two goats. I cannot stress this enough. Goats are herd animals, and if you get only one, it will scream. A lot. All night. Trust me on this.

              Goats are notorious escape artists, and a fence is weirdly expensive. Having a pen or pasture that’s escape-proof will save you lots of time running around the neighborhood trying to find your escapee and potential heartache later.

              Luckily, goats are simple in terms of their housing needs. My minis love their Dogloos (those igloo dog houses), and my bigger goats have a simple loafing shed. There are tons of DIY pallet goat house tutorials online if you have a weekend.

              Next, ask yourself what kind of time and money you have to dedicate to your endeavor of being a goat shepherd.

              Meat, pet, and other lifestyle goats take much less time than dairy goats (because you don’t have to milk every day) and can be as easy to keep as a dog. Dairy goats take more time, but again, cheese. Decide if you want a doe (female), a buck (an unaltered male), or a wether (a castrated male).

              Goats can be relatively inexpensive keepers if you access to pasture, and the actual buying of a goat is hardly the only expense. There are endless blogs on how to save money on goat feed and how to do basic veterinary care. If you live in an area where it’s allowed, you can sell milk to offset some costs. Whenever my husband complains about our feed bills, I threaten to buy a horse instead.

              How to start your search when buying a goat

              Once you’ve figured out why you want goats and considered the more practical aspects of goat ownership, it’s time to start the search.

              First, narrow down what you want in terms of your preferred breed. Consider size, purpose, and temperament. Find stories and articles from other people who have goats for the same reason you want them. See what breeds they have and why. Both you and your new goatie friends will be happier with your relationship if you start off the bat with the right breed to fit your needs.

              When you find a breed you like, start by checking out the association dedicated to them. The American Dairy Goat Association covers many of the “old school” dairy breeds. In my case, both the Miniature Dairy Goat Association (MDGA) and The Miniature Goat Registry (TMGR) register Miniature Lamanchas. The American Boer Goat Association covers the meat Boer goats. The National Pygmy Goat Association is for the smaller meat goats, pygmies.

              Some people choose to not worry about registrations when buying a goat, others pay close attention to it. I have found that selling kids is easier and will bring a better price with registered stock, but it all depends on what you’re looking for in your life.

              Most breeds have Facebook groups of enthusiasts dedicated to them as well. See if there is a breeder in your area who will let you visit and meet their animals. It’s happened to me more than once that I go to “just look” and end up buying a goat.

              The most expensive part of owning a goat is maintenance. It’s better to get exactly the animal you want and pay a little more for it on the front end than to wish you had later. One of my goat mentors said it best: “It costs to same to feed the right goat as it does to feed the wrong one.” Make sure to get yourself the right goat.

              Where to look for goats

              Buying a goat is a process. I’ve found goats for sale on Craigslist and farm websites. Also, your state or area probably has a goat Facebook group or even several. Facebook has a prohibition against animal sales, but goat people will say that a goat is “looking for new pastures” or is “up for discussion.” That language is the indicator a goat is for sale as a way to thwart the rules. Usually, through the search process, you will meet people – and if they don’t have what you’re interested in, they might know someone else who does.

              When presented with a cute photo of a goat, it’s hard not to purchase every single one that becomes available. I promise it’s so much better, in the long run, to be smart and deliberate in the purchase process and get THE RIGHT goat, and not just A goat. Now, go get your goat.

              Sticking with the Homegrown Year while traveling

              Jan 29, 2021 ·

              Gettin’ out

              How do I travel during the Homegrown Year? Imagine it. I can’t have any food at the airport. I can’t have any food on the plane. I got an upgrade and passed up free mimosas. That’s how serious I am about not cheating on this challenge, people! Traveling during a year where I eat almost entirely food produced from our tiny, urban farm seems like it would be nigh impossible, but that won’t stop me. There’s almost no margin for error. Here’s how it gets done.

              A few weeks ago, Facebook sent me an ad for a “socially distanced” live show (I love live music) from one of my favorite singer/songwriters, Robert Earl Keen. The only problem for me? The concert was occurring in Virginia. Luckily, it was right by the house of one of my best friends, who also loves REK as much as I do. It’s been a long year for all of us. A chance at a show with my bestie was worth making it work.

              So, I hatched a plan. Fly out for two nights, first for the concert and one to use one of the four “cheat meals” with my friends. It will be a FEAST. More on that later. But that’s only one meal accounted for in 72 hours. It’s a good time for me to travel because I have a brief window when the goats are dry (I don’t have to milk every day) and kidding season (when I need to be around to be a goat doula). With those responsibilities off my plate, I got ready to fill my literal plate with Homegrown Year-compliant goodies.

              Logistics

              I pre-shipped a box of food for myself. I hard froze disposable containers filled with zucchini zoodles and turkey, which I could heat to have some warm meals. I also checked a bag with a jar of sauerkraut, applesauce, and pickles. Then I packed freeze-dried cheese, freeze-dried goat milk, zucchini chips, and an apple in the carry-on. If you’re keeping track, that’s three— count ’em, three!— bags of food, lest any of them fail to arrive or get confiscated by government authorities. Failsafes! I figured if any one of the three bags didn’t work out, I would probably be fine.

              As I write this, I’m sitting in Virginia, the shipment came, the checked bag is here, and my carry-on had no problems (although I did get some questions from TSA agents about freeze-dried cheese.) Of course, by the way, I had the regulation that cheese is allowed as a carry-on item pulled up on my phone in case they tried to confiscate it. Never underestimate a libertarian cheesemonger on a mission.

              But what to ship? An important part of meal-planning on this trip was hangover mitigation. If I indulge over my FEAST— and I plan on really living it up with this meal— I’m gonna need something to heal me after. In the box I shipped, I made sure to pack the turkey’s fattiest parts. Hangover cure!

              So, travel just means a little bit of planning, but it’s not impossible, and it’s totally worth it. Now, let’s get ready for this cheat meal!

              I’m no longer sorry for who I am

              Jan 21, 2021 ·

              This makes me sad to even write

              My name is Kelly, and I’m a conservative. The previous sentence reads as a combative way to start a post, and I genuinely don’t mean it that way. It makes my soul sad that such a simple declaration would make so many either inclined or disinclined to read further.

              When I started this blog, I viewed it as an opportunity for a fresh start. You may or may not know that I have spent the vast balance of my professional life in politics. In fact, I hope that if you’re a semi-regular reader of my sporadic postings here, you have no idea what I do for a living. I created this space because I love food; I’m passionate about our small farm, goats, and making cheese. As Barbara Cooney said in her book, Miss Rumphius, “You must do something to make the world more beautiful.”

              Those words inspire and haunt me often. I started RealBestLife to try to express the deep need gnawing at me to be 3-dimensional in a world where I feel relegated to acting as just a political paper doll. Yes, I have a political philosophy, but it’s just a facet of the many things I am. I do my best to show you the beauty of my world in the words, pictures, and videos I post.

              Good intentions

              Like so many others, I started in politics for all the right reasons. I’m a conservative because I believe innovation and the free market are some of the most stunningly beautiful expressions of our humanity that exist in the world. An unchecked government will stifle us, or worse, in my view. I also believe that the phrase “endowed by our Creator with certain unalienable rights” is one of the most powerful ideas ever conceived. For me, my conservatism is a loving expression of those core beliefs.

              Unfortunately, professionalized politics is far from what I idealized when I started. In the 1998 movie Hope Floats, the character Justin Matisse, played by Harry Conick Jr., describes his challenge with the American Dream: “You find something that you love, and then you twist it, and you torture it, try and find a way to make money at it. You spend a lifetime doing that. At the end, you can’t find a trace of what you started out lovin’.” His monologue perfectly encapsulates how I feel about politics.

              I sometimes look back over the last decades and wonder exactly what, if anything, I have accomplished. Have I done anything to make the world more beautiful? Often, I tell friends that if this blog or crazy project ever takes off, I can finally “check out of the Hotel California of politics.” But, like the Hotel California, you can never leave.

              I have to stop running from myself


              So, I started this RealBestLife project as an escape from my political identity. When working in an environment so toxic and polarizing, it’s natural to want a reprieve. On RealBestLife, I planned never to share anything about what I do for a living. Not that I can hide it, a brief google of my name makes it pretty obvious what I do.

              In the current environment, it all feels like such a liability. I didn’t (and still don’t) want to alienate those who have differing views, and, like so many others, I am afraid. The speed and brutality with which you can ruin yourself and a brand you’re working to build is staggering.

              I want this site to be about my love for tiny sustainable farming, goats, Mom advice, the occasional inspiration and support for others, a few DIY projects, and a journey through a bizarre challenge.

              But, yesterday, yet another example of a coordinated online attack on a woman whose business is entirely unrelated to politics emerged that compelled me to write. A famous baby sleep trainer on Instagram, Cara Dumaplin, was revealed to have, gasp, given personal donations to the Trump reelection campaign.

              The backlash was swift and merciless. Baby Instagram influencers went bananas. Many apologized for ever associating with her and talked about their need to “process” their feelings of betrayal. As if Ms. Dumaplin’s sin of having personal political beliefs that differed from theirs made all of the VERY NEEDED (I say this as someone with a baby currently in sleep regression) skills and advice she brings to the table invalid. They posted her premium content, those videos for which she charges, for free, to undermine her business, ability to make money, and keep her employees paid.

              They treated her as a wolf in sheep’s clothing, and as a fraud. She is neither.

              Cara Dumaplin is living my nightmare (and girl, I hope today you have google searches for your name turned off, but if you don’t – I support you). I am so afraid that my political life will invalidate everything else I love, believe in, and want to share. Recently, I’ve caught myself preemptively pulling content, wondering if THIS is the thing that will turn the mob on me. I want to make this site and project successful, but I also know it’s a target as soon as that happens.

              It’s sad to hide who I am because of worries that if a book publisher would ever consider letting me write a book about this project, my life so far will be too big a liability for them. If I have this other secret part of me, maybe someone who would partner with me will decline, as I’m too high a risk. I self-censor in the hopes of being marginally more socially acceptable.

              My liberal friends think I'm being dramatic when I say that I don't know if I would ever be allowed to do anything else for a living. I sure didn't know when graduating college that I was closing literally EVERY OTHER DOOR by having the audacity to be a conservative politico. -> https://t.co/7aT0P7kdtq

              — Kelly Maher (@okmaher) January 21, 2021

              Texting with a friend who is a legit food blogger as a profession (#goals) yesterday about the Dumaplin canceling fiasco, she made the critical point that the mob justice was brutal, but few stood with Dumaplin. We don’t support or protect ourselves out of fear. We allow ourselves and others to be publicly shamed, and every conservative feels more isolated when this happens. No one stands up and says, “ME TOO. I’m conservative, too.”

              One of my best friends just sent me a message I desperately needed to hear. She reminded me of the quote from St. Katherine Drexel, “Press forward and fear nothing.” I promptly bought a super-basic wall-hanging from Etsy to remind myself of this, every day.

              I have spent the better part of the last several years apologizing for myself, for what I believe, and for my profession. I don’t want to be ashamed, and I don’t want to be in fear of cancel culture anymore. My voice is small, and it’s just one person, but I’m a regenerative farmer, a Mom, a wife, a goat herder, a gardener, a cheesemaker, a friend, a person who tries to take joy in the small things and make the world more beautiful. And, I’m a conservative. And I’m not sorry.

              My husband bow hunting deer

              Jan 21, 2021 ·

              Hunting to eat

              I’m fortunate to have married one of those rare breeds of husband who will go out bow hunting a deer and bring home neatly wrapped packages of meat ready to cook. Like Liam Neeson, my husband, Mark, has a particular set of skills. Skills he has acquired over a lifetime of hunting animals for food. Luckily for me, he has utilized these skills to keep me in meat for the Homegrown Year.

              As a patently non-vegan person who is also doing a crazy challenge to live off our farm for a year, meat procurement has been critical. There are only so many chickens, and quail one person can eat before she needs something more substantive. Luckily, hunting is allowed under the rules of the challenge.

              So, I took the (human) kids in exchange for Mark heading out to utilize his skills. I also handed him a camera with a selfie stick and told him to video the process. Enjoy.

              Not for everyone

              ALSO, BE WARNED THAT THIS IS A VIDEO ABOUT AN ANIMAL DYING. I tried to edit it to be not gory, but again, this is real life. It is a real best life, but real none-the-less. So, if this isn’t your jam, don’t watch it.

              A fun video project

              I enjoyed editing this video not just to show the farm’s natural beauty but also to show the sheer amount of work, preparation, and thought that goes into hunting. There is often a misconception from people who don’t hunt that hunters are Neanderthal-like people who stomp out into a forest and just shoot wildly at the closest animal. Nothing could be further from the truth. As Mark likes to say, he doesn’t go out to hunt “deer,” he goes out to hunt “a specific deer.” He will do weeks and weeks of prep work to try to keep the herd healthy and vibrant.

              Many people understand the hunting process, but few understand the sheer work that goes into everything afterward. In the second video of the series, Mark shows us the process of taking an animal downed in a field to the freezer. Again THIS VIDEO IS NOT FOR EVERYONE.

              A lifestyle with these kinds of projects is a lot. A lot of work, a lot of fun, a lot of learning, and a lot of heartache. I still wouldn’t trade it for anything and feel fortunate to have found a partner who not only appreciates my crazy ideas but who will do the hard work to help me succeed at these nutty goals.

              Christmas – my first cheat meal

              Jan 5, 2021 ·

              A Christmas cheat

              If you’ve been following the Homegrown Year challenge, you know that I’m allowed four cheat meals for the entire year. I want to keep a backup feast or two as a ripcord if I start to crack, but made it almost five months without a cheat. It’s only cheat meal and not a cheat day so I clarified the rule in advance. As long as I didn’t stop eating, a long, grazing meal counted.

              What better day than Christmas to celebrate by eating everything I could desire in a single meal? I announced to my husband, Mark, Christmas would be the first cheat meal of my challenge. He excitedly embraced the challenge of cooking or procuring all my favorite foods with gusto.

              An insane menu

              Mark compiled his elaborate Christmas menu yet. In the past he made a full cajun-themed dinner one year that took almost a week of prep work. We had, and I am not joking about this: raw oysters, grilled oysters with a special sauce, smoked salmon dip, anchovy-stuffed olives, shrimp, smoked pork belly with a maple glaze, paté, pheasant sausage, two kinds of caviar, artichoke and tomato salad, king crab, Mark’s special cottage cheese (it’s my favorite), a New York roast, and an entire tiramisu cake.

              The coup de grâce

              As if that wasn’t enough food, I even one-upped him. Mark spent much of December talking about this Serrano ham display kit he’d seen at Costco but declined to buy on account of my challenge. It was “”the ham that got away. He thought it would be cruel to have a perfectly cured ham on display while I couldn’t touch it. For weeks he lamented not buying it. Of course, Costco quickly sold out. After looking for the ham at every Costco in town, I special ordered him a ham and display cutting stand of his own to open on Christmas Eve.

              Mark opened it with the sparkle of wonder in his eye that’s reserved mostly for young children when presented with Santa’s bounty. Meat does that for him.

              So, we had the entire meal AND a massive ham on a stand in the middle of the kitchen table. Why not?

              Drinking is “meh” now?

              I planned to enjoy cocktails most of the day on Christmas. Because of my friend, Allison, I have access to some spectacular wine for the year from California. However, that’s the only alcohol I’ve had so far since the challenge started. I was ready for some liquor. It made sense to dive in with an amaretto sour in a champagne glass. As the first sugar in almost five months, it was so sweet I puckered as if eating a raw lemon. The back of my palate almost ached with the taste. Although it’s one of my favorite cocktails, I couldn’t finish it.

              After the amaretto, I tried just a vodka soda. I thought I was going to die. A good martini has always been my go-to but that was almost unthinkable. Apparently, retoxing after detoxing is not something that can’t be done suddenly. I spent the rest of the day slowly sipping on a nice sparkling rosé, and then drinking beer. So much for being a cocktail person anymore.

              I ate everything

              Overall, I ate my way through the day and drank less than I had planned – but it was a great cheat. With all the delicious seafood, I made my best orca impression, which was a nice way to take a meal away from zucchini. The flavors were spectacular. Even with so many options at my disposal, though, my body propelled me to the simplest things. I just stood over the cocktail shrimp and shoveled. By the time we got to the crab I could barely butter it, so I just ate the sweet meat. It was perfectly grilled. Both my body and my palate have changed in the last five months.

              This was supposed to be a reprieve from the simplicity of my everyday fare, but I am not getting to the point where I actually crave exactly what I have.

              I also realized that I don’t actually like the feeling of being overfull. Maybe it’s just because everyday I eat mostly as much as I want in volume, but of very “clean” foods. By the time I got to the tiramisu I didn’t even really enjoy it that much.

              The next morning I could do little else but lay around and go to bed early. It was like my body woke up and yelled at me “WHAT THE HECK WAS THAT?!?!” I didn’t drink that much, but it felt like a hangover. It was a beautiful meal, and so worthwhile, but it’s a rarity, and probably better that way.

              The Top 10 Homegrown Year Recipes of 2020

              Dec 31, 2020 ·

              Here are my top 10 Homegrown Year recipes from 2020.

              2020 sure was an interesting time to start an ambitious project like the Homegrown Year. Frankly, 2020 was an interesting time to start anything. The Homegrown Year is such an audacious goal, and 2020 was such a 3-ring-disaster-circus, we had several heavy conversations in our household about it. Was this the right time to start? Did this make sense with a job, two babies, and a barnyard in the middle of a pandemic? 

              But, I lept, and here we sit, five months in. So far, it’s been so much harder than I thought but so much more gratifying. I have had some incredible health benefits – I’ve lost 47 pounds and sleep better than I can remember. However, one of the best parts is that I’ve had to get creative with recipes through the Homegrown Year’s particular constraints. Here are a few of my favorites in 2020 – let’s see what crazy stuff we cook up in 2021!

              10 – Eggs on eggs

              Eggs on eggs

              The Homegrown Year was even a possibility because, between eggs and goat milk, I produce enough calories to at least survive almost every day on the farm. But eating eggs every day means that you have to get creative. Luckily eggs are one of the most versatile ingredients in the kitchen. 

              I made an egg quiche bottom in my little dutch oven and then topped it with . . . more eggs (poached). The quiche laid a sumptuous but fluffy base juxtaposed with the brightness of the tomatoes. The yolks of the poached eggs on top acted as a “sauce.” Most good sauces are yolk-based anyway. 

              Quiche egg base

              Goat Butter

              3 eggs 

              1 Tablespoon goat cream

              3 Tablespoons goat whey ricotta

              1/2 C. grated or zoodled zucchini

              Salt to taste 

              Poached eggs

              2 eggs

              1/2 C. vinegar 

              Topping 

              Sliced Tomatoes

              Preheat oven to 375. Melt butter in the dutch oven over a stove. Beat eggs until creamy. Fold in cheese, cream, and zucchini. Bake at 375 for 40 minutes – checking occasionally.

              Bring half a pot of water and vinegar right over the precipice of a boil. Ensure it’s not rolling, but you should see bubbles. Gently crack an egg over the liquid. There will be some strands from the white, but you should see the egg white start solidifying in a shell around the egg yolk. Using a slotted spoon, gently roll the egg over in the liquid, ensuring a consistent finish. Once the white is cooked, and the yolk is still soft, remove the egg from the liquid using a slotted spoon and drain. Repeat.

              (If you don’t eat eggs several times a day like I do, plan a few extra eggs with which to practice poaching. Eat your mistakes.) 

              Assemble the eggs on top of the . . . eggs. Add a few tomato slices and enjoy. 

              9 – Taziki-style dipping sauce 

              Our growing season was beautiful for me this year because I couldn’t walk through the garden without finding at least two or three cucumbers to stow away in my overalls (cliché farmer outfit). Those that didn’t go straight to a fresh salad mostly ended up in pickle jars. A select few of the cucumbers with the best flavor became the perfect cooling addition to a Taziki-style sauce. Homemade goat yogurt adds a particular depth of flavor that perfectly compliments a greek-style dip. Plus feta cheese, because cheese.

              1 C. goat yogurt (drained) 

              1 small cucumber peeled and grated

              1/2 head of fresh dill finely chopped or 1/2 tsp. dill seed

              1/4 C. crumbled feta

              Squeeze of lemon (I had some from my Uncle and Aunt’s tree in AZ) or 1/4 tsp. white vinegar

              Salt to taste

              Whisk all the ingredients together except salt. Allow it to chill for an hour to allow the flavors to settle before you taste and salt. The feta will add saltiness, and if you don’t wait, it’s relatively easy to oversalt. Serve it with fresh chopped veggies, or just a spoon. 

              This leads me to the main ingredient, #8 . . .

              8 – Homemade Goat Yogurt

              I didn’t know until I got goats how incredibly EASY it is to make yogurt at home. Obviously, the first step of “homemade goat yogurt” is “milk your goat.” I realize for most people that’s not realistic. However, if it’s from your local farmer or a small food store, there are many places to get fresh and non-homogenized milk.

              Like almost everything in food, the quality of the ingredients determines the flavor of your dish. Fresh goat milk has such a high butterfat content; the resulting yogurt has a stunningly creamy mouthfeel. It’s as if the yogurt was a cultured custard. During this challenge, I’ve learned that many of the simplest meals are the most delicious.

              4 C. goat milk

              2 Tablespoons of the yogurt of your choice or a yogurt culture (I use the creamy yogurt culture from here)

              Fruit or topping of your choice (I used the pears shipped to me by my friend, Mary Katharine.) 

              Heat milk to 185 degrees slowly in a saucepan stirring to prevent scorching. Cool to 112 degrees and add yogurt of your choice or culture and whisk gently into a mixture. If you eat lots of yogurt and want individual cups, I suggest this yogurt maker. For occasional yogurt-making, pour into a thermos or crockpot on the “keep warm” setting. You want to maintain 110 degrees for 6-12 hours. Refrigerate and enjoy! 

              7 – Deer and goat cream zoodle “stroganoff”

              The first month of the Homegrown Year was almost entirely vegetarian for me. It wasn’t out of some newfound ethic – it was a practical decision. August was a month where the garden was poppin’. Eating fresh meant that I was saving all the food banked in the freezer for when I needed it, and it lessened the load of what needed preserving.

              Going from a coffee and wine-drinking, fast food-loving carnivore to a fresh, raw food vegetarian literally overnight was a shock to the system. Thanks to my husband and one of my best friends, Matt, who came for the start of the challenge, for tolerating me. Two weeks in, though, my husband, Mark, defrosted the only deer steak without asking me. At that point, I had stretched the limits of my tolerance and our marriage with my withdrawal. If it is possible to send a passive-aggressive message through defrosting, this was it. 

              Ultimately, his was the right call, as the resulting zoodle dish with cream sauce and deer was one of the best meals I’ve ever had. Mark hadn’t yet gotten his deer for the season, so when I saw the last remaining deer from the previous year’s kill defrosted, it felt so precious I needed to do it justice. 

              1 Tablespoon goat butter

              1 small onion – chopped finely

              3 sprigs rosemary – finely chopped

              Deer meat

              1/2 C. goat ricotta

              2 Tablespoons goat sour cream

              1 Tablespoon goat milk

              Zoodles

              Melt butter and lightly sauté onion and rosemary in a skillet. Add deer, brown to rare. Using tongs, remove the meat and reserve. Add sour cream, ricotta, and milk, whisk briskly until creamy over low heat. Add meat back in.

              Serve over zoodles.

              6 – The most simple salad 

              The lesson I keep learning over and over with this challenge is that you don’t have to do a lot of cooking with superior ingredients. Just the act of combining a few things at their peak creates beautiful meals. When I ate this salad, I thought: “I could eat this, exactly as it is, every day for the rest of my life, and be so happy.” That is the perfect meal.

              Fresh tomatoes

              Cucumber from the vine

              Freshly made feta

              Chop, combine, and eat. That’s it. The feta adds the salt. This need nothing.

              5 – Spicy, creamy, cheesy dip

              My Mom used to make a warm, spicy, creamy artichoke dip that was always a hit at parties growing up. I tried my best to replicate it using what I had on hand. None of our artichokes flowered (is that what they do? Fruited? Unclear) this year. In lieu of artichoke, I used some of the zucchini I fermented. Fun fact: fermenting zucchini is was less gross than you think. It’s pretty delicious.

              I served the dip with dehydrated squash chips. I promise I am, in fact, losing weight, even with all the dips. 

              1 C. goat Fromage blanc cheese

              1/2 C. drained fermented zucchini

              3 chopped jalapeños

              1/4 C. shredded goat parmesan

              Chips 

              Mix the goat Fromage blanc, zucchini, and jalapenos in a baking dish. Bake at 350 for 10 minutes or until bubbly. Sprinkle parmesan cheese over the top and bake for 3-5 more minutes. If no one is watching, skip the chips and pull out the spoon. 

              4 – Tummy warming veggie soup

              Soups and salads – salads and soups. When your diet consists mostly of vegetables, meat, dairy, and eggs – these become the staples. Luckily, I love both salad and soup. As the weather gets colder, taking jars from the Homegrown Year shelves in our storage (yes, I have shelves dedicated solely to this project) and combining them, simmering in a pot, to a hearty soup, steels me against Colorado’s winter wind. 

              1.5 C. crushed tomatoes

              2 c. water and combined

              1 small zucchini, chopped

              1 small crookneck squash, chopped

              1/2 an onion, chopped

              3 sage leaves, chiffonaded

              Bring all ingredients to a simmer for 30-ish minutes until onion is translucent. Salt to taste.

              3 – Salty, sweet, and spicy snack bites 

              Except for honey, which I use occasionally and sparingly, there’s very little sweet in my diet. However, this fall, I had the great fortune of acquiring some more pears from my friend, Calla, at around the same time I bartered with my other friend, Greg, for some watermelon. One of the things I’m allowed, according to the Homegrown Year rules, is pectin. So, I used the watermelon juice as a sweetener in a pear preserve. The preserves only have pears, watermelon juice, and a little pectin.

              For a salty, sweet, and spicy flavor meld, I created these little amuse-bouche snacks. With only three ingredients, they played so well together.

              Goat feta

              Pear preserve

              Fresh jalepeño

              Cherrywood smoked salt

              Chop and assemble. Lightly salt.

              2 – Everything in the garden frittata 

              At the height of harvest season, the best meals are merely “take what’s in the basket and add eggs.” They’re a feast for the eyes as well as the palate. 

              Goat butter

              Carrots (including greens)

              Zucchini

              Chard 

              Eggs, beaten

              Radish

              Purple onion

              Tomato 

              Goat feta

              Lightly sauté the ingredients that take the longest to soften (carrots, zucchini, chard, radish, and onion) in the goat butter. Pour eggs over the veggies and cook to rare. Sprinkle tomato and feta on top. Cover and allow it to cook through until the top is fully cooked and the feta is soft and melty. 

              1 – Cornbread deer “pie”

              This “pie” ended up being my Thanksgiving meal. I like my turkeys too much to slaughter them. The cornbread base is modeled after this recipe, which I found by googling “flour-free cornbread.” Almost all cornbread recipes have flour and I still have none.

              The only reason I have cornmeal is that Mark picked corn when he was deer hunting and bought it home, dried it, and ground it. He got a deer, two, in fact. Although we haven’t yet slaughtered the pigs, I bartered for some bacon with my brother-in-law, who raised a hog and had some left. So I used bacon grease from that. After reading the comments on this recipe, I also added about 1.5 tablespoons of honey.

              I topped the cornbread with sautéd onions and deer steak. It made for a perfect Thanksgiving meal. 

              Cornbread base

              Topping

              Goat butter

              Onion

              Deer steak

              Follow the cornbread recipe but add 1.5 Tablespoons of honey. Saute onion and deer steak in goat butter and top. Eat the whole thing with a fork, and be filled with gratitude. Wonder if this is what Little House on the Prarie was like. Check your phone and realize no, this is not what Little House on the Prarie was like; you’re much less likely to die. 

              .

              Homegrown Year Update: not dead yet, quite the opposite

              Nov 24, 2020 ·

              Still doing the Homegrown Year

              Well, Thanksgiving is upon us, and I have been doing the Homegrown Year Challenge for 115 days – not that I’m counting. Here’s a quick Homegrown Year update. The first several weeks were absolutely brutal. I was experiencing what can only be described as physical withdrawal. It manifested in almost constant headaches, punctuated by an inability to regulate my body temperature and waves of nausea. Delightful.

              Although I had planned to use the summer months to slowly taper off garbage food, non-stop coffee, and evening wine and cocktails, my anxiety-mitigation habits were too strong during the start of the pandemic. So, I cold-turkeyed it. This was a mistake.

              A rocky transition

              After the first few weeks, I started to slowly regain normalcy – and now I feel great. The first month consisted of almost entirely of a vegetarian diet. I had lots of cheese and eggs for protein but almost no meat. Because I started the challenge in August, there were still fresh vegetables everywhere. Every preserved meal I pulled off the shelf or out of the freezer was one more thing I needed to preserve for the time where our garden wasn’t busting with food. Just preserving enough for myself for overwintering with two sons under three, a full-time job, and a working farm meant I needed to be strategic and smart about what I eat and when.

              So, I abruptly went from a coffee-guzzling, preservative mainlining, wine-sipping, emotional overeater – to an exclusively fresh-veggie-straight-from-the-garden eater. It was a shock to the system indeed. Honestly, it’s probably exactly what I needed. I now sleep better, have more energy, and have lost 35 pounds and counting.

              No perky motivation memes

              That said, I hate the people who do some big life transformation and then talk about it incessantly online as they try to sell you on their crazy thing. You won’t see any perky “if I did it, YOU can do it too!” posts from me. Although we can all grow or make something to add to our own diet, I apparently embraced the most extreme way to accomplish it.

              This challenge is very hard. So hard. But also, it’s now just my habit. I wake up and eat eggs, zucchini, cheese, veggies, etc. I milk the goats and feed the chickens. I walk outside every day, and I can tell you exactly where every single thing I eat came from – and it’s kind of amazing.

              So, check out the Facebook group if you want to keep up on what’s going on or sign up for the newsletter of the same name, “Kelly hasn’t starved to death . . . yet.”

              DIY Distressed Farmhouse Nightstand/Side Table Refacing for Under $30

              Oct 17, 2020 ·

              This DIY distressed farmhouse nightstand project will brighten up any room and add something fun to your decor!

              I did a really fun DIY paint/stain project with these vintage nightstands, (bedside tables? Farmhouse nightstand? What’s the difference? I don’t know) to get a distressed farmhouse look. I love how they turned out, and it took just a few hours total of work.

              A picture of a before and after or a distressed farmhouse nightstand project

              Where to find pieces:

              I picked these nightstands up off OfferUp. If you haven’t tried it yet, it’s a great app – kind of like Craigslist, but it rates the users so you can determine, based on their other interactions, if you want to do business with someone. I also have found some great deals on Craiglist, Facebook Marketplace, and Nextdoor – so they’re great to check out, too. Nextdoor is ideal for furniture because there usually isn’t a lot of driving involved.

              A picture of a before nightstand before I panted and glazed it in a distressed farmhouse style.

              The woman who posted these pieces asked for $20. I offered $15 and she agreed. $7.50 per nightstand. Score.

              How to pick:

              What really appealed to me about these pieces was the scrollwork on the front. I really loved the visual interest they could add to a room. Especially with smaller accent pieces, there’s a lot of wiggle room to add color and pattern to a change a look without the commitment you have to make with bigger and more expensive pieces.

              Closeup pictures of the nightstands I used in a distressed farmhouse nightstand refurbish project

              I also liked that although they have a lot of depth, and they aren’t wedded to a specific decor. I’ll be using them as farmhouse pieces, but they could also work equally well in coastal or even modern rooms. They also provide great storage. I have two kids. I always need more storage.

              What you need:

              Can of chalk paint – I used the Killz “blue juniper” color which comes out to a nice, rich, almost duck egg blue. It’s brighter on a piece than the swath on the can makes it look. Luckily, I knocked it down with glaze. A whole can cost about $20 (I used less than half the can.)

              Paint brush – Luckily, chalk paint is very forgiving, but I still prefer to go with the nicer paint brushes. It’s ok if you have a few brush strokes, it will look really pretty when you use . . .

              Glaze for chalk paint spray can – I used the Rust-oleum “Chalked” smoked glaze. Luckily, I managed to buy this on clearance for $1.50 (score) but it’s normally in the $6-7 range. It is designed to complement cool tones. I really wanted to use a glaze to pull out the great detailing of these pieces.

              Non-pilling cloth or rag – To wipe the surfaces of the pieces to achieve the desired “distressed” look. I just use old cheese cloths and trash them after.

              Spray paint topcoat for chalk paint – Since I was already using a spray glaze I thought I would go ahead and try the spray topcoat. It’s great. I used the Rust-oleum “Chalked” topcoat.

              A picture of the glaze and topcoat I used in a farmhouse nightstand refurbish project

              Gloves – You don’t want to have paint stuck under your nails.

              Denatured alcohol or another cleaner – You want your pieces perfectly clean before you start painting.

              New knobs – I found these modern brass knobs on Amazon. The new hardware helps to give a facelift and really set off the cool carved look of these pieces.

              Optional: Sandpaper – I decided to sand these pieces, even though I’m not generally a big fan of sanding. These vintage pieces have a laminate top that is really common for furniture from the 60s, 70s, and 80s (I have no idea how old they are – but that 30-year-range is a good guess.) I wanted to make sure that the paint adhered well.

              What to do:

              Sand and prep

              Many pieces don’t require sanding if you’re using chalk paint (chalk paint isn’t for everyone, but I love it, try it with some small and cheap pieces first to see if you dig it.) However, I decided to sand these. The tops of both tables are laminate and the carved drawer fronts seem to be some kind of resin. I sanded down all the surfaces to be painted but didn’t do a second sanding with a fine grain paper. I like a little bit of wood grain, brush strokes, and a slightly rough look.

              Next and most importantly, I really cleaned both pieces well not only used a cleaner but also a disposable duster. This is to ensure there wasn’t anything left over from sanding. A really thorough cleaning is necessary to ensure ideal paint adhesion.

              I then taped up all the places on the edges of the drawers to ensure would have a straight line.

              Paint

              This is the fun part. I put the kiddos to bed. Then I opened my paint can, poured some in a cup, turned on my favorite podcast, and went to town. There is something so gratifying about the actual painting process. I painted with the grain of wood, (in the parts that were wood) and pulled long, even strokes across the laminate top. In the carved portions I used a dab motion to ensure total coverage without pooling.

              A picture of the painting process during a farmhouse refurbish nightstand project

              My husband came out to the garage several times to note how BLUE they were. Yes, that’s the point. It’s fun to play with bold colors when they’re small and inexpensive pieces.

              I allowed them to dry overnight.

              Glaze

              For these tables, especially to bring out the beautiful carved look, I used a smoked glaze designed specifically for use with cool-toned chalk paint. I took all the pieces outside and only sprayed a small section at a time, then wipe it down with the cheesecloth until I got the look I wanted.

              A pictured of glazing the farmhouse nightstands in my refurbish project in a distressed patina

              The glaze brought out the beautiful detailing. It also added depth, especially in the places where the pieces had gotten a little beat up.

              I let the pieces dry for four hours.

              Topcoat

              I used the Rust-oleum matte clear topcoat spray can. It was so easy. I let the first coat dry for about 30 minutes and then did a second. Next, I let all pieces dry for a full 24 hours before putting the drawers back in and adding the new hardware.

              A closeup picture of the farmhouse refurbished nightstands in a distressed finish
              Finish

              Pics or it didn’t happen.

              A picture of the before and after of a pair of refurbished distressed nightstands DIY
              Oh, also

              If you enjoyed this, check out the vanity I whitewashed. Also, you know how the blogging world is, doing this stuff is way more fun when you get to share it with others. Please share and pin these. I will be forever grateful.

              Here’s a web story I made about these fun pieces!

              Farmhouse bedside tables for under $30

              Three reasons to love Guinea fowl eggs

              Aug 13, 2020 ·

              Guinea eggs

              Many people haven’t tried eggs from Guinea fowl, but they are really special. A few weeks ago, I went on one of my last lunches before starting the Homegrown Year (don’t know what it is? Check it out.) I brought my friend a “farm bag” of veggies, cheeses, and eggs. Particularly for my more gourmet friends, I love to bring them special treats. When he opened up the egg carton I pointed out the eggs from our Guinea Fowl. He was excited to try them. If you can get some, you should too.

              We originally got Guineas to act as flock protectors and watchdogs. They’re great at both jobs. We keep six Guineas in our flock. They mostly hang out together. Guineas are bolder than the chickens or ducks. They spend the day walking the fence line, keeping guard, or out in the pasture walking a militaristic line, hunting bugs, snakes, and mice.

              Guineas are the most superior hunters in our flock by a large margin. Because we acquired Guineas as protectors, and not for eggs, I was surprised their eggs turned out to be my favorite of all. Unlike our chickens, our Guineas lay late spring to fall, so I only get them part of the year. When we have their eggs it’s a treat.

              Superior taste

              Some say that Guinea eggs taste exactly the same as chicken eggs, but I disagree. They have a higher yolk to white ratio and I think they’re creamier and richer than their chicken counterparts. That said, there is only a subtle difference so they can be cooked just like chicken eggs.

              Since Guineas tend to be such good hunters, they get a more varied diet than the other birds in the flock, and what a bird eats directly affects the flavor of her eggs.

              There are great applications for every kind of egg on the farm. Duck eggs are great for baking and meringues as their whites retain air better. Chicken eggs are great for scrambling and also just to have consistent eggs throughout the year. Quail eggs are fun little nuggets, but the work/payoff ratio is very high. Guinea eggs, however, are what I save for dishes that really feature the egg flavor, and especially the yolk – poached, sunny-side up, and hard-boiled.

              Harder and thicker shells

              Not only do Guinea eggs have a superior taste to their chicken counterparts, but their shells are also much thicker and stronger. Having armored eggs is useful at our home, particularly when pulling them from the nest with a three-year-old “helper.” We lose fewer Guinea eggs to breakage than others. Because the shells are thicker and stronger, I find they are easier to peel for hardboiled eggs as the pieces come off in larger chunks.

              If you’re using Guinea eggs in your own kitchen, make sure to really whack the shells to break them. They are STRONG.

              Perfect size

              Guinea eggs are just a bit smaller than chicken eggs. Their size is ideal as they are perfectly bite-sized. For recipes, the general rule is that you replace each chicken egg with two Guinea eggs.

              They’re great for a quick hardboiled egg snack. I have one lady who buys eggs from me and prefers Guinea eggs because her husband works construction and can just eat a single-bite egg straight from the bag without taking his gloves off.

              I love to pickle Guinea eggs. They are an ideal shot of protein and salt to the system when you’re on the go. The higher yolk percentage ensures they’re delicious and flavorful every time. It’s fun to make high-class dive-bar food.

              If you ever get the chance, try some Guinea eggs. You’ll be a convert, too!

              • Go to page 1
              • Go to page 2
              • Go to page 3
              • Go to page 4
              • Go to Next Page »

              Footer

              Follow REALBESTLIFE

              • facebook
              • twitter
              • instagram
              • youtube
              • pinterest
              • wordpress
              • Food, furniture flipping, and farming – making urban farming a lifestyle
              • Hi, let’s be friends
              • Blog
              • Homegrown Year

              Copyright © 2023 RealBestLife on the Seasoned Pro Theme